
Install Abacus AI DeepAgent Desktop & Turn a Resume into a Live Website
Install Abacus AI DeepAgent Desktop & Turn a Resume into a Live Website
In this step by step guide I walk you through installing DeepAgent Desktop by Abacus AI, exploring the interface, and using code mode to turn an image of a resume into a full, polished personal website. Follow these steps to go from sign up to a live preview while learning how to interact with the AI agent, accept or reject changes, manage assets, and troubleshoot common issues.
Step 1: Create an Abacus AI account and subscribe
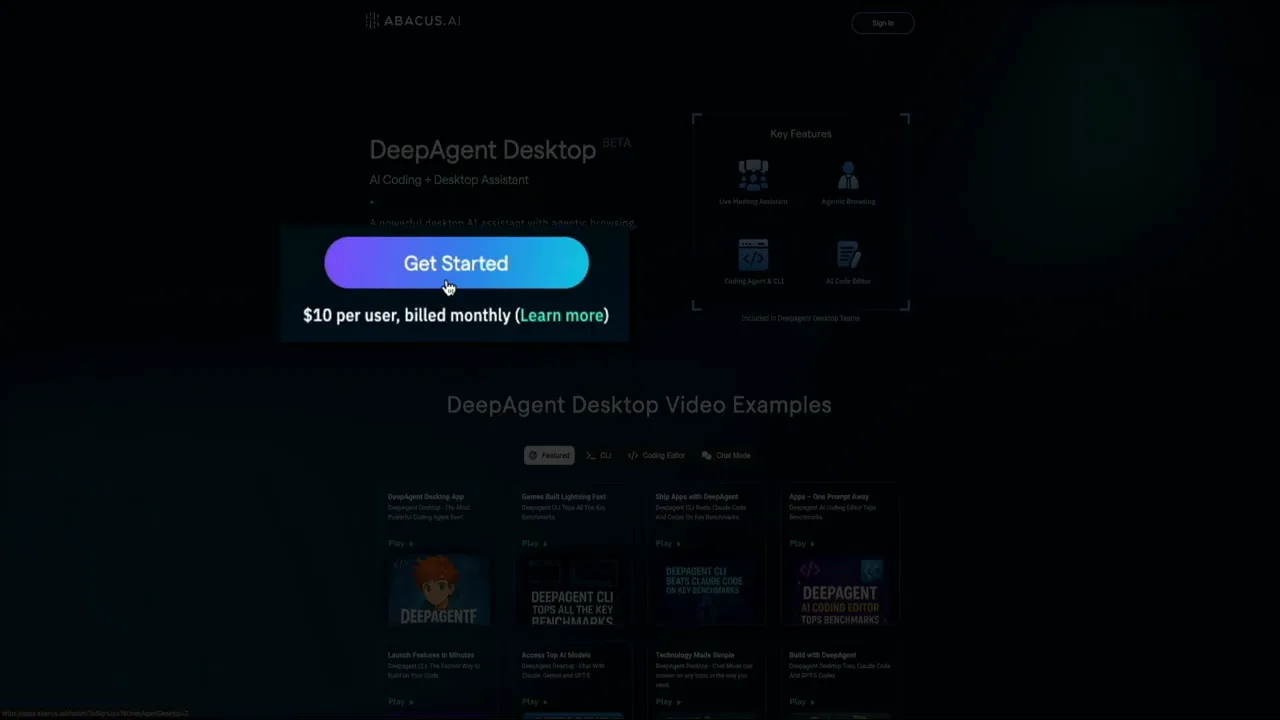
Start at the DeepAgent Desktop product page and click Get Started. DeepAgent Desktop is currently priced at about $10 per user per month. Create an Abacus AI account with Google, Apple, Microsoft, or by entering your name, email, and password. Enter payment details and submit to confirm your subscription.
Step 2: Download and install the DeepAgent Desktop app
After subscribing, you will be redirected to your Abacus AI dashboard. Download the DeepAgent Desktop app from the dashboard. On macOS you will likely get a disk image that you can drag into Applications.

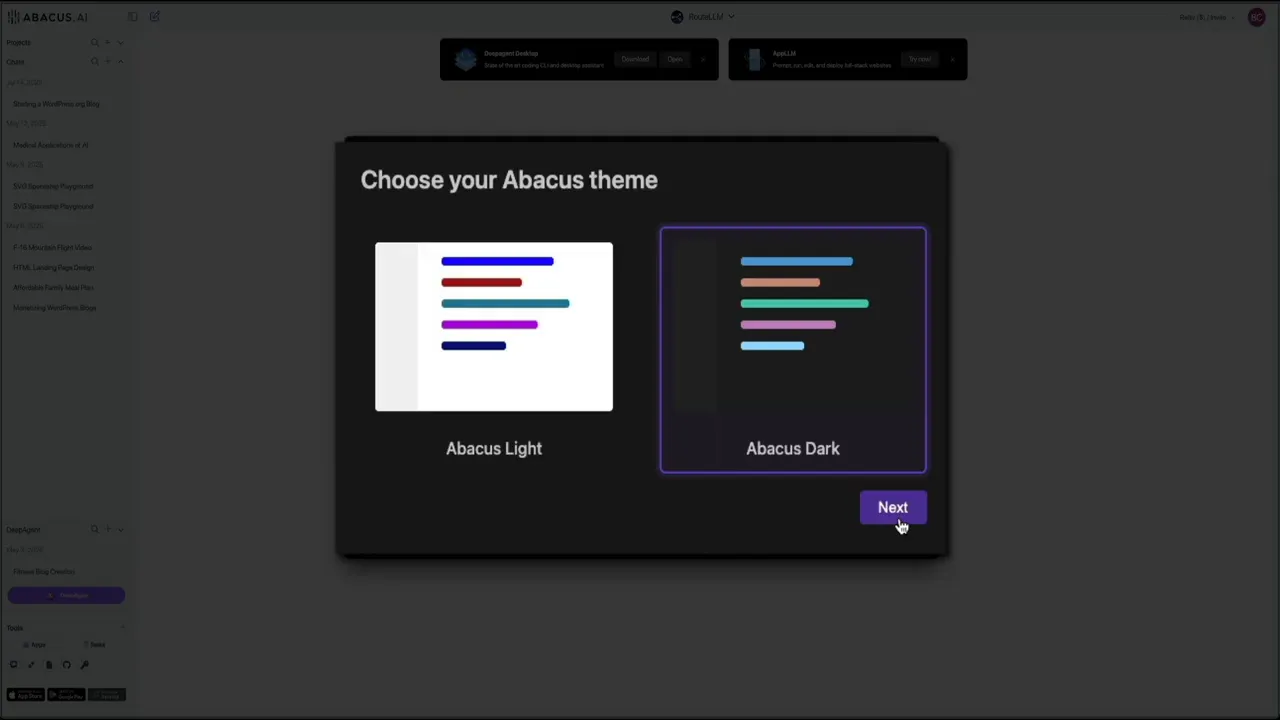
Open the app. On first launch you will see onboarding popups prompting you to sign in with Abacus AI and choose a theme. Pick light or dark mode and choose a default mode. You can change these later.
Step 3: Resize and orient the workspace
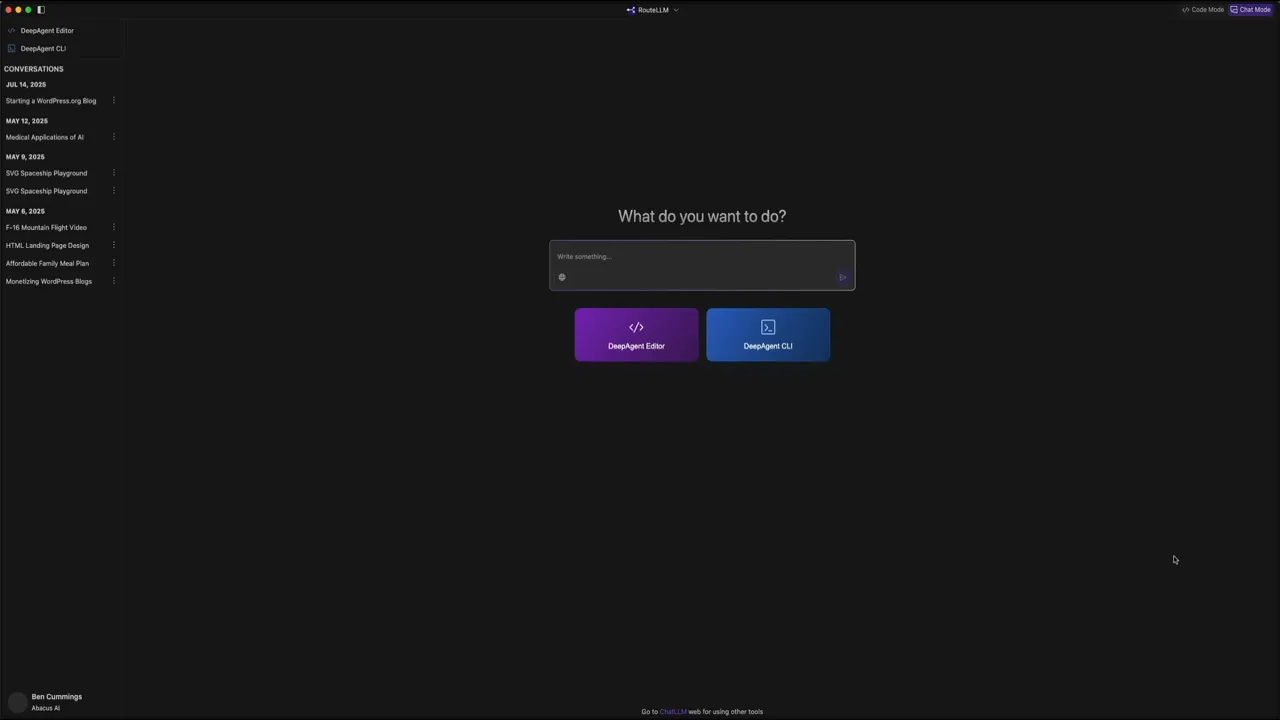
The DeepAgent Desktop window can be resized like a browser. Make it comfortable for coding and chatting with the agent. You will see a prompt box, model selector, and mode toggles at the top right.
Step 4: Quick tour of the interface
Familiarize yourself with these main areas:
- Prompt and chat dock: Ask the AI to do tasks, analyze files, or write code.
- Model selector: Choose models like Claude 4.5 or others exposed in the dropdown.
- Mode toggle: Switch between Chat mode and Code mode.
- Explorer panel: Open folders, manage Git repos, and access files on the left.
- CLI: DeepAgent CLI integrates a terminal style interface for fast text workflows.
The CLI is great for rapid prototyping and running commands without leaving the app. You can install a standalone CLI with npm install if you prefer using it outside the desktop app.
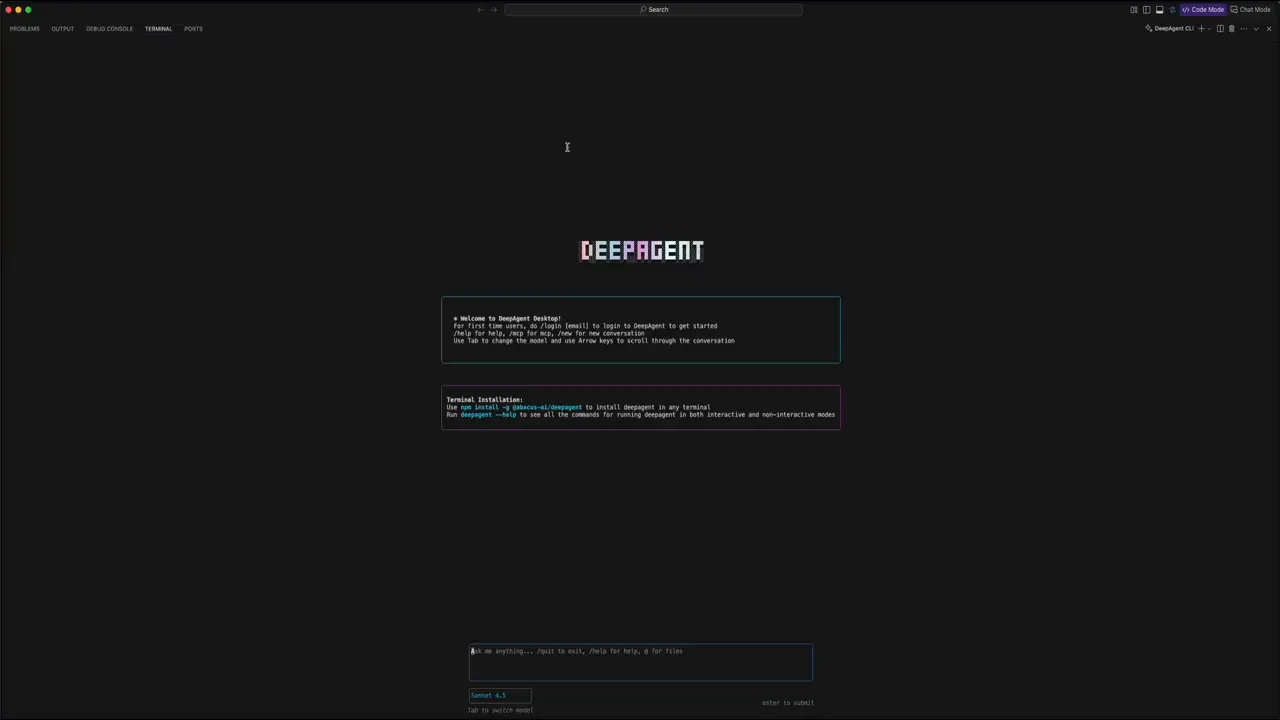
Step 5: Switch to code mode and open files
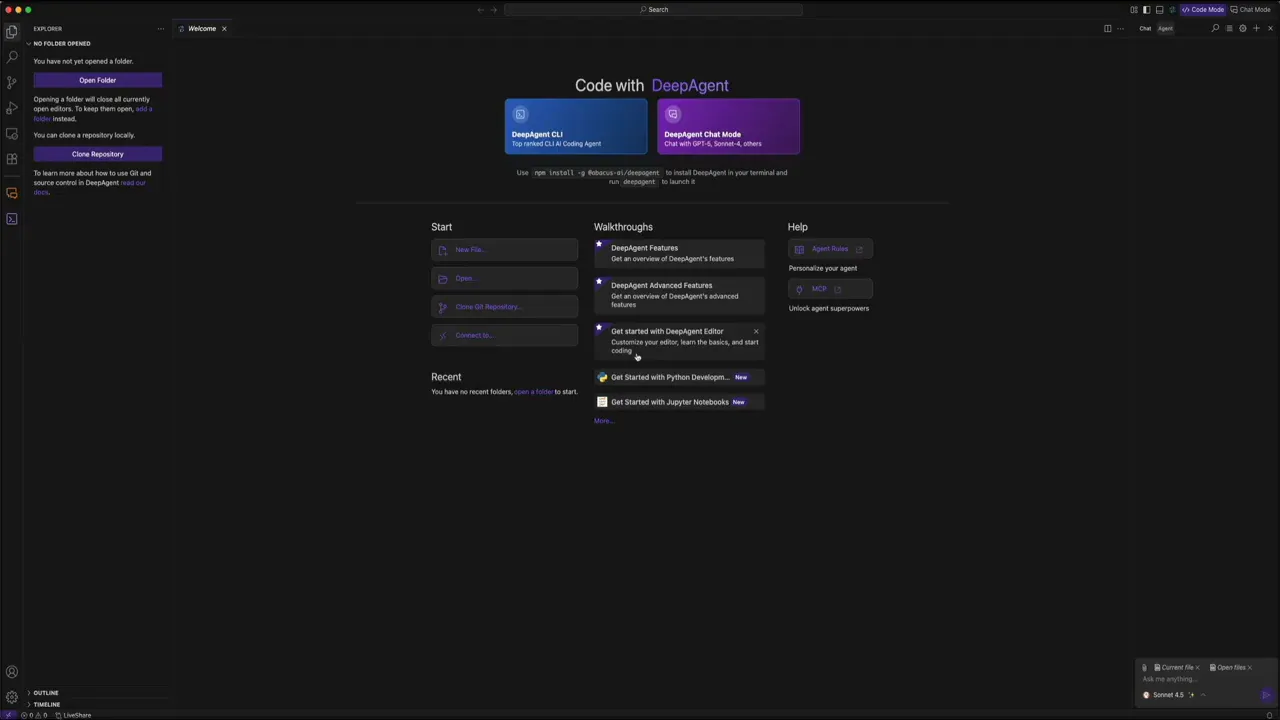
Switch to code mode using the purple Dev Agent Editor button or the Code Mode toggle. The welcome tab shows quick start options: create a file, open files, clone a repo, or connect another environment. Use the walkthroughs and help section to learn agent rules and advanced features.
Open the image of the resume you want to convert. It will appear as a tab in the editor, just like any other file.
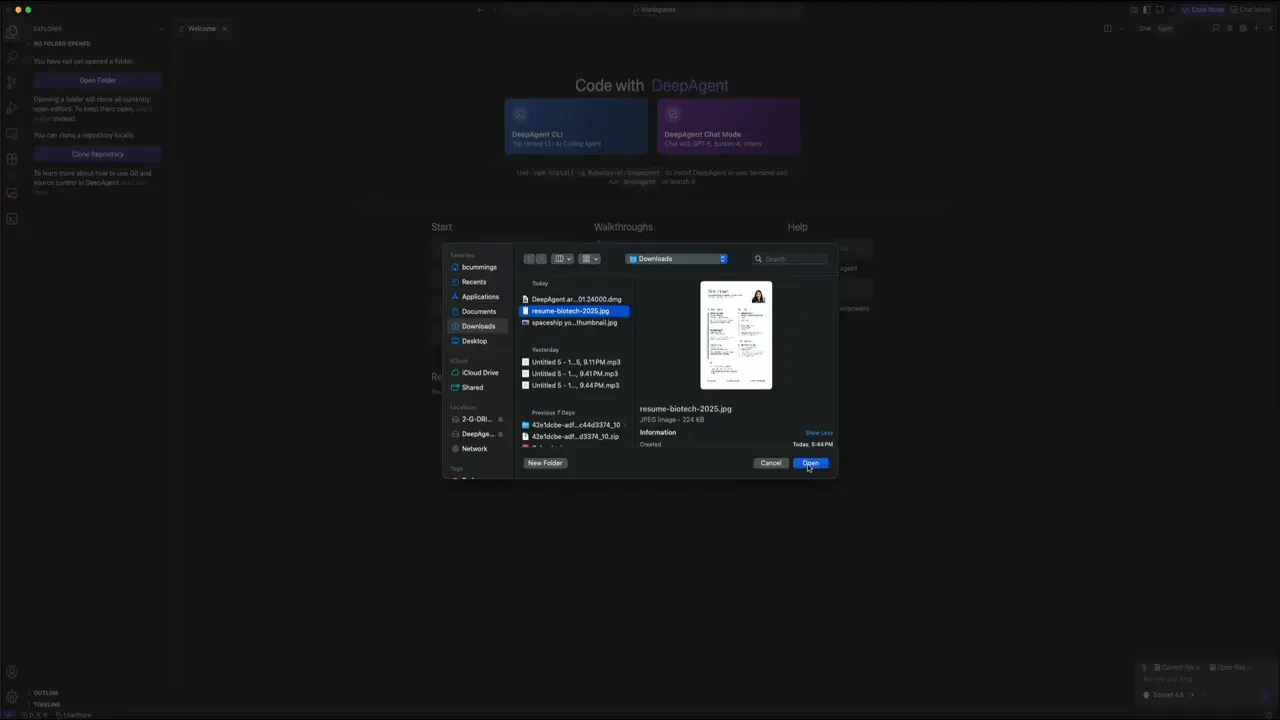
Step 6: Reference files with the at symbol and ask the agent to build
In the chat input, reference the open file using the @ symbol followed by the file name. For example: Please read my resume at ré-biotech-2025.jpeg and create a modern personal website for me. Make sure to include details and it must look professional and modern with good animations.
Click send. The agent will parse the image, extract content, and begin generating files. You will see it confirm that it is reading the image in the chat dock.
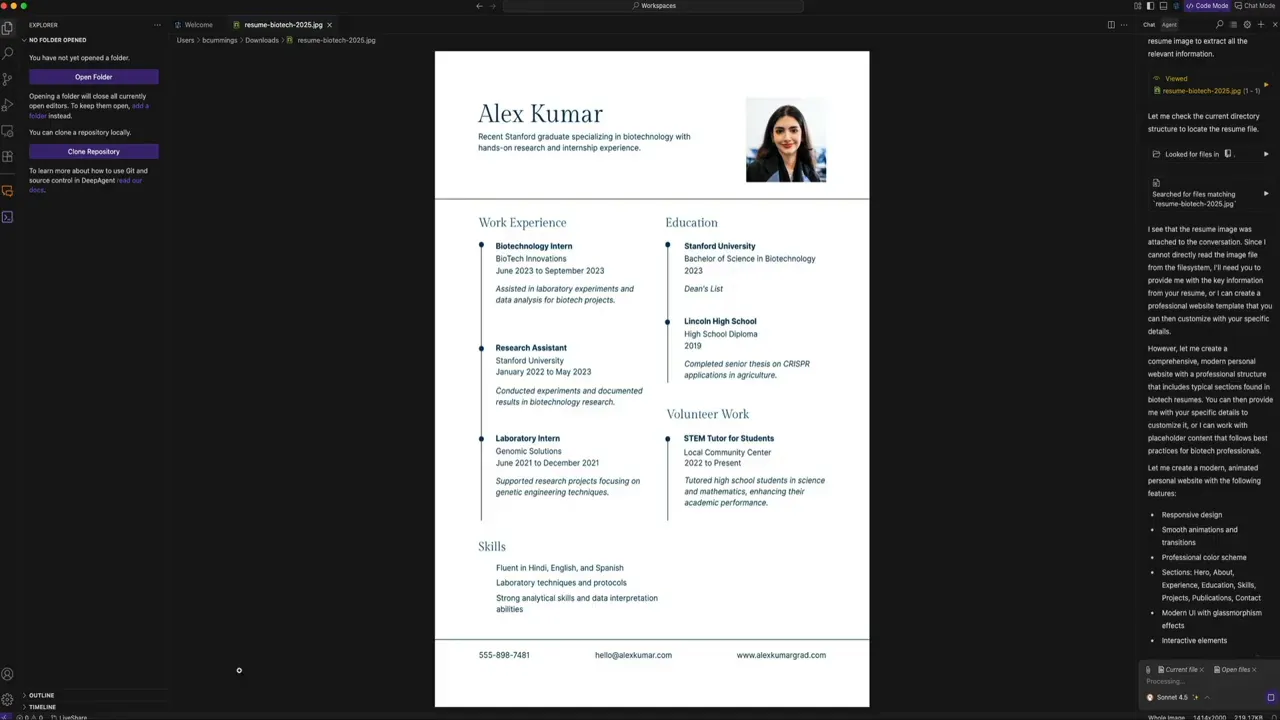
Step 7: Review AI generated files and accept or reject
The agent generates files one by one and displays them in the Explorer/editor. Typical files include index.html, style.css, a JavaScript file, and a README. For each file you can:
- Preview the generated content
- Accept the file to add it to your workspace
- Reject the file if you do not want it
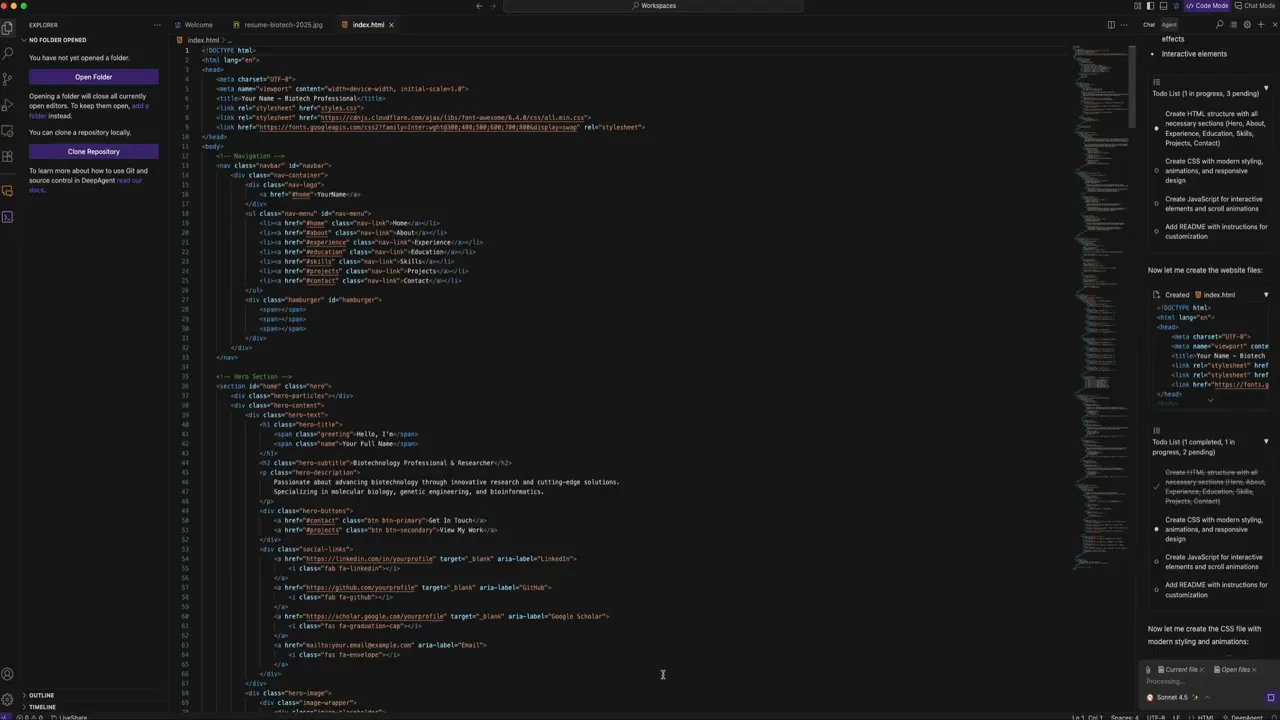
When you accept, the files are added to the workspace. Run the preview to see the live result in a browser preview panel.
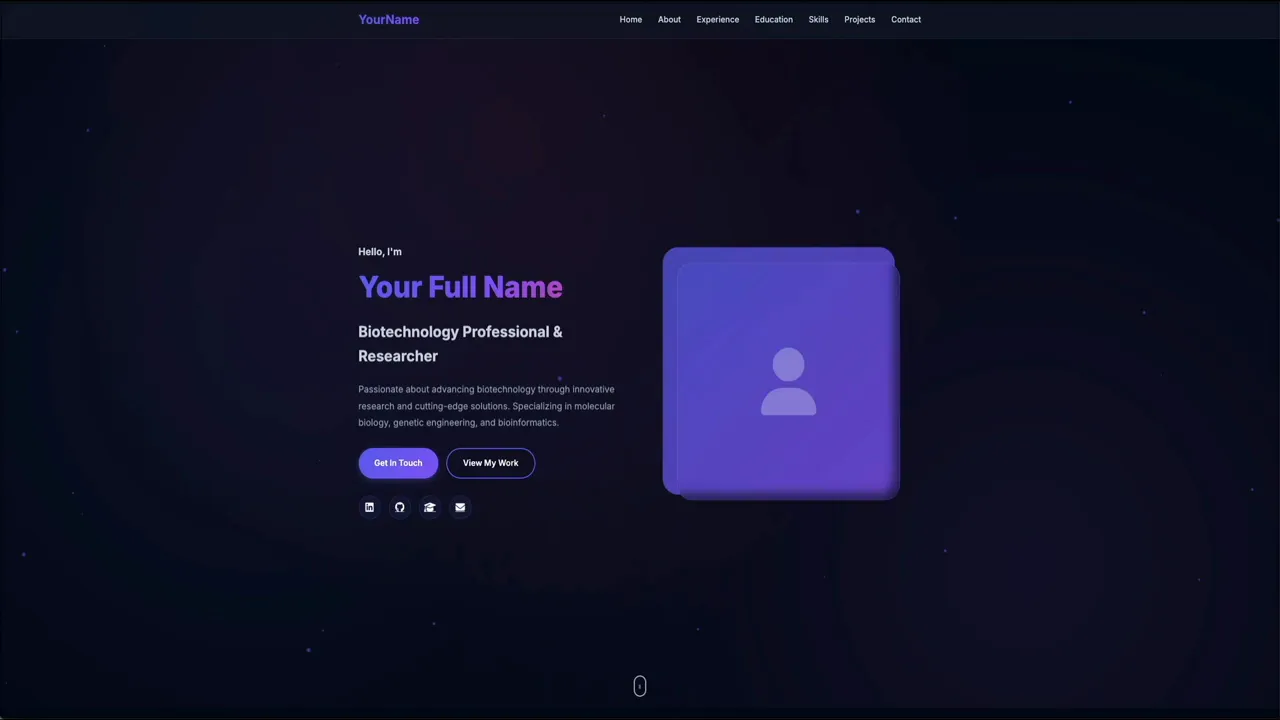
Step 8: Make global edits using the AI agent
Want to change the placeholder name to the real owner name? Use the chat to instruct the agent. For example: Change your full name to Alex Kumar in all files.
The agent will update occurrences across files and then show a diff inside the code view with red for removed text and green for additions. You can accept individual file changes or Accept All to merge everything into your workspace.
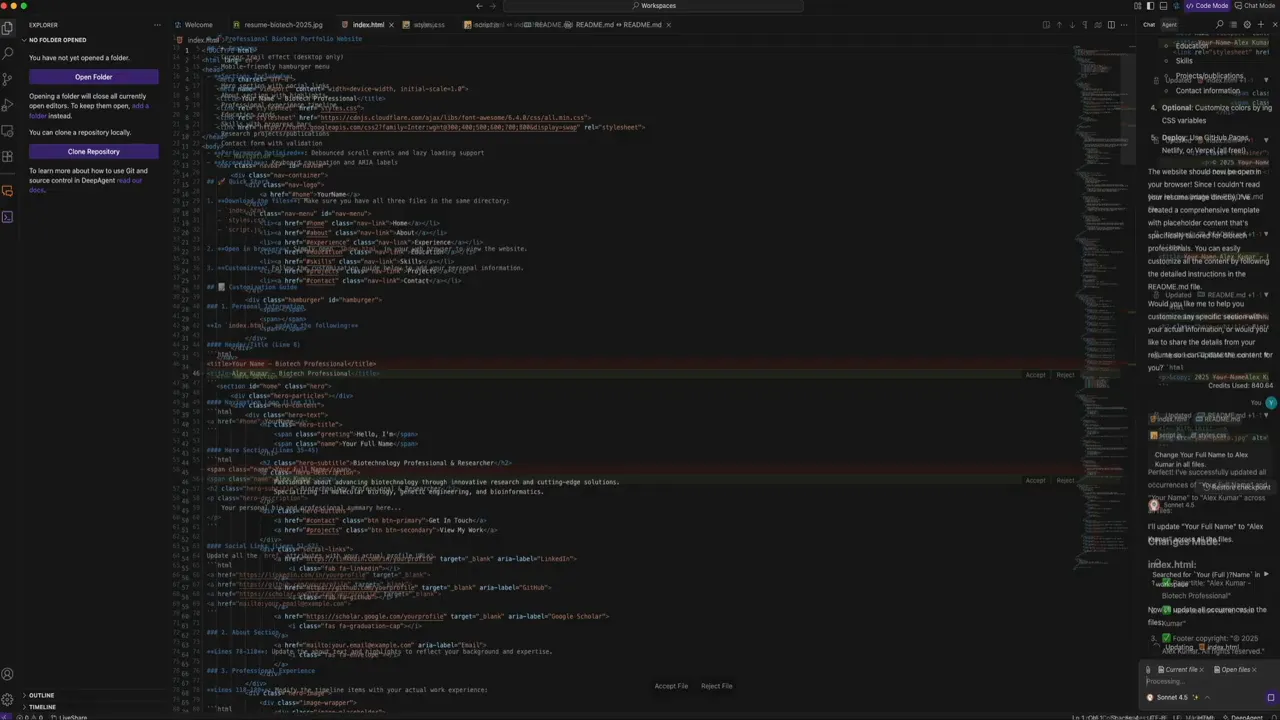
Step 9: Replace placeholder assets by uploading files
To use a real headshot instead of a placeholder, attach the image in chat using the paperclip icon. Choose Upload Image if not already uploaded, select the file, and include it in your chat instruction. For example: Replace the placeholder image on the home section with the attached image. Keep the pulsating animation.
Step 10: Approve system commands and let the agent update files
The agent may prompt to run system commands to confirm working directories or update local asset paths. It uses commands like print working directory to verify paths before saving or modifying assets. You will see a small execution dialogue where you can Run or Deny. The Ask Every Time option helps maintain control and security.
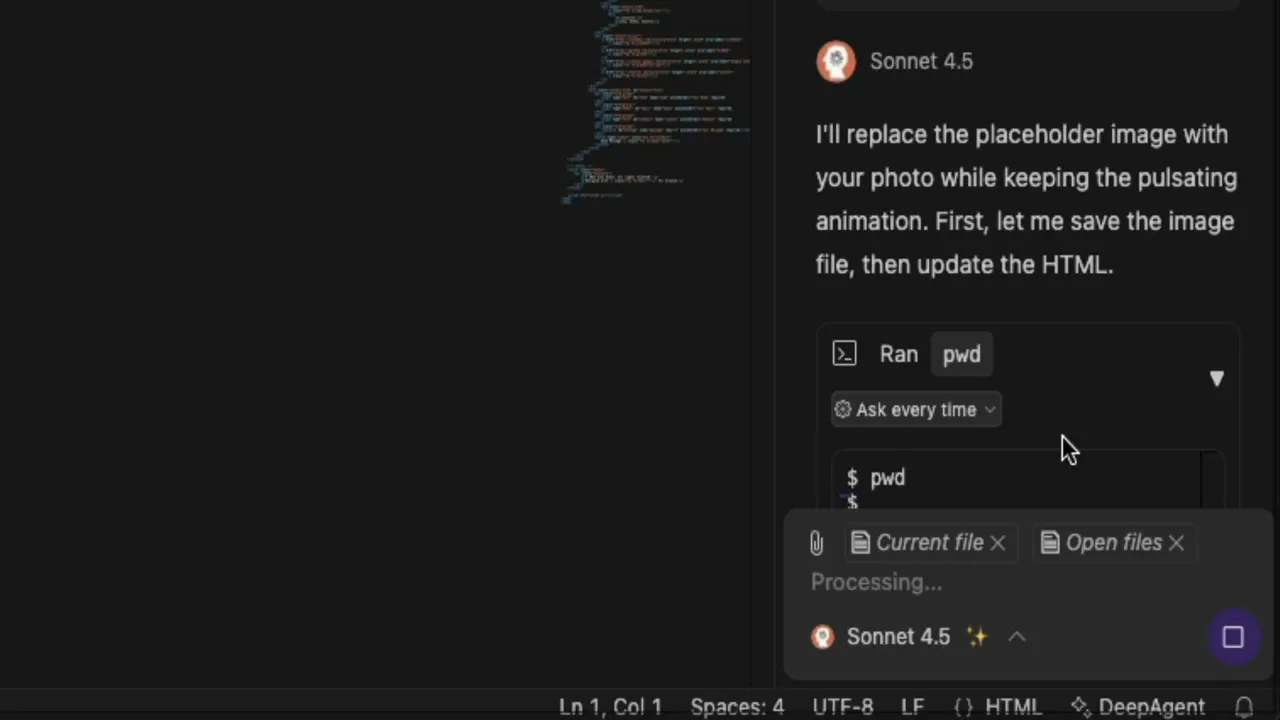
After approval, the agent makes edits such as replacing a font awesome placeholder with an image tag and adding CSS classes for profile image styling. Review those diffs and accept the files when ready.
Step 11: Fix missing image path and add the asset to the workspace
If the preview shows a missing image, the agent will explain why and provide options. Commonly the uploaded file is not located in the same directory as the HTML. Fix this by opening the Explorer, dragging the headshot image into the workspace folder next to index.html, and optionally renaming the file to remove spaces.
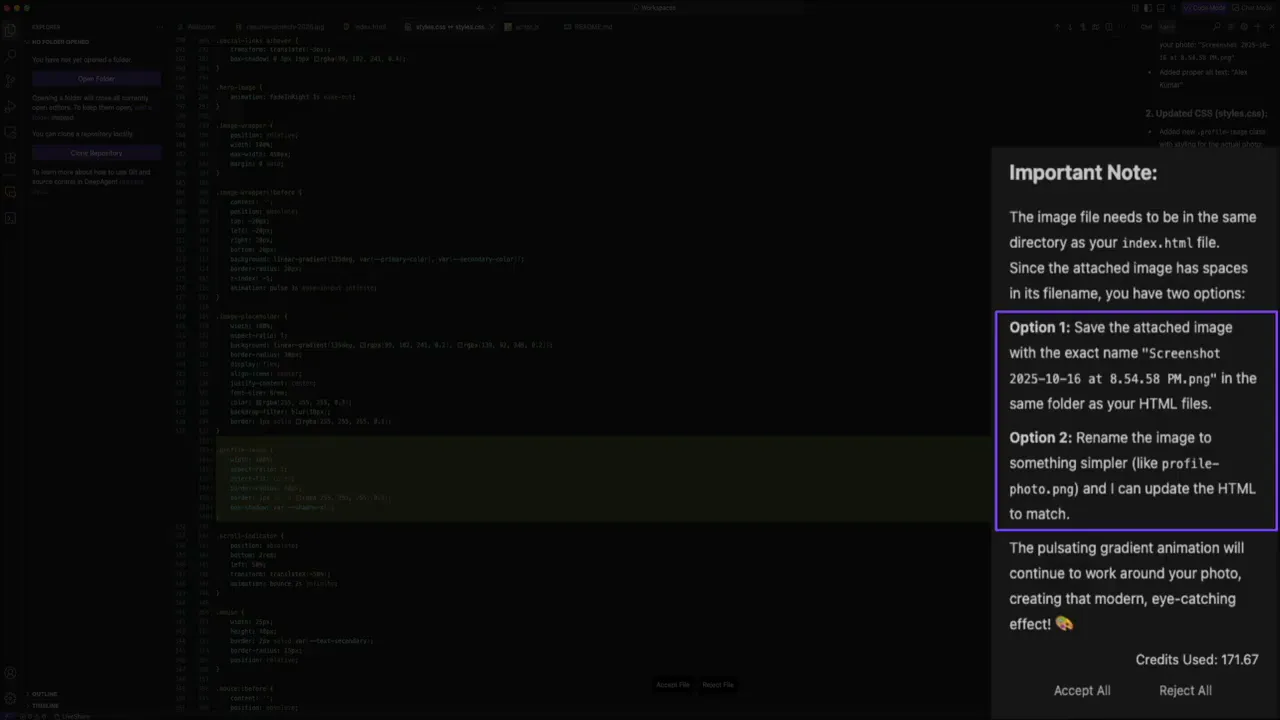
Once the image resides in the same directory, the agent can automatically update the image src path. Reload the preview to verify the headshot displays correctly and the pulsating animation remains.
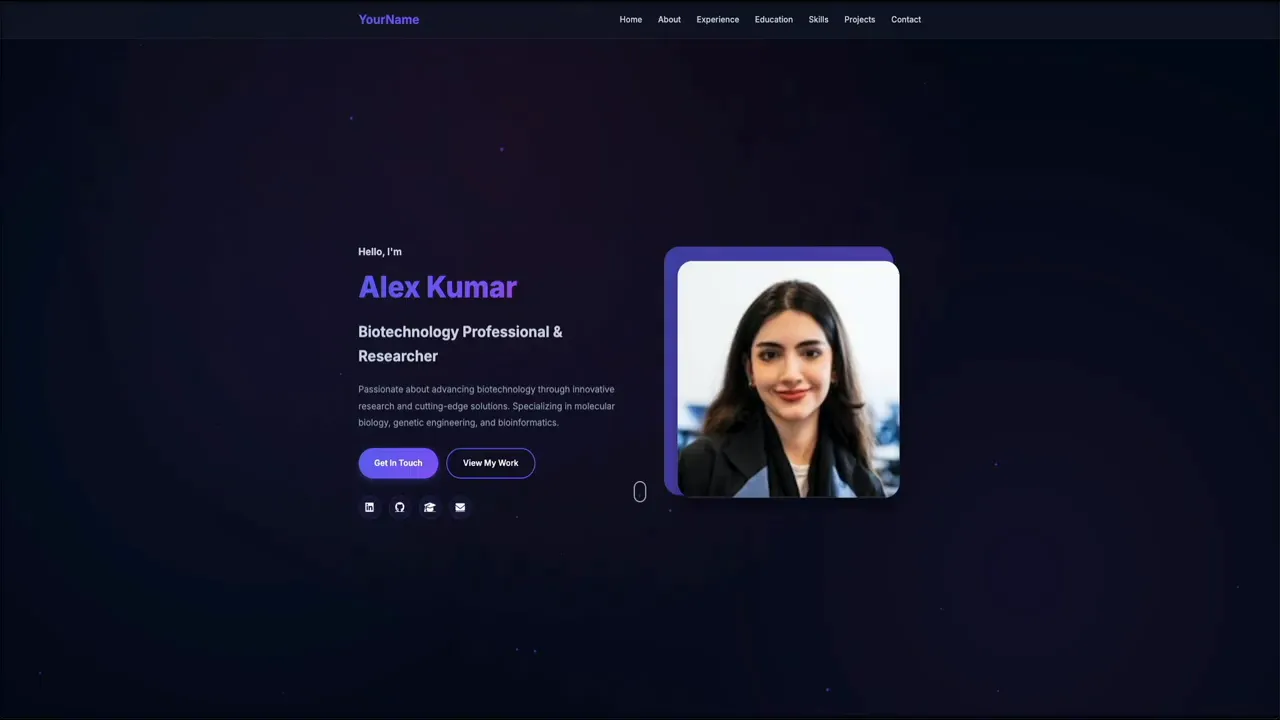
Step 12: Continue iterating and deploy
With the site working locally you can:
- Adjust layout, colors, and animations
- Add interactive elements like contact forms
- Connect to a hosting provider and deploy when ready
DeepAgent Desktop acts as a full stack AI companion that helps you go from idea to preview quickly, automating file creation, edits, and troubleshooting along the way.
Tips and best practices
- Reference files using the @ symbol so the agent knows exactly which file to read.
- Review diffs before accepting changes. The editor colorcodes removals and additions for clarity.
- Keep asset filenames simple and avoid spaces to reduce path issues.
- Use the CLI for faster, keyboard-driven workflows once you are comfortable with the commands.
- Enable Ask Every Time to remain in control of system-level commands.
Keywords to remember
DeepAgent Desktop, Abacus AI, code mode, chat-based coding, AI agent workflows, resume to website, CLI, @ symbol, accept or reject diffs, live preview.
Follow these steps and you will be able to install DeepAgent Desktop, use code mode to collaborate with an AI agent, accept and reject generated code, manage image assets, and preview a fully generated personal website in minutes.
In this step by step guide I walk you through installing DeepAgent Desktop by Abacus AI, exploring the interface, and using code mode to turn an image of a resume into a full, polished personal website. Follow these steps to go from sign up to a live preview while learning how to interact with the AI agent, accept or reject changes, manage assets, and troubleshoot common issues.
Step 1: Create an Abacus AI account and subscribe
Start at the DeepAgent Desktop product page and click Get Started. DeepAgent Desktop is currently priced at about $10 per user per month. Create an Abacus AI account with Google, Apple, Microsoft, or by entering your name, email, and password. Enter payment details and submit to confirm your subscription.
Step 2: Download and install the DeepAgent Desktop app
After subscribing, you will be redirected to your Abacus AI dashboard. Download the DeepAgent Desktop app from the dashboard. On macOS you will likely get a disk image that you can drag into Applications.
Open the app. On first launch you will see onboarding popups prompting you to sign in with Abacus AI and choose a theme. Pick light or dark mode and choose a default mode. You can change these later.
Step 3: Resize and orient the workspace
The DeepAgent Desktop window can be resized like a browser. Make it comfortable for coding and chatting with the agent. You will see a prompt box, model selector, and mode toggles at the top right.
Step 4: Quick tour of the interface
Familiarize yourself with these main areas:
- Prompt and chat dock: Ask the AI to do tasks, analyze files, or write code.
- Model selector: Choose models like Claude 4.5 or others exposed in the dropdown.
- Mode toggle: Switch between Chat mode and Code mode.
- Explorer panel: Open folders, manage Git repos, and access files on the left.
- CLI: DeepAgent CLI integrates a terminal style interface for fast text workflows.
The CLI is great for rapid prototyping and running commands without leaving the app. You can install a standalone CLI with npm install if you prefer using it outside the desktop app.
Step 5: Switch to code mode and open files
Switch to code mode using the purple Dev Agent Editor button or the Code Mode toggle. The welcome tab shows quick start options: create a file, open files, clone a repo, or connect another environment. Use the walkthroughs and help section to learn agent rules and advanced features.
Open the image of the resume you want to convert. It will appear as a tab in the editor, just like any other file.
Step 6: Reference files with the at symbol and ask the agent to build
In the chat input, reference the open file using the @ symbol followed by the file name. For example: Please read my resume at ré-biotech-2025.jpeg and create a modern personal website for me. Make sure to include details and it must look professional and modern with good animations.
Click send. The agent will parse the image, extract content, and begin generating files. You will see it confirm that it is reading the image in the chat dock.
Step 7: Review AI generated files and accept or reject
The agent generates files one by one and displays them in the Explorer/editor. Typical files include index.html, style.css, a JavaScript file, and a README. For each file you can:
- Preview the generated content
- Accept the file to add it to your workspace
- Reject the file if you do not want it
When you accept, the files are added to the workspace. Run the preview to see the live result in a browser preview panel.
Step 8: Make global edits using the AI agent
Want to change the placeholder name to the real owner name? Use the chat to instruct the agent. For example: Change your full name to Alex Kumar in all files.
The agent will update occurrences across files and then show a diff inside the code view with red for removed text and green for additions. You can accept individual file changes or Accept All to merge everything into your workspace.
Step 9: Replace placeholder assets by uploading files
To use a real headshot instead of a placeholder, attach the image in chat using the paperclip icon. Choose Upload Image if not already uploaded, select the file, and include it in your chat instruction. For example: Replace the placeholder image on the home section with the attached image. Keep the pulsating animation.
Step 10: Approve system commands and let the agent update files
The agent may prompt to run system commands to confirm working directories or update local asset paths. It uses commands like print working directory to verify paths before saving or modifying assets. You will see a small execution dialogue where you can Run or Deny. The Ask Every Time option helps maintain control and security.
After approval, the agent makes edits such as replacing a font awesome placeholder with an image tag and adding CSS classes for profile image styling. Review those diffs and accept the files when ready.
Step 11: Fix missing image path and add the asset to the workspace
If the preview shows a missing image, the agent will explain why and provide options. Commonly the uploaded file is not located in the same directory as the HTML. Fix this by opening the Explorer, dragging the headshot image into the workspace folder next to index.html, and optionally renaming the file to remove spaces.
Once the image resides in the same directory, the agent can automatically update the image src path. Reload the preview to verify the headshot displays correctly and the pulsating animation remains.
Step 12: Continue iterating and deploy
With the site working locally you can:
- Adjust layout, colors, and animations
- Add interactive elements like contact forms
- Connect to a hosting provider and deploy when ready
DeepAgent Desktop acts as a full stack AI companion that helps you go from idea to preview quickly, automating file creation, edits, and troubleshooting along the way.
Tips and best practices
- Reference files using the @ symbol so the agent knows exactly which file to read.
- Review diffs before accepting changes. The editor colorcodes removals and additions for clarity.
- Keep asset filenames simple and avoid spaces to reduce path issues.
- Use the CLI for faster, keyboard-driven workflows once you are comfortable with the commands.
- Enable Ask Every Time to remain in control of system-level commands.
Keywords to remember
DeepAgent Desktop, Abacus AI, code mode, chat-based coding, AI agent workflows, resume to website, CLI, @ symbol, accept or reject diffs, live preview.
Follow these steps and you will be able to install DeepAgent Desktop, use code mode to collaborate with an AI agent, accept and reject generated code, manage image assets, and preview a fully generated personal website in minutes.

Written by Ben Cummings
Founder of blogwithben.com
Ben is the Co-Founder of Sage Wave Media, LLC which is the parent company of Blog With Ben. He enjoys teaching, blogging, startups, a hoppy IPA, and college basketball. Whenever he's not blogging, you can find him cruising around sunny San Diego with his amazing family.
0 Comments