Create Stunning YouTube Thumbnails Fast with Kittl | Step-by-Step Tutorial
Create Stunning YouTube Thumbnails Fast with Kittl | Step-by-Step Tutorial
If you're a content creator looking to save time, maintain consistent branding, and craft professional YouTube thumbnails without needing any design skills, you're in the right place. Creating eye-catching thumbnails is essential to grab attention and boost your video clicks, but spending hours in complicated design software can be frustrating and inefficient.
That's why I want to introduce you to an incredibly intuitive tool called Kittl. It makes designing thumbnails fast, easy, and fun, even if you don't have a background in graphic design. In this comprehensive guide, I’ll walk you through how to use Kittl to create stunning, brand-consistent thumbnails in just a few minutes.
We'll cover everything from picking ready-made YouTube thumbnail templates to customizing colors, uploading and editing your own headshots, adjusting text, and exporting your final designs ready for upload. By the end, you'll have polished thumbnails that look professional and help your videos stand out.
How to Create a YouTube Thumbnail Bundle
Getting started with Kittl is straightforward. First, head over to the Kittl dashboard, where all the magic begins. The dashboard is your central hub for accessing templates and starting your design projects.
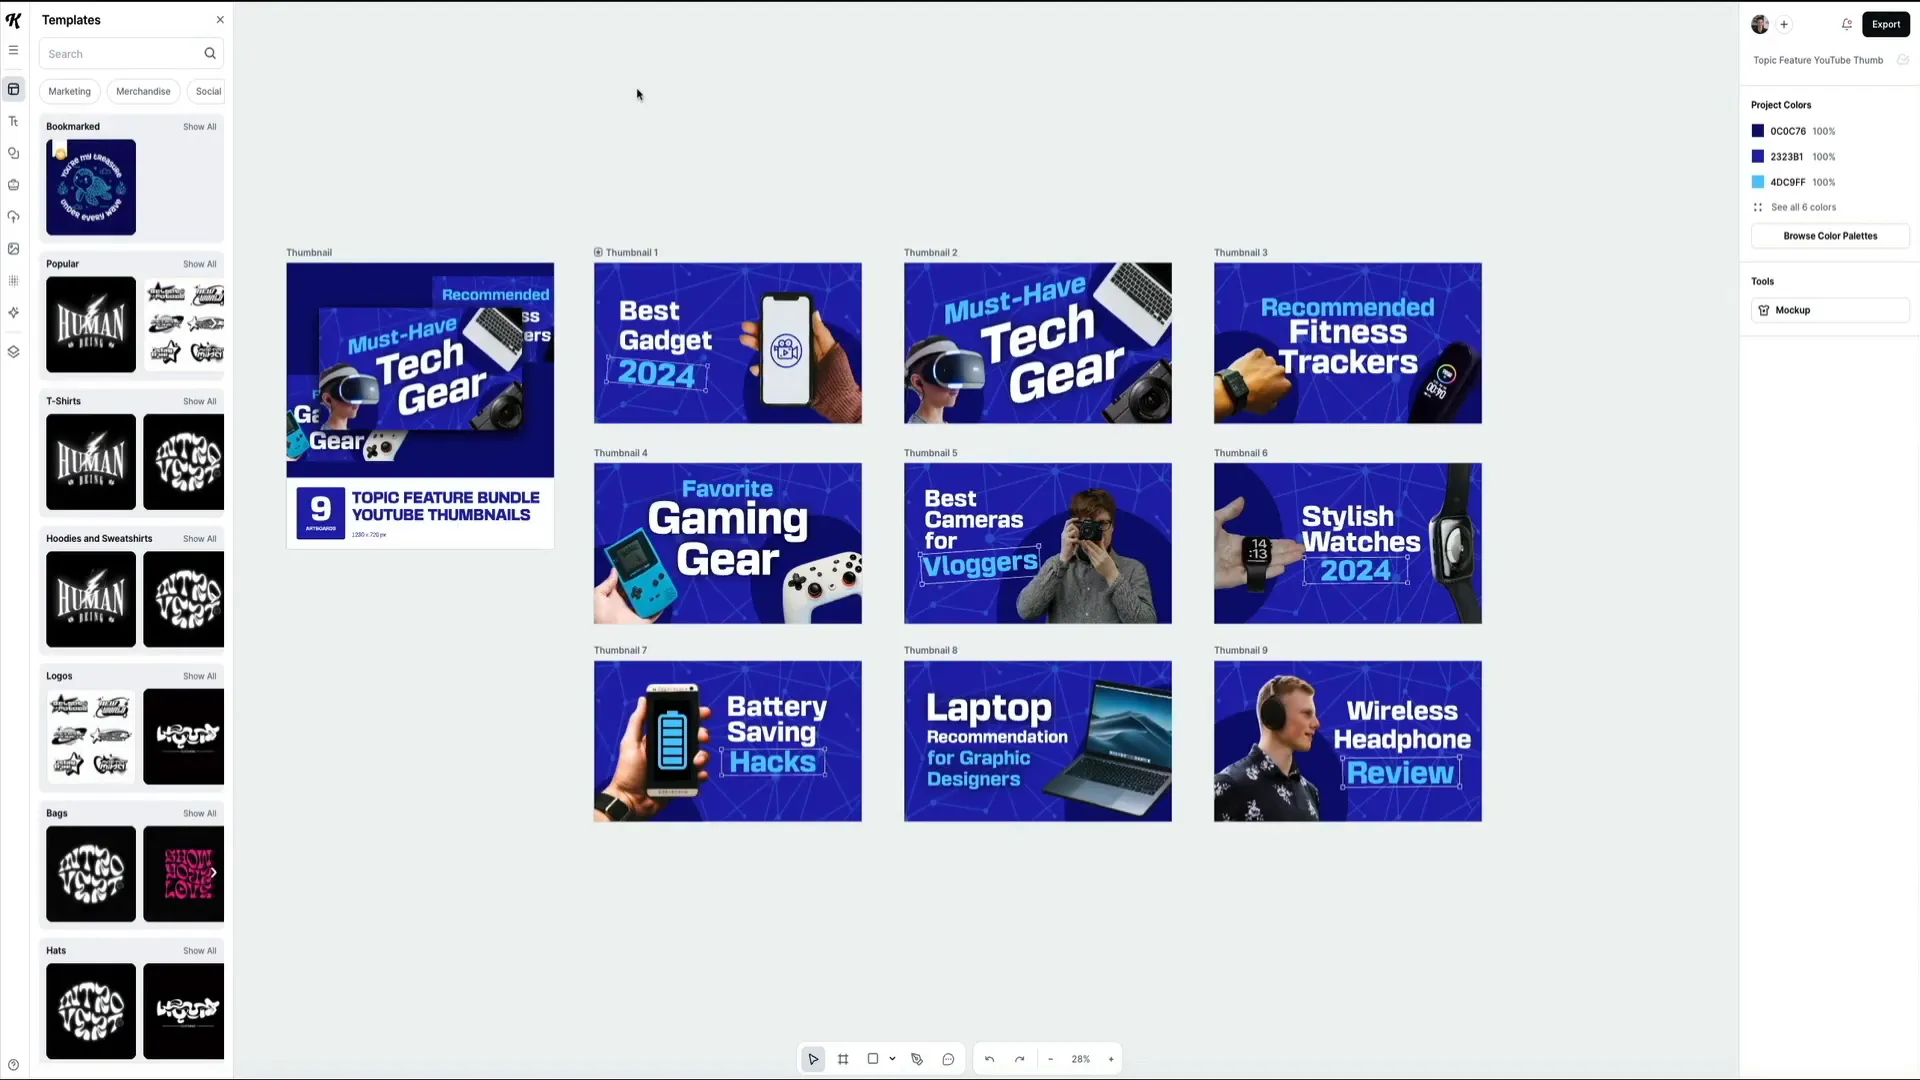
In the left-hand menu, click on Templates. This section houses a vast collection of pre-made designs, including those specifically crafted for YouTube thumbnails. It’s an excellent resource for inspiration or for jumping right into editing a ready-to-use layout.
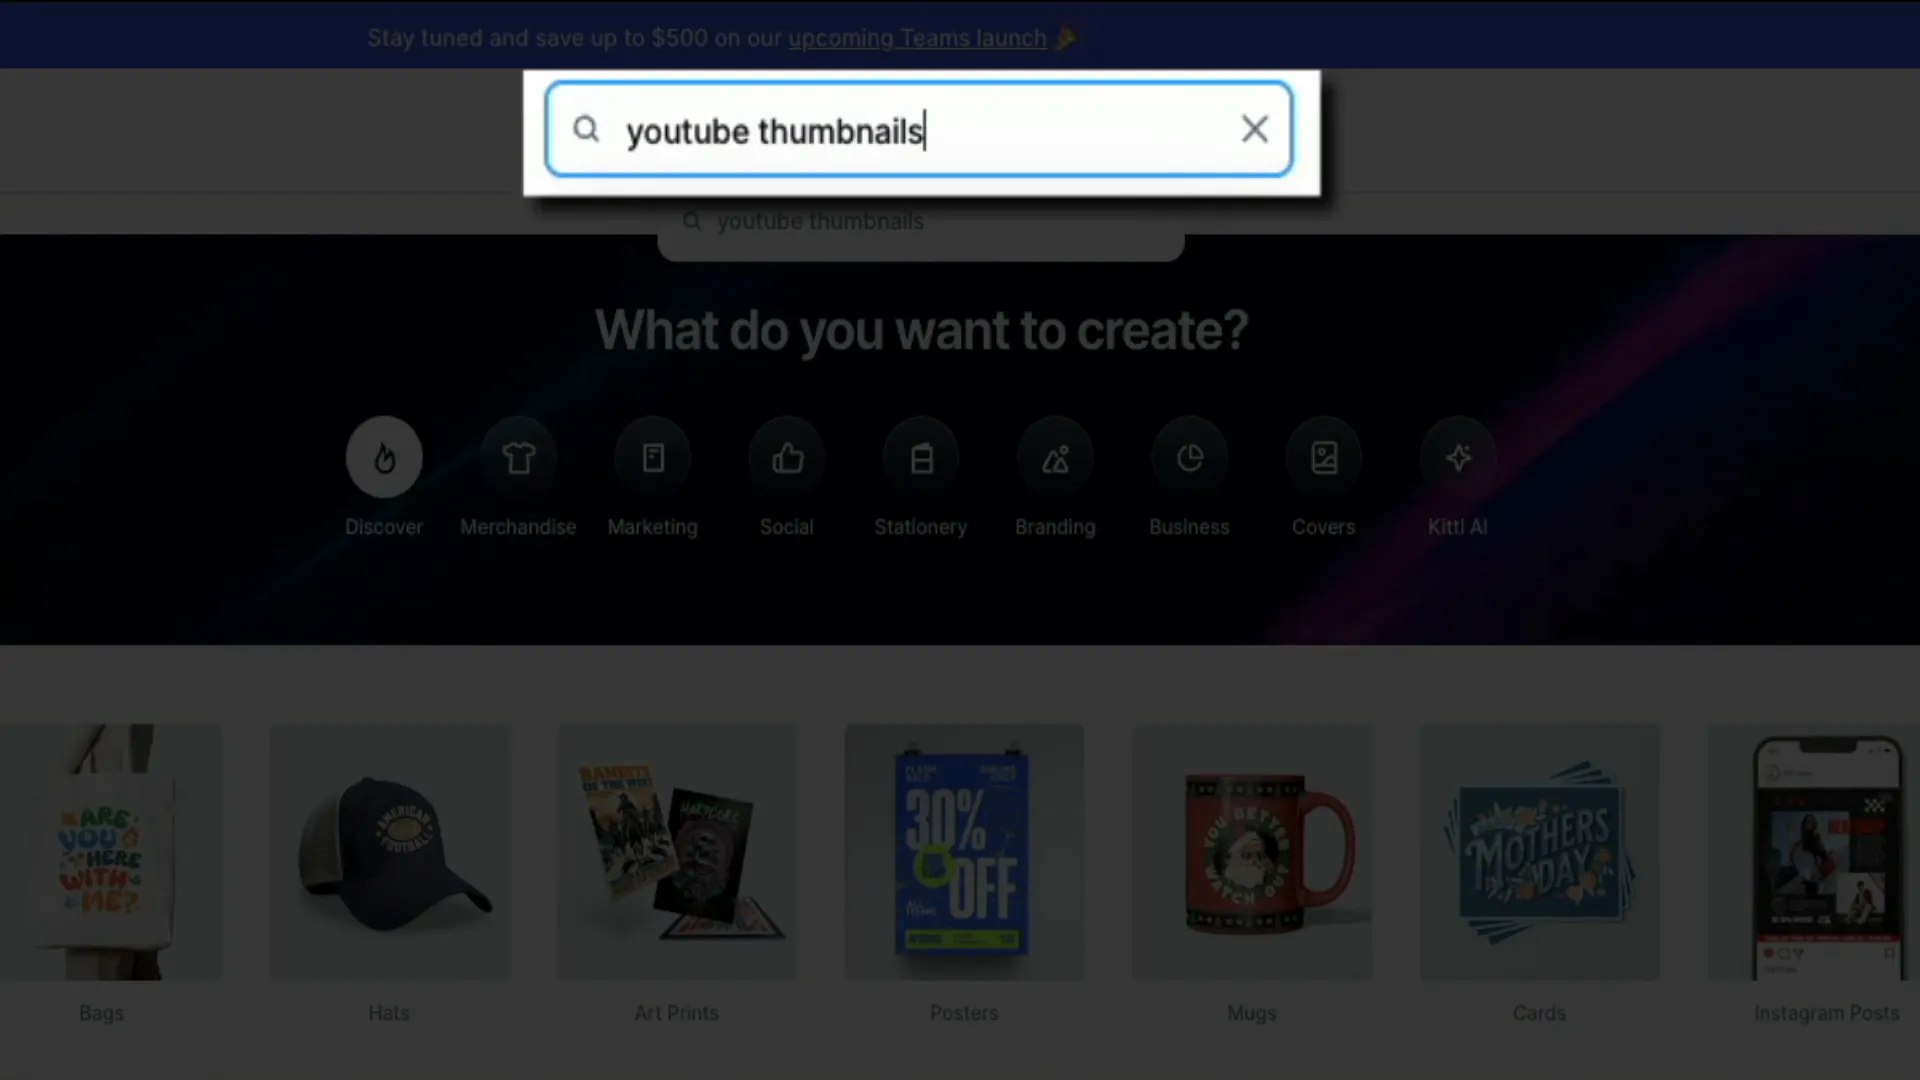
To find thumbnails tailored for YouTube content, simply use the search bar at the top of the templates page. Type “YouTube thumbnails” and hit enter. Instantly, you'll see a curated list of templates designed to fit YouTube’s visual style and dimensions.
Kittl offers two types of templates:
- Individual thumbnail templates — perfect for one-off videos.
- Template bundles — collections of multiple thumbnail designs that keep your branding consistent across a series of videos.
Bundles are especially useful if you’re creating a video series or want to maintain a cohesive look throughout your channel. You can easily spot bundles by a number badge in the corner of each preview, showing how many designs are included.
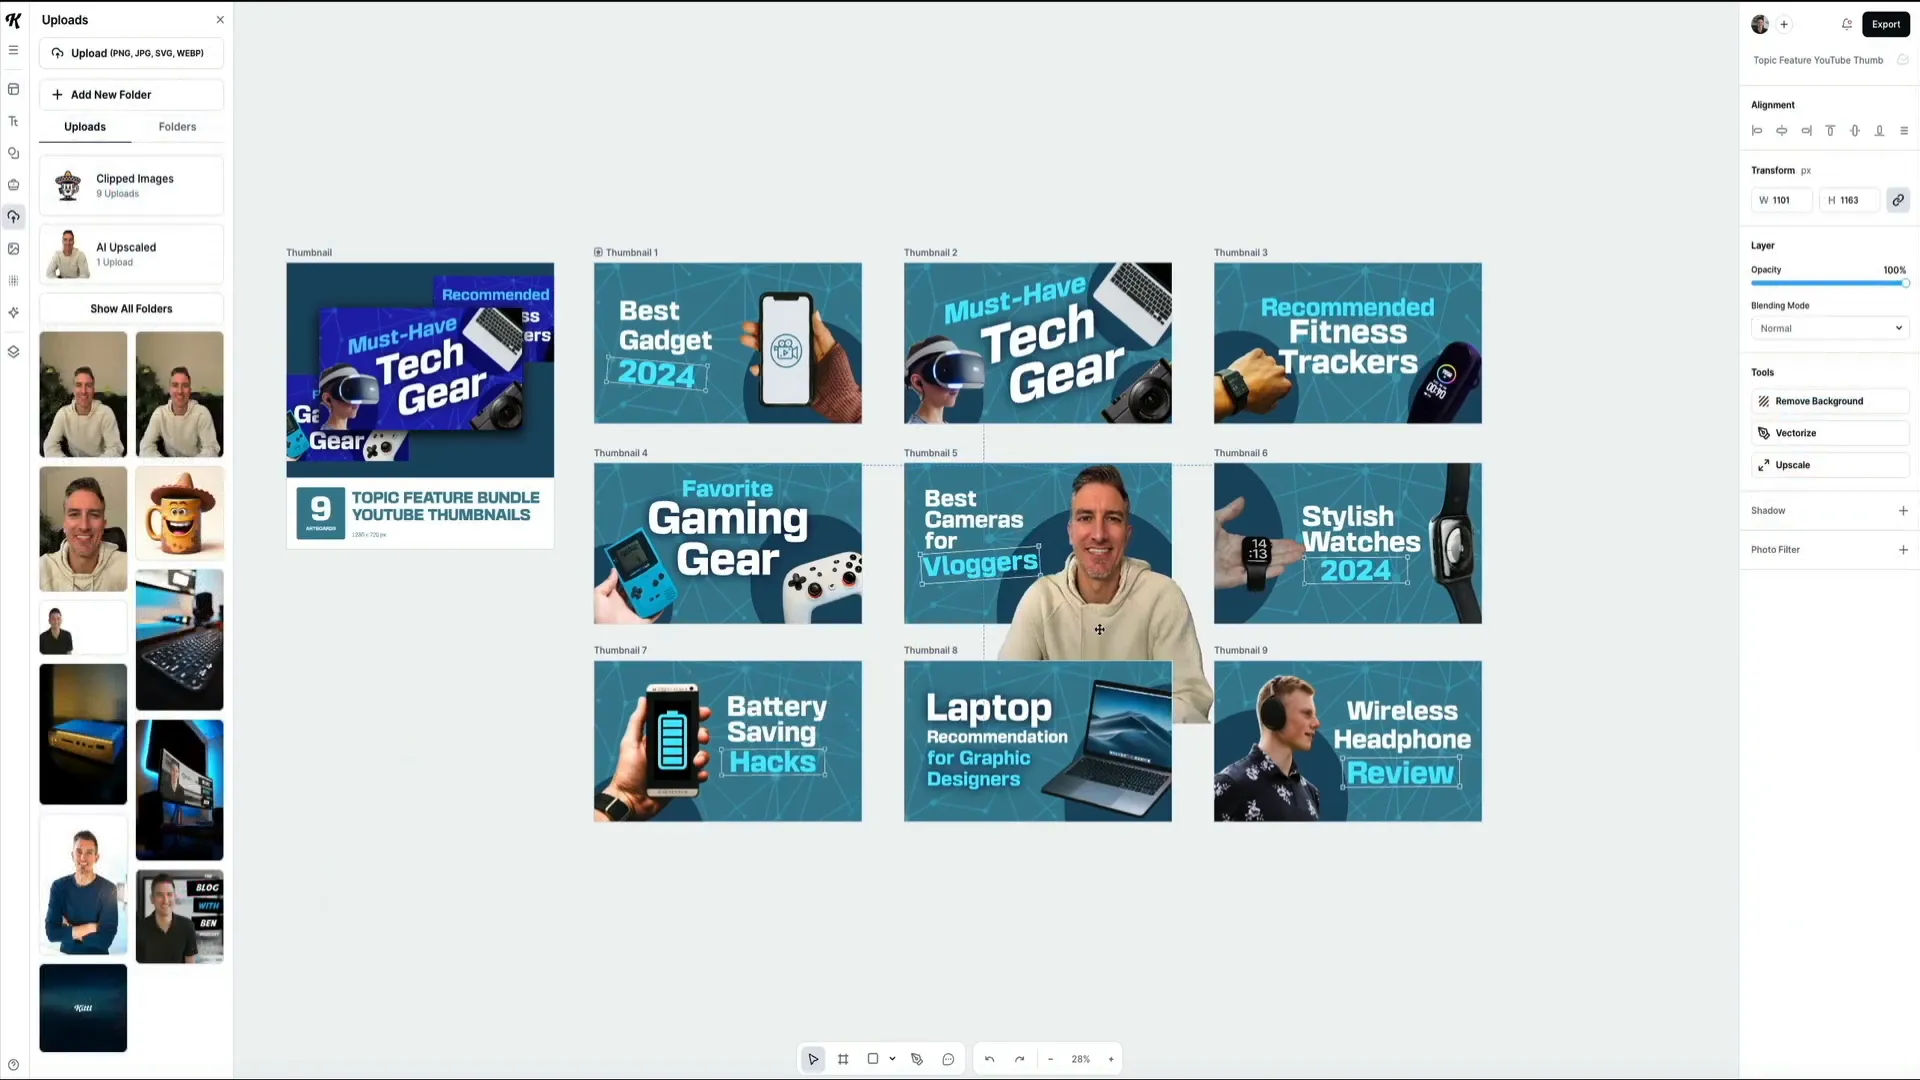
Once you find a bundle that fits your style, click on its preview to open it in Kittl’s visual editor. Here, you’ll see all the thumbnail variations included in the set, ready for customization with your own text, colors, and images, all while preserving a professional look and feel.
This approach is not only intuitive but also a huge timesaver, especially if you regularly create content and want to streamline your workflow.
How to Change the Color Palette
After selecting your template bundle, the next step is to customize the thumbnails so they align perfectly with your brand or channel's style. One of the quickest ways to do this is by adjusting the color palette.
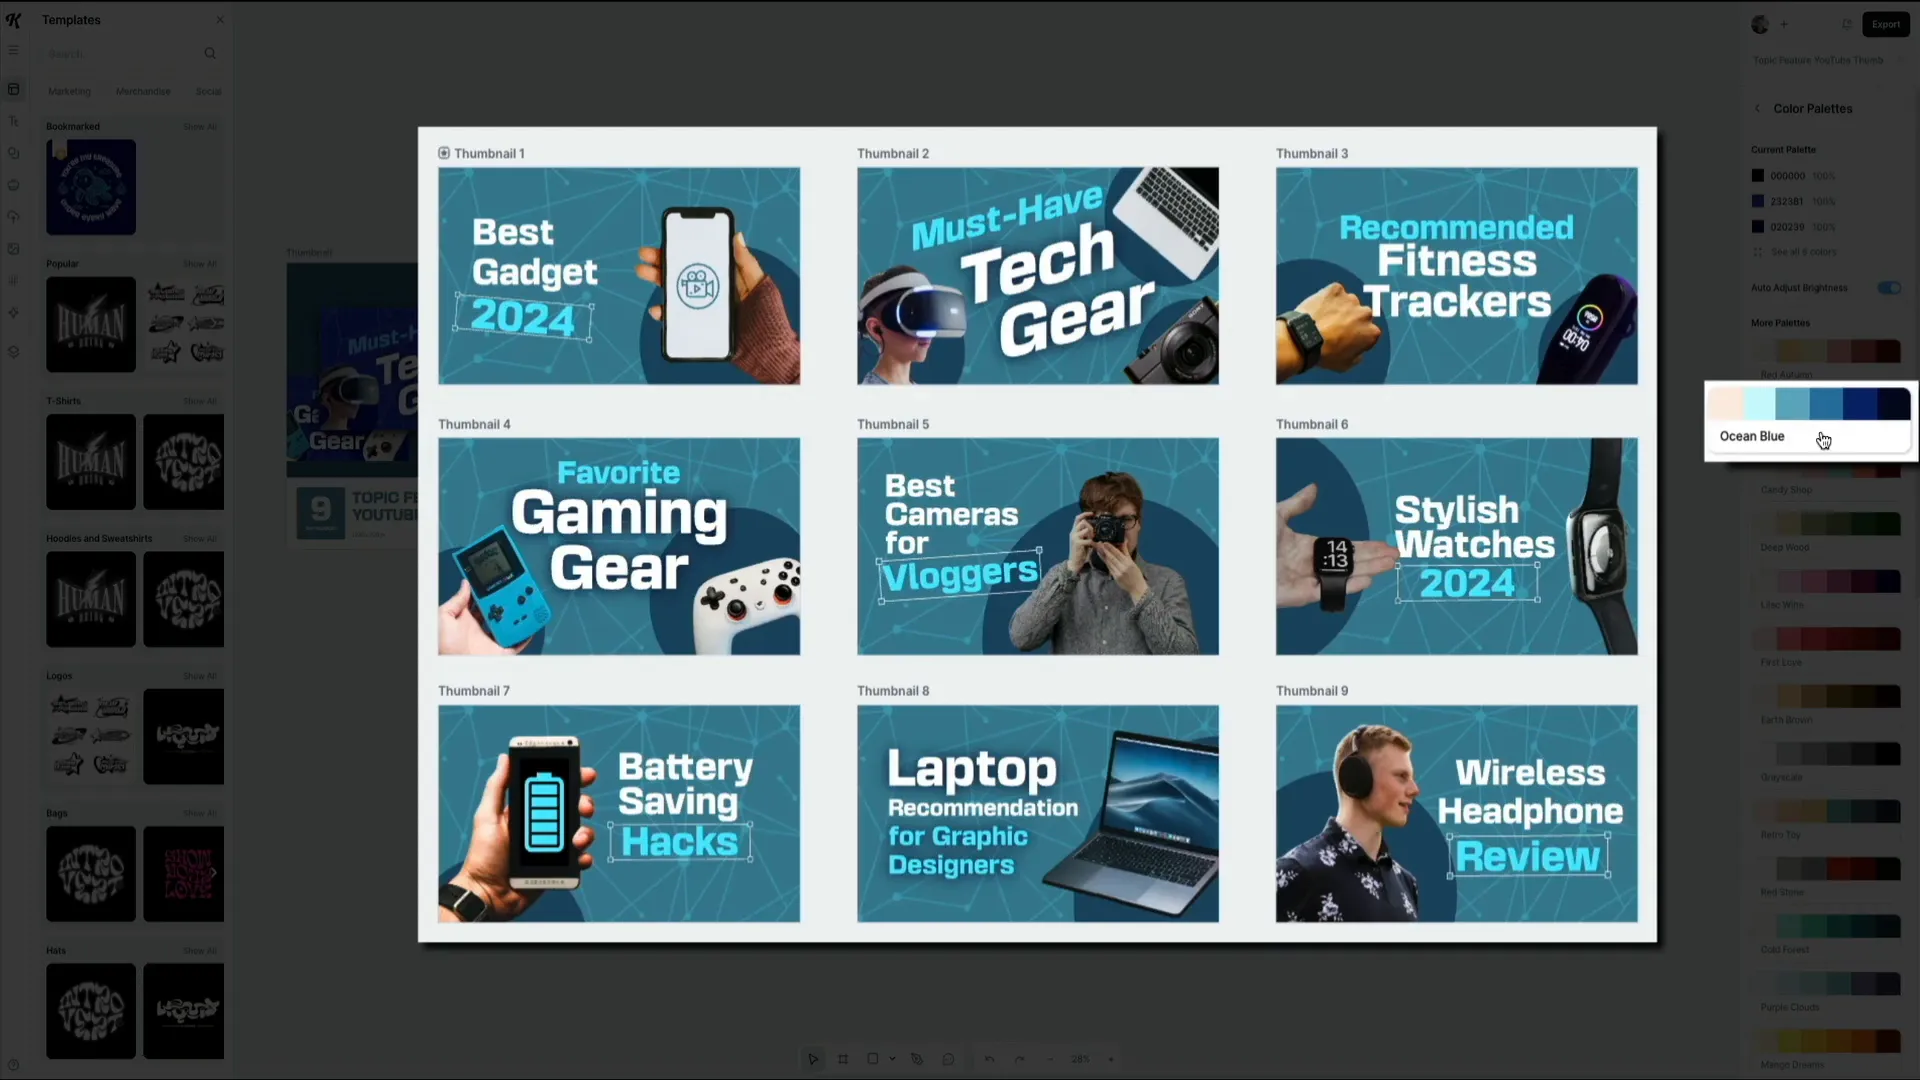
On the right-hand side of the editor, you'll find a button labeled Browse Color Palettes. Clicking this opens a variety of professionally curated color themes to choose from.
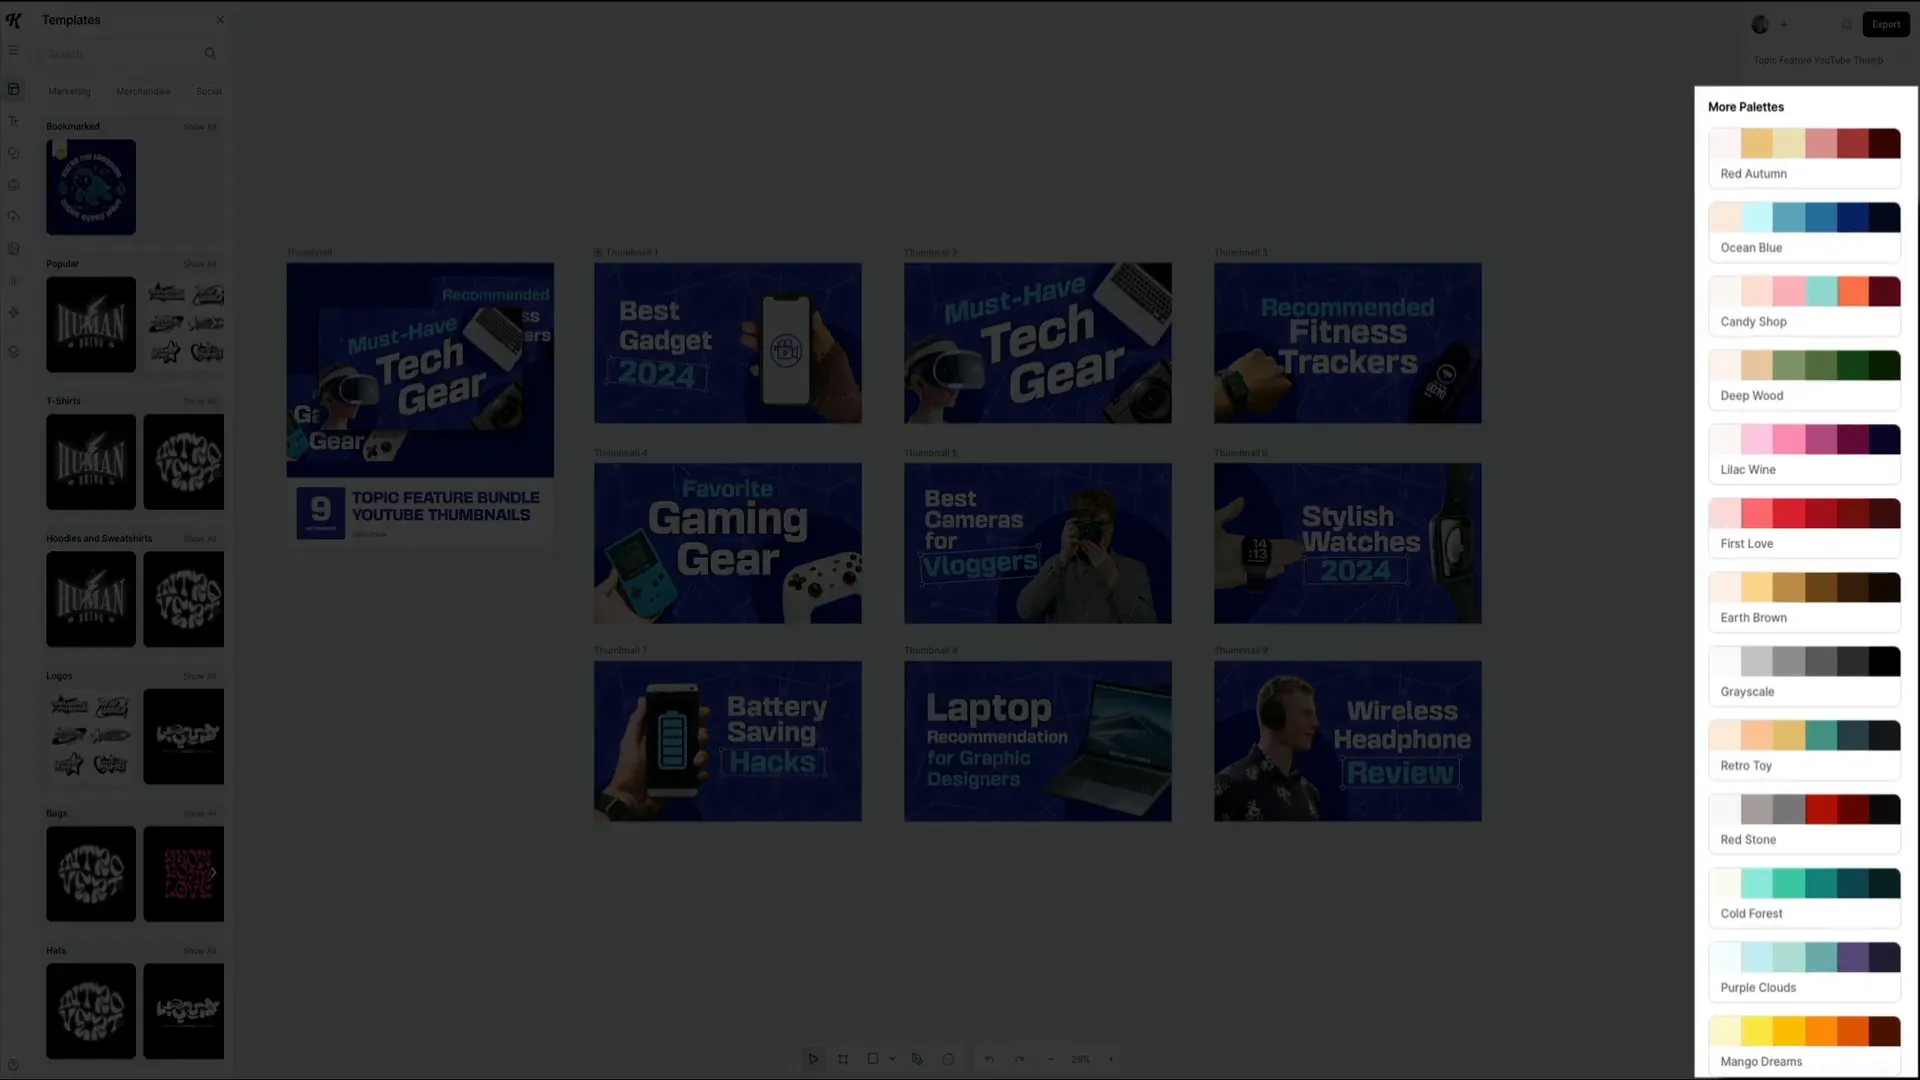
Here’s a neat feature: when you hover your mouse over any color palette, Kittl instantly previews how all the thumbnails in your bundle will look using that color scheme. This real-time update lets you experiment with different vibes and moods until you find one that perfectly fits your branding.
If you want even more control, you can customize individual colors within the palette manually. Just click on the color palette section and you’ll see all the colors used in the design. You can swap out any color for one that better matches your brand’s identity.
This is ideal if you already have a brand kit or a specific look you want to maintain. Otherwise, feel free to hover over the different palettes until you find one that resonates with your style.
For my example, I chose the Ocean Blue palette. It gave the thumbnails a clean, modern look that makes both text and visuals pop on screen. Best of all, it applied instantly across all nine thumbnails in the bundle, saving me tons of time compared to editing each one individually.
How to Upload a Headshot and Remove Background
Adding a personal touch to your thumbnails can significantly boost your channel's recognition and brand presence. Including your face or a recognizable image of yourself is a great way to do this.
Uploading your headshot in Kittl is simple and doesn’t require studio-quality photos. I used a casual photo taken on my iPhone, and with just a few clicks, it looked polished and professional.
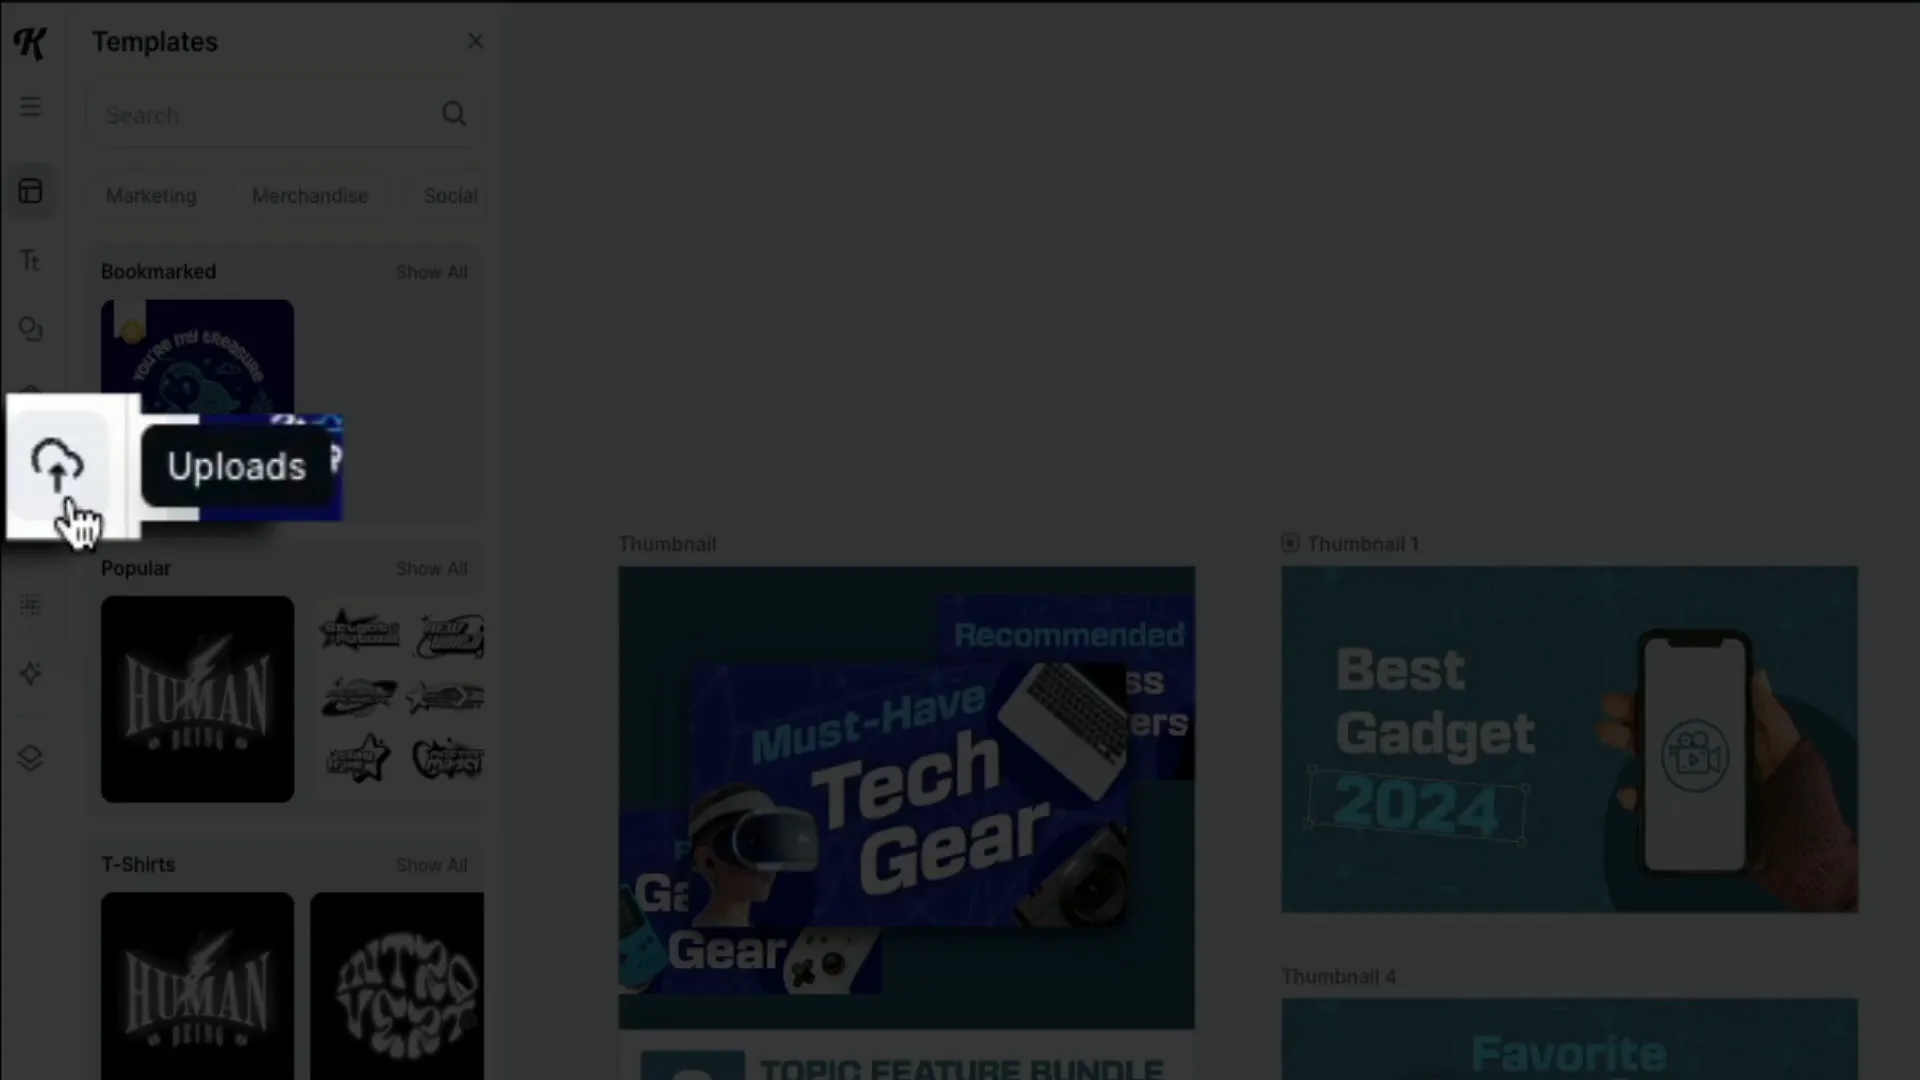
To upload your image, click the Uploads icon in the left toolbar. This opens your media library where you can access previously uploaded images or upload new ones. Click the upload button at the top and select your image file. Kittl supports common formats such as PNG, JPEG, SVG, and WEBP.
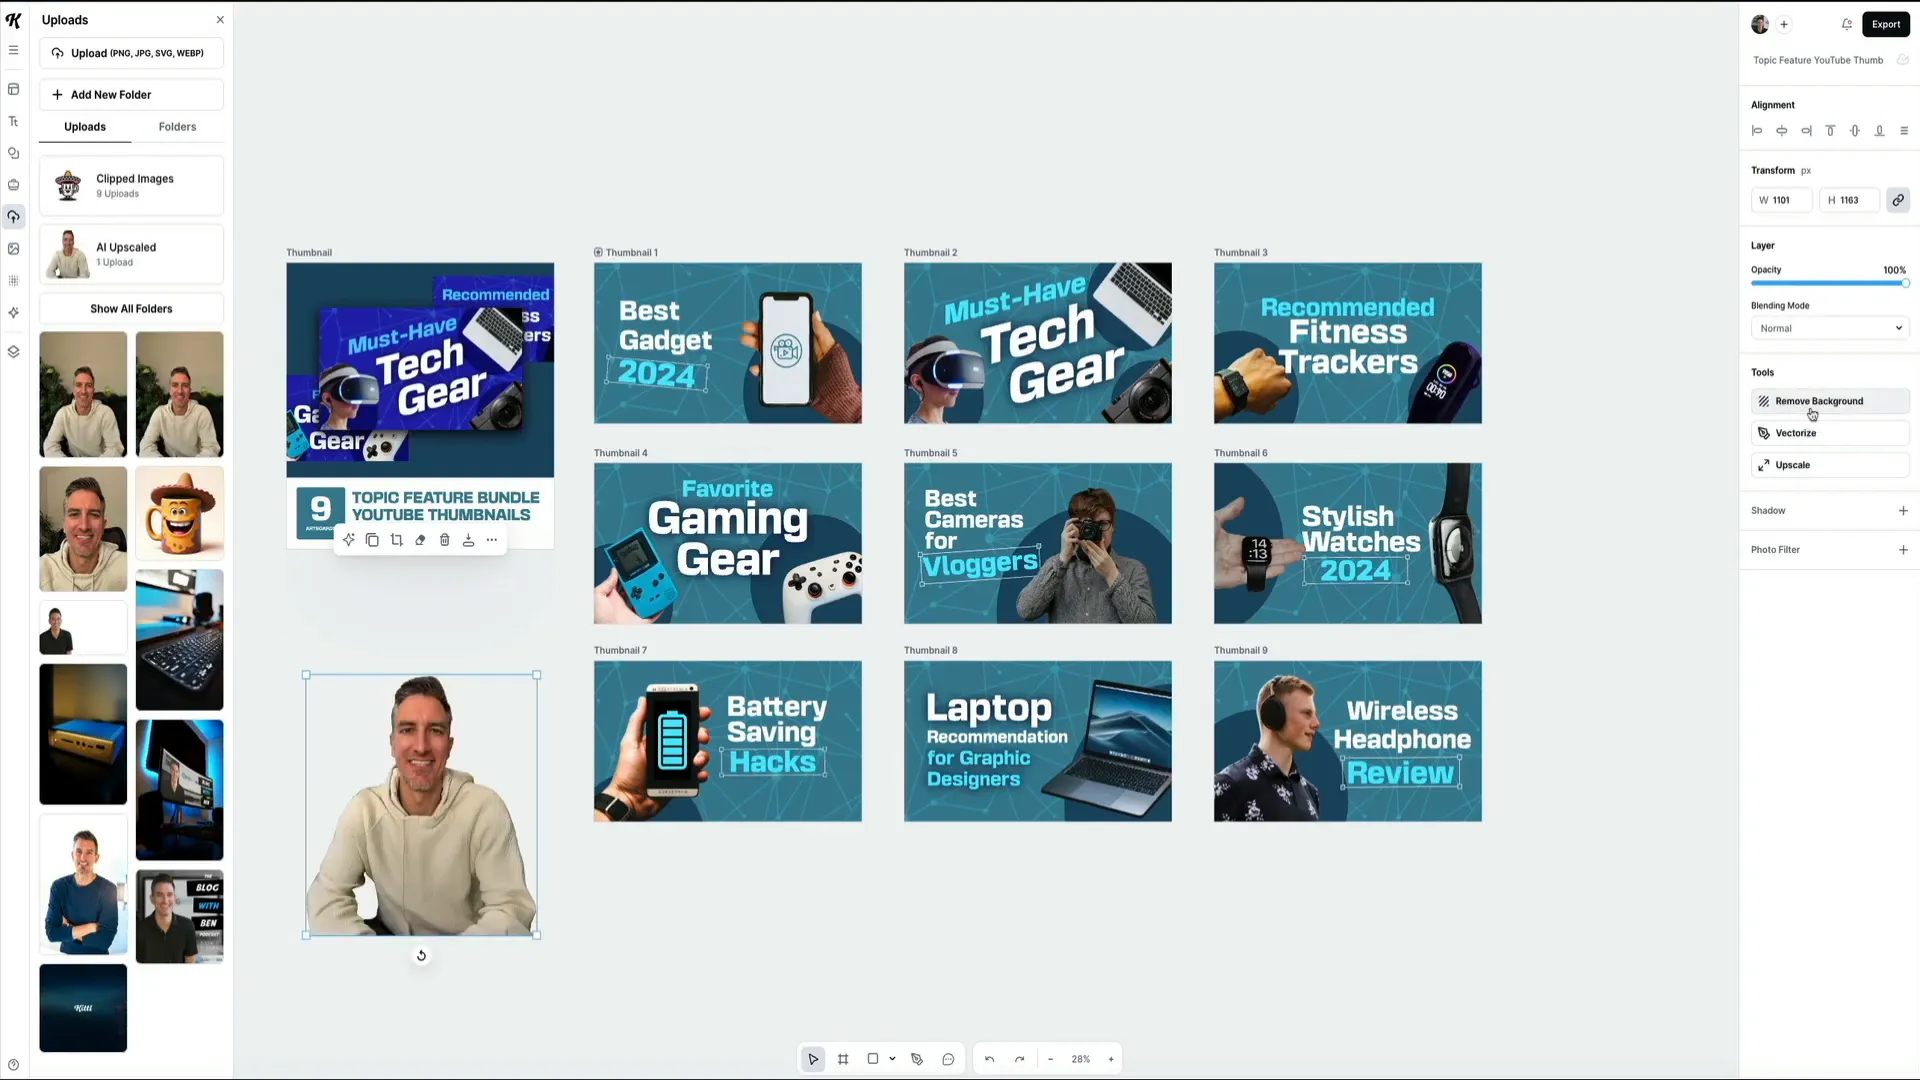
Once uploaded, your image appears in the uploads panel and on your canvas. You can drag and drop it to reposition it within your design.
Now, it’s time to clean up your image by removing the background. Select your photo, then head over to the tools section on the right and click the Remove Background button. Kittl works its magic, and within seconds, the background is gone, leaving a crisp cutout of you that fits seamlessly into your thumbnails.
For example, my photo went from a casual iPhone shot with a Christmas tree in the background to a clean, isolated headshot, perfect for grabbing attention on YouTube.
How to Edits Thumbnails in Kittl
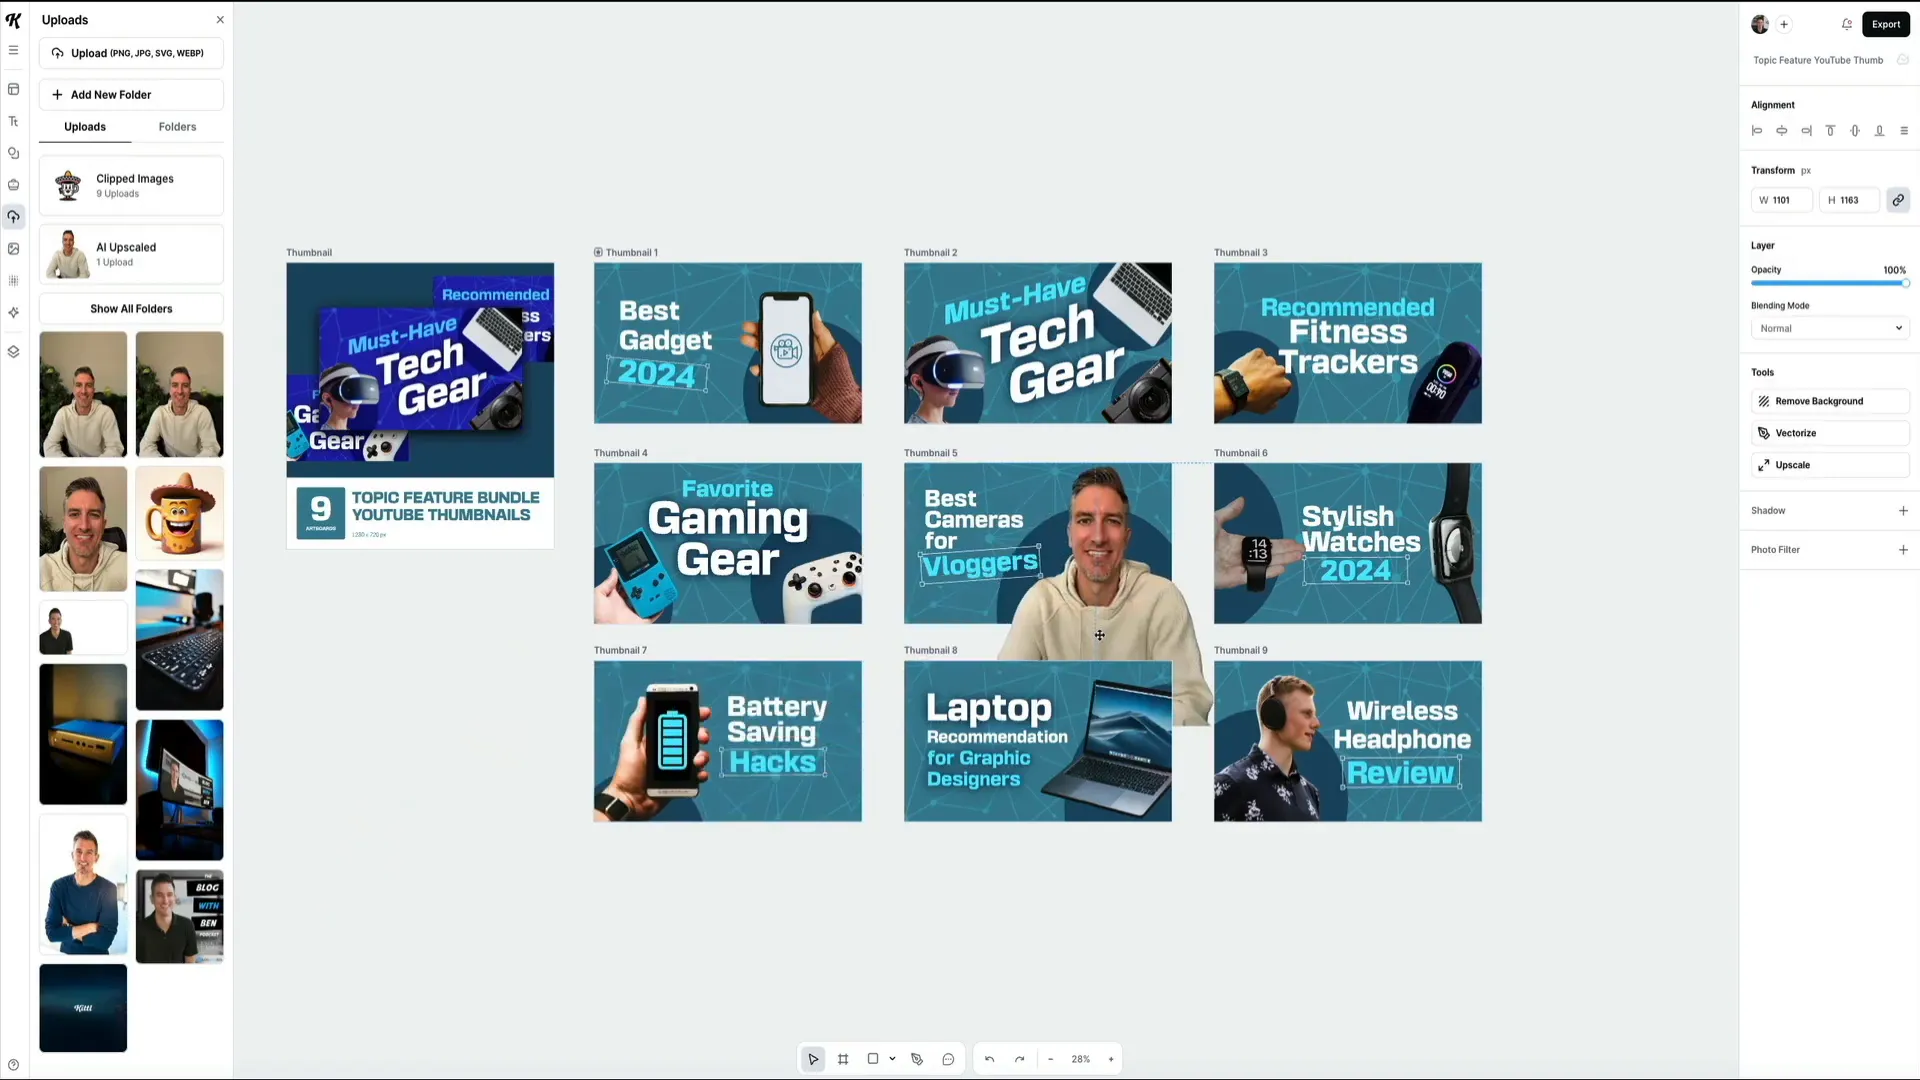
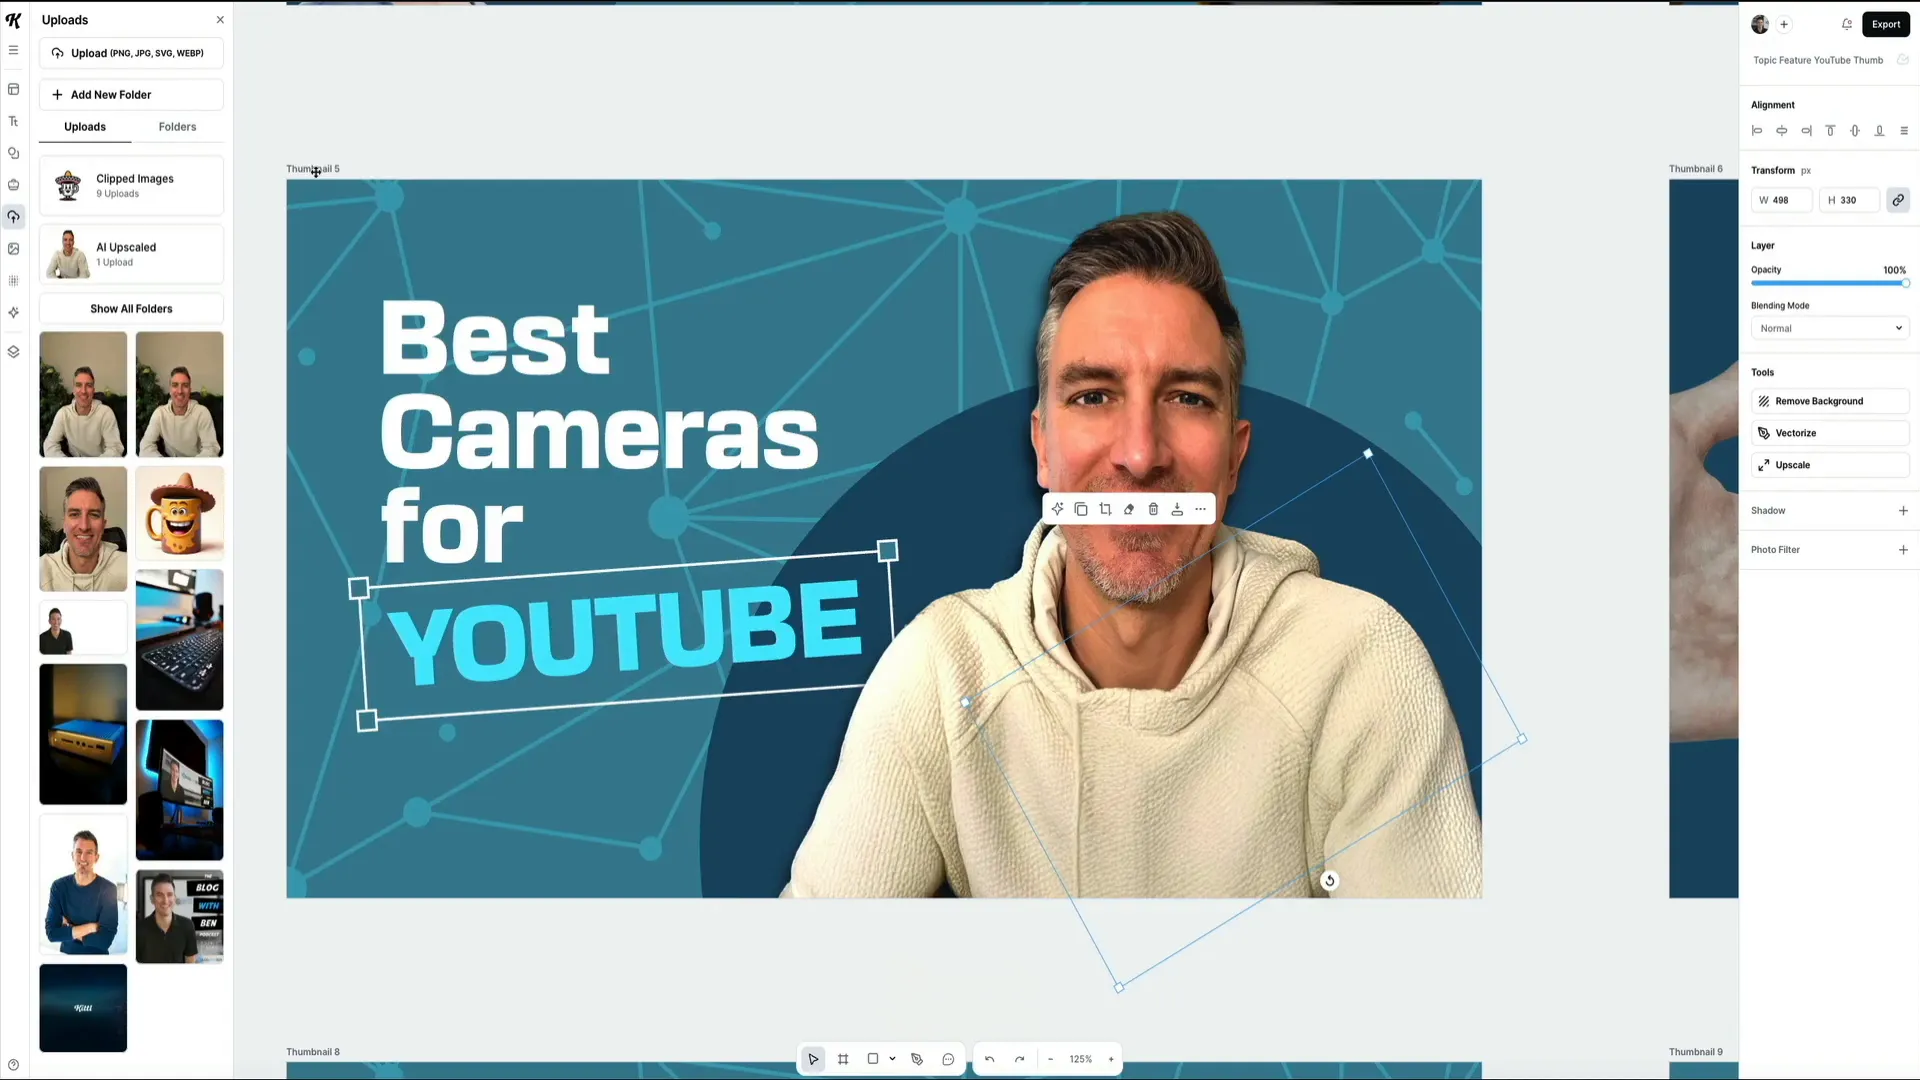
With your headshot ready, let’s place it into one of your chosen thumbnail templates. For example, I added my headshot to thumbnail number five in my bundle.
You might notice an existing image in the template, such as another person’s photo. Simply select that image and hit delete to remove it, making room for your headshot.
Drag your photo onto the thumbnail canvas, resize it by dragging the corners, and reposition it to get the perfect framing. Keeping your face large and visible helps your thumbnail stand out in YouTube’s crowded feed.
For precise editing, here’s a quick tip: click the thumbnail’s name in the top left corner (e.g., “Thumbnail 5”) to select the entire artboard. Then, use the zoom dropdown in the bottom toolbar to choose Fit to Artboard. This zooms in on your design, making it easier to fine-tune layouts, align text, and balance elements.
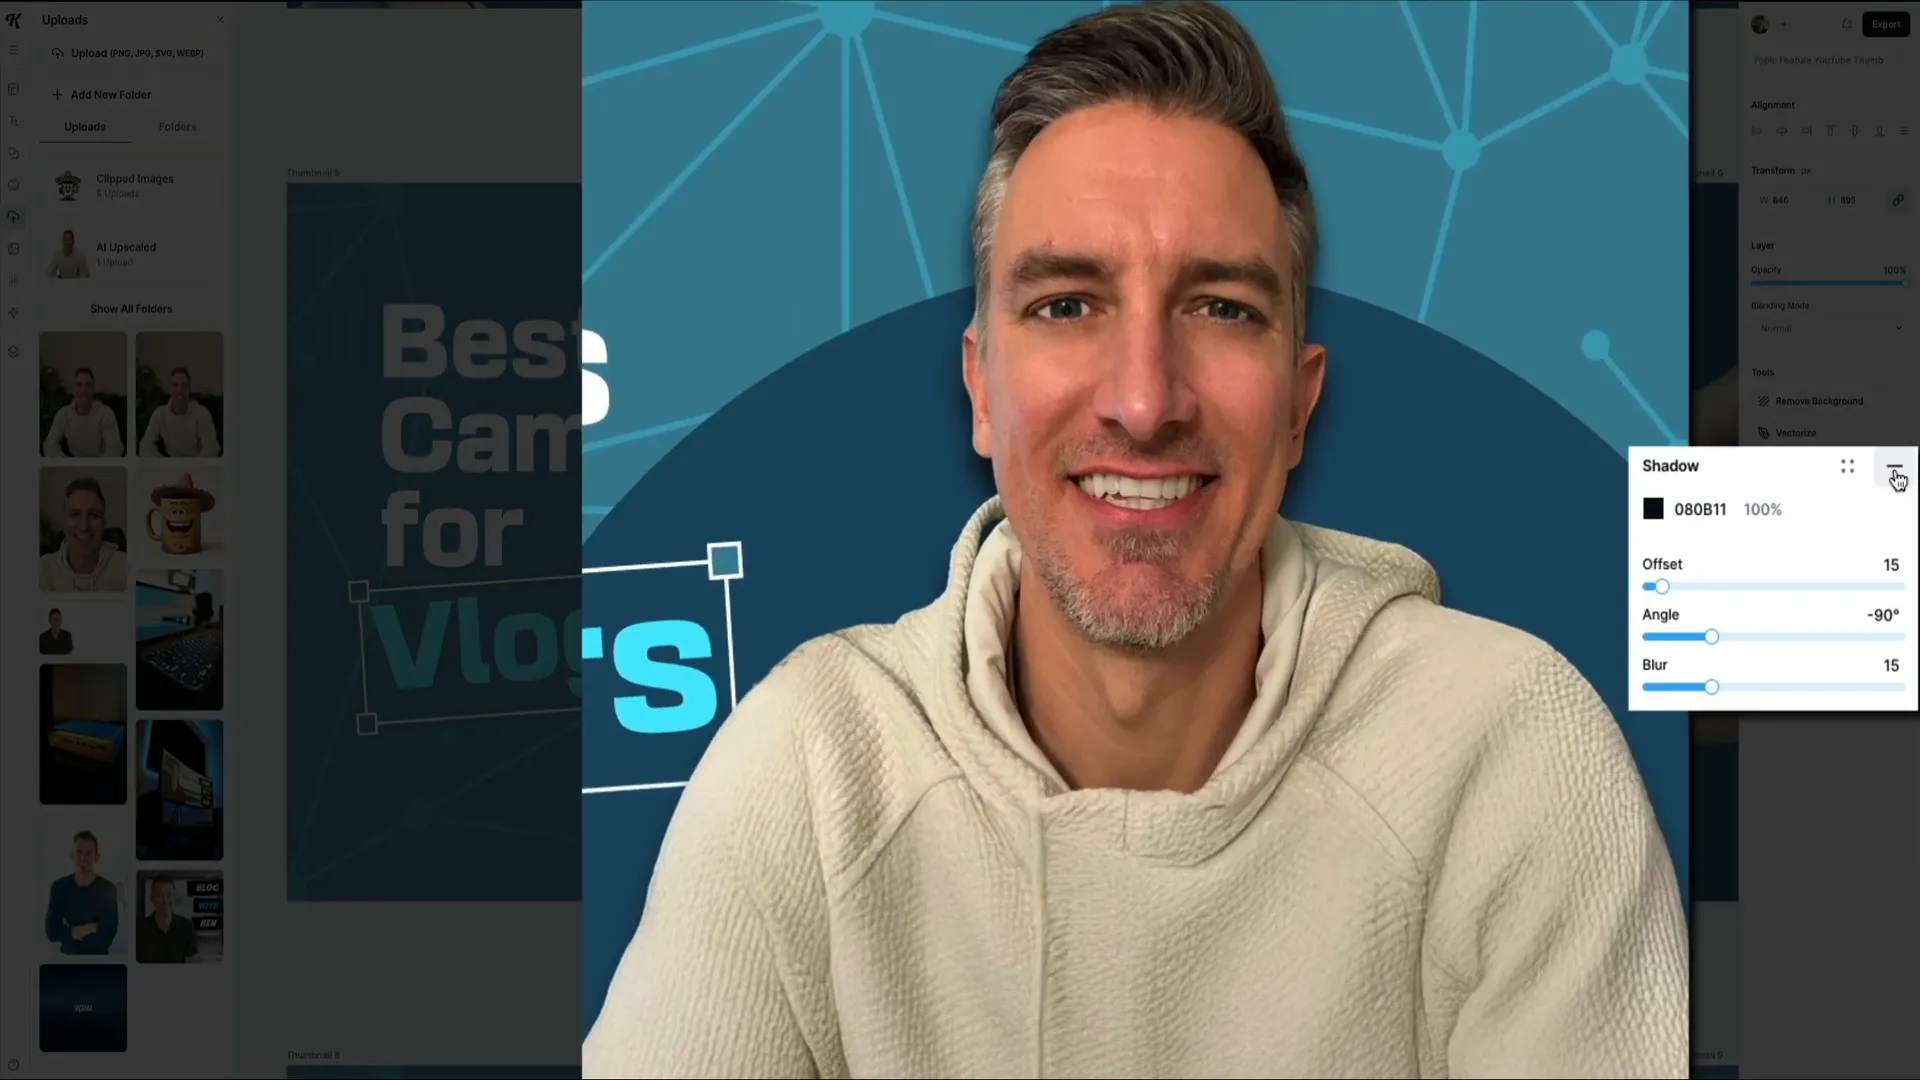
Once your headshot is in place, you can make it pop off the background by adding a shadow. Select your image and open the editing panel on the right. Click the Shadow section, then the plus icon to open shadow settings. Here, you can adjust color, opacity, blur, angle, and distance of the shadow. I prefer a soft shadow to subtly separate the image from the background without harshness.
Next, open the Photo Filter section. This lets you tweak brightness, contrast, saturation, and more to correct lighting or enhance the overall tone. Even small adjustments can make a big difference, especially when your face is front and center.
Don’t worry if you close these settings; closing them removes the effects from your image, so keep them open if you want to retain the look.
Editing text is just as easy. Click on any text box to start typing your own words. I changed “vloggers” to “YouTube” to better reflect my audience. You can also adjust font size, color, font family, and even angle to make the text fit your style.
One of Kittl’s coolest features is the ability to mix and match elements from different templates within a bundle. For example, if you like a camera graphic from another thumbnail, just copy it (Command+C on Mac or Control+C on PC), then paste it (Command+V or Control+V) into your current design.
If the new element appears behind other objects, use the Layers panel on the left toolbar. This panel shows every object in your design stacked by layers. Drag the new element above your headshot layer to bring it to the front, then reposition it as needed. I moved the camera graphic to the bottom-left corner to balance the composition and reinforce the thumbnail’s theme.
To customize another template in your bundle, zoom out by selecting the zoom feature and choosing Fit to Content. This shows all thumbnails in the bundle at once. Select the one you want to edit, zoom back in with Fit to Artboard, and start customizing.
For example, I selected a template with a phone graphic and battery savings hacks text. I deleted the battery graphic by selecting it and pressing delete, then replaced it with a new headshot I had already uploaded and background removed.
Sometimes your image might be too small when dropped onto the canvas. Resize it by dragging the corners, and position it to fit perfectly inside frames or shapes. To make the headshot fit inside the phone screen, I cropped the image by right-clicking it, choosing Crop, and adjusting the crop handles. After cropping, I used the erase tool from the top toolbar to carefully erase parts of the image overlapping the phone’s finger, creating a realistic illusion that the headshot is inside the screen.
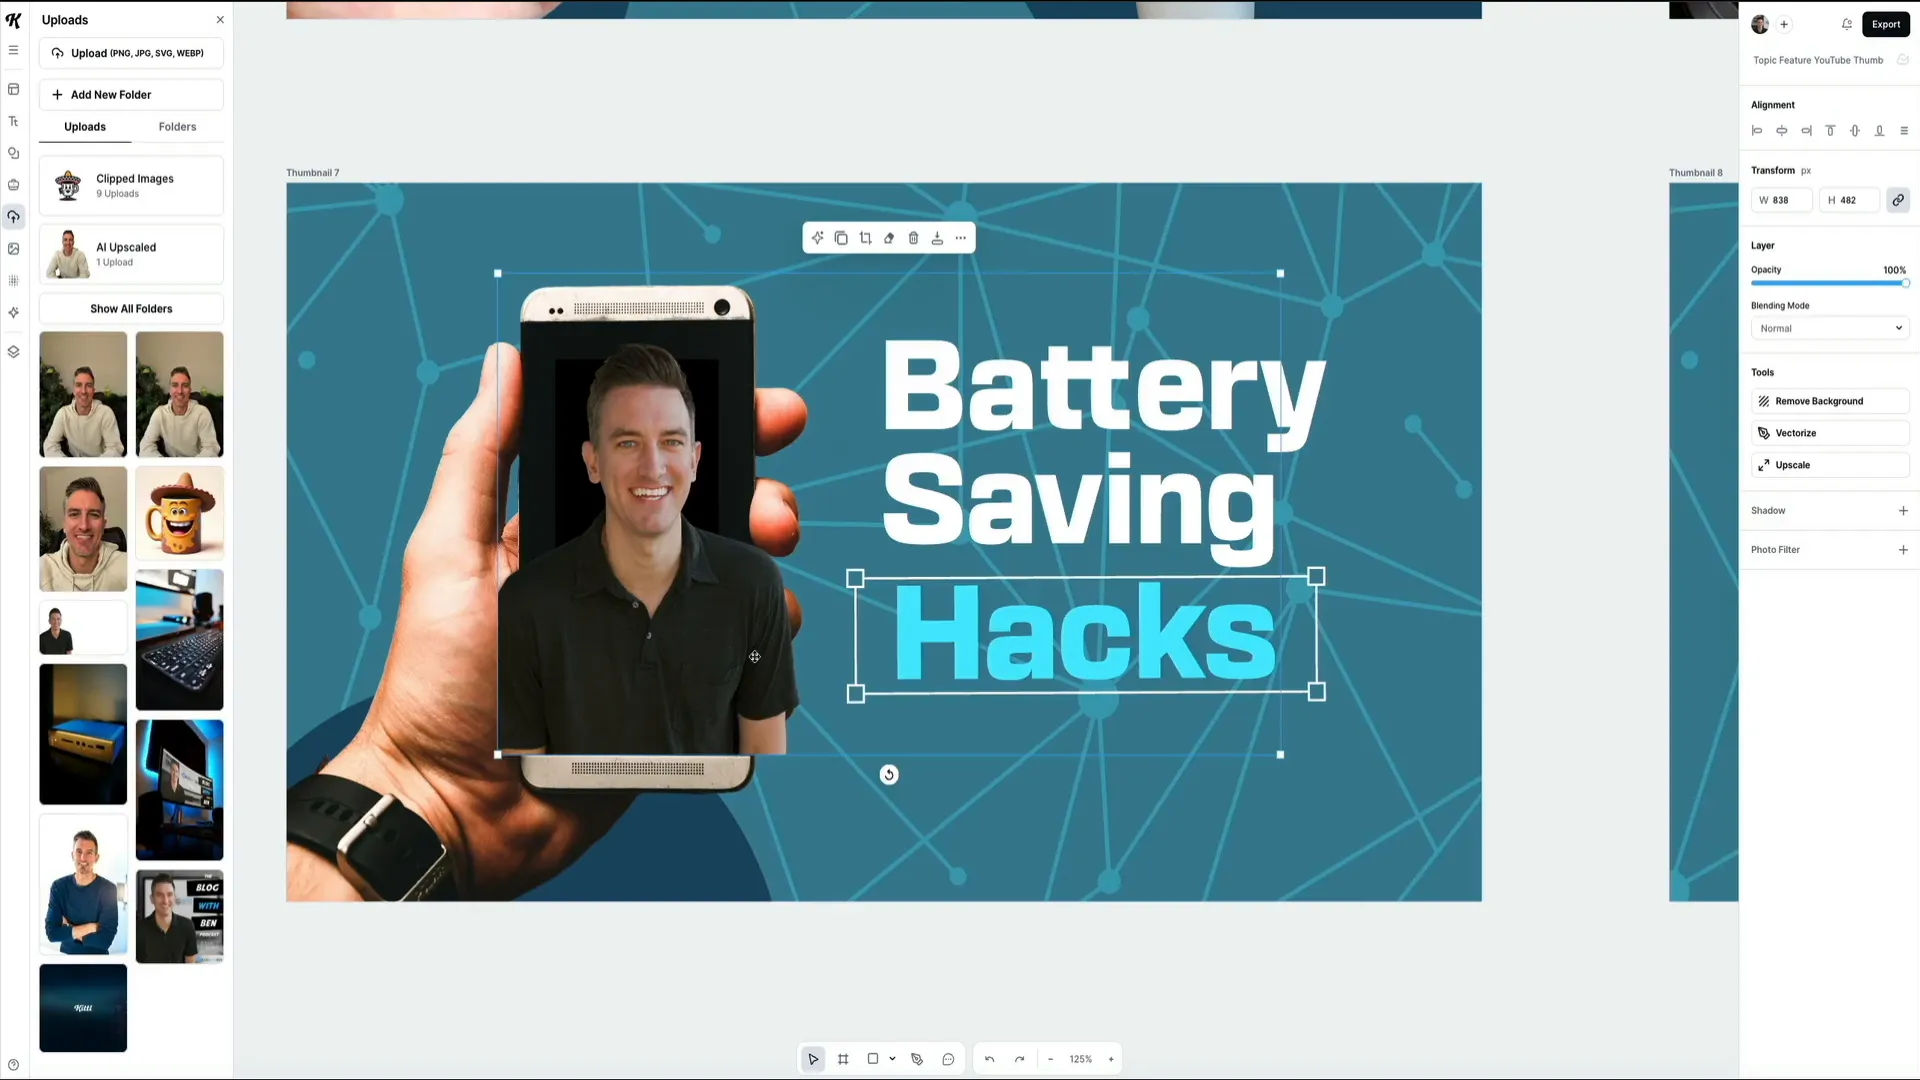
Finally, adjust text accordingly by clicking on text boxes to edit and tweak fonts as needed. I replaced “battery saving” with “mobile app” to match my new topic. I also slightly increased brightness and contrast on the headshot to help it blend with the design.
Adding a new headshot to other templates follows the same process: upload or select your photo, remove the background, drag and drop it onto the canvas, resize, and reposition. This fast and easy method personalizes your thumbnails while maintaining visual consistency across your channel.
How to Export Your Thumbnails
Once you’re happy with your designs, the final step is exporting your thumbnails to use on your YouTube channel.
In the upper right corner of Kittl’s editor, click the Export button. This opens the export panel where you can choose to export all artboards or just select individual thumbnails.
By default, all artboards are selected to export at once. You can open the artboards dropdown to see each thumbnail. If you want to export just one, deselect all and then check the box for the specific thumbnail you want.
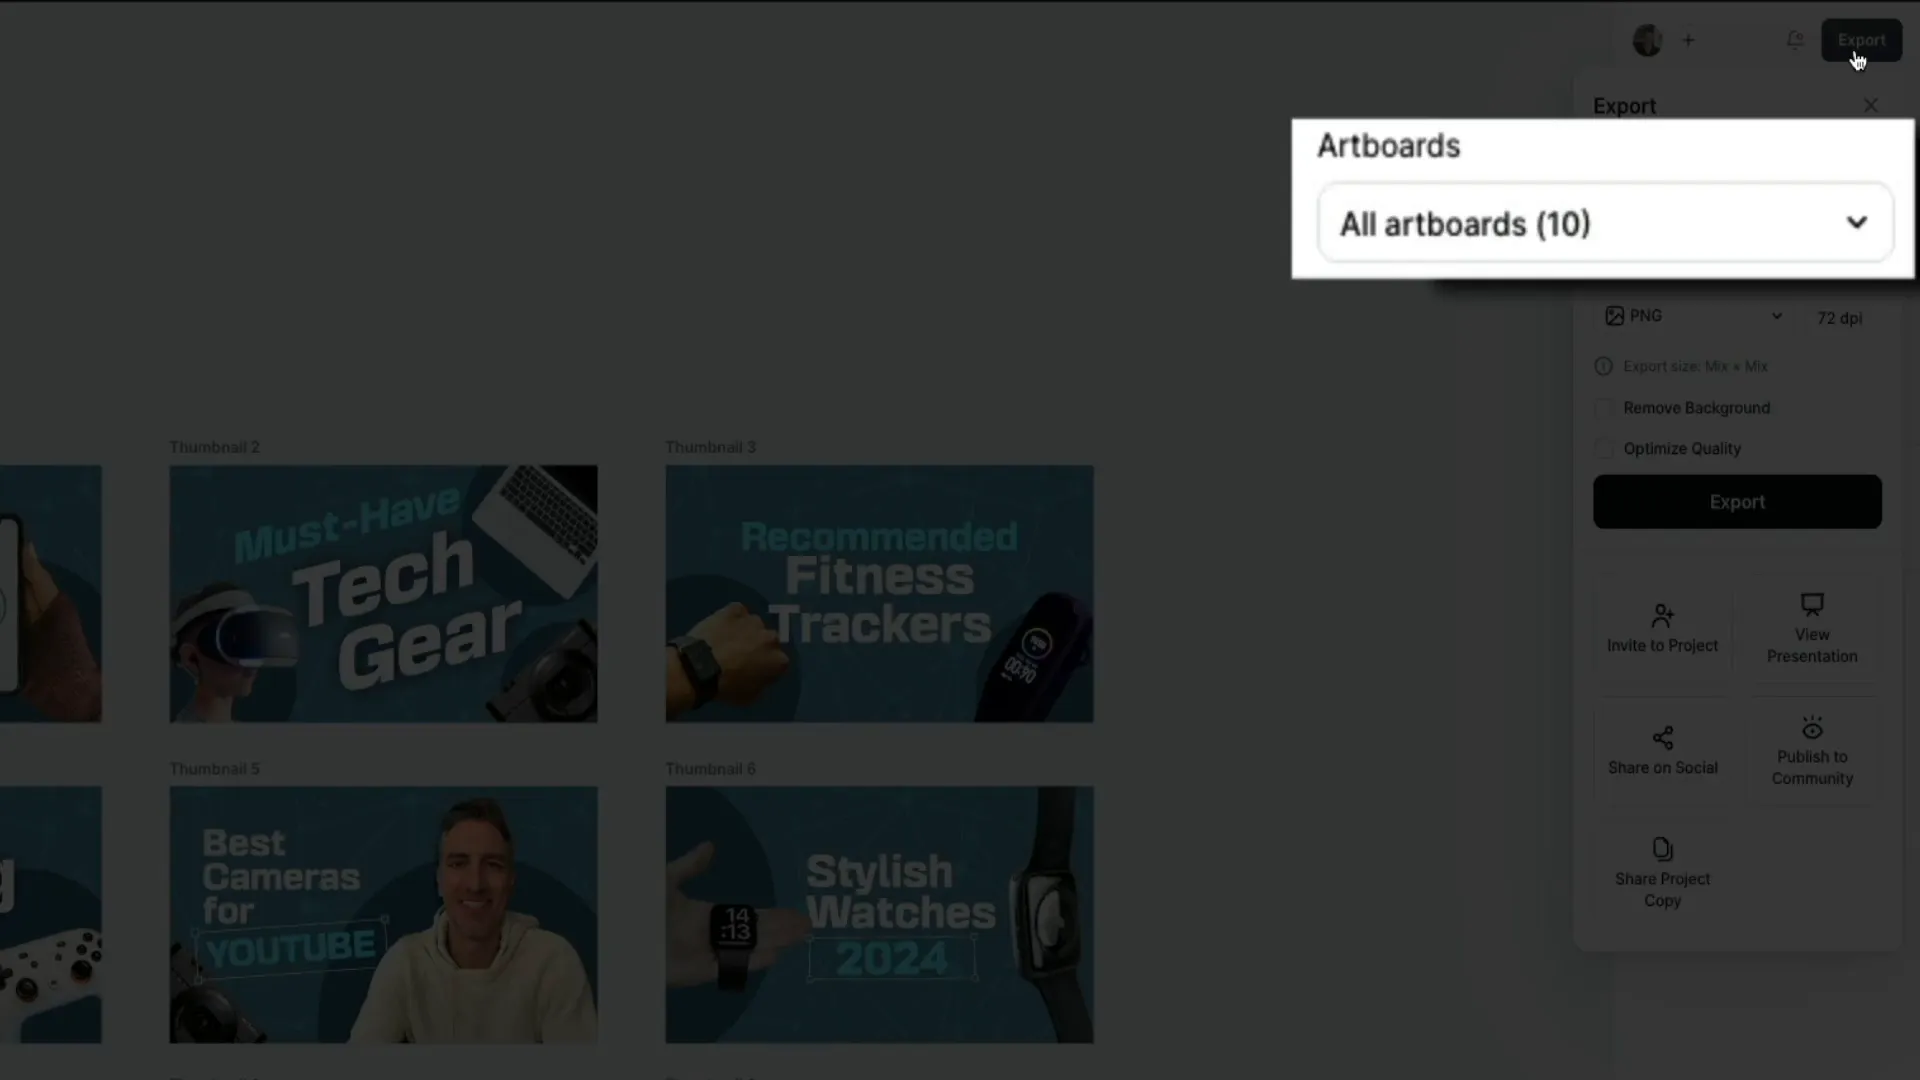
Make sure your file type is set to PNG to ensure high-quality images. The resolution should be set to 72 dpi unless you need something different.
Click Export, and your thumbnail will download to your computer, ready to upload to YouTube.
Don’t worry about losing your work, your templates remain fully editable in Kittl. You can return anytime to make updates or download additional thumbnails as needed.
My Final Thoughts
Kittl has made creating professional-quality YouTube thumbnails incredibly accessible, even for those without design experience. With its intuitive drag-and-drop interface, background removal tool, photo filters, and easy export options, you can create eye-catching thumbnails in minutes, saving you hours of work.
If you’re serious about building your brand or growing your YouTube channel, consider upgrading to Kittl’s Pro plan starting at just $10 per month. The pro features include high-resolution exports, advanced editing tools, and commercial licensing, which are perfect for creators looking to take their visuals to the next level.
Remember, thumbnails play a crucial role in attracting viewers and increasing your video’s click-through rate. Investing a little time in creating polished, consistent thumbnails can make a significant difference in your channel’s growth.
For more resources and tutorials on blogging, YouTube, AI, and tech trends, be sure to visit my website, Blog With Ben – Learn How To Start A Blog. You can also connect with me on Instagram and Facebook for updates and tips.
Thanks for reading, and I hope this guide helps you create stunning YouTube thumbnails quickly and easily with Kittl!
If you're a content creator looking to save time, maintain consistent branding, and craft professional YouTube thumbnails without needing any design skills, you're in the right place. Creating eye-catching thumbnails is essential to grab attention and boost your video clicks, but spending hours in complicated design software can be frustrating and inefficient.
That's why I want to introduce you to an incredibly intuitive tool called Kittl. It makes designing thumbnails fast, easy, and fun, even if you don't have a background in graphic design. In this comprehensive guide, I’ll walk you through how to use Kittl to create stunning, brand-consistent thumbnails in just a few minutes.
We'll cover everything from picking ready-made YouTube thumbnail templates to customizing colors, uploading and editing your own headshots, adjusting text, and exporting your final designs ready for upload. By the end, you'll have polished thumbnails that look professional and help your videos stand out.
How to Create a YouTube Thumbnail Bundle
Getting started with Kittl is straightforward. First, head over to the Kittl dashboard, where all the magic begins. The dashboard is your central hub for accessing templates and starting your design projects.
In the left-hand menu, click on Templates. This section houses a vast collection of pre-made designs, including those specifically crafted for YouTube thumbnails. It’s an excellent resource for inspiration or for jumping right into editing a ready-to-use layout.
To find thumbnails tailored for YouTube content, simply use the search bar at the top of the templates page. Type “YouTube thumbnails” and hit enter. Instantly, you'll see a curated list of templates designed to fit YouTube’s visual style and dimensions.
Kittl offers two types of templates:
- Individual thumbnail templates — perfect for one-off videos.
- Template bundles — collections of multiple thumbnail designs that keep your branding consistent across a series of videos.
Bundles are especially useful if you’re creating a video series or want to maintain a cohesive look throughout your channel. You can easily spot bundles by a number badge in the corner of each preview, showing how many designs are included.
Once you find a bundle that fits your style, click on its preview to open it in Kittl’s visual editor. Here, you’ll see all the thumbnail variations included in the set, ready for customization with your own text, colors, and images, all while preserving a professional look and feel.
This approach is not only intuitive but also a huge timesaver, especially if you regularly create content and want to streamline your workflow.
How to Change the Color Palette
After selecting your template bundle, the next step is to customize the thumbnails so they align perfectly with your brand or channel's style. One of the quickest ways to do this is by adjusting the color palette.
On the right-hand side of the editor, you'll find a button labeled Browse Color Palettes. Clicking this opens a variety of professionally curated color themes to choose from.
Here’s a neat feature: when you hover your mouse over any color palette, Kittl instantly previews how all the thumbnails in your bundle will look using that color scheme. This real-time update lets you experiment with different vibes and moods until you find one that perfectly fits your branding.
If you want even more control, you can customize individual colors within the palette manually. Just click on the color palette section and you’ll see all the colors used in the design. You can swap out any color for one that better matches your brand’s identity.
This is ideal if you already have a brand kit or a specific look you want to maintain. Otherwise, feel free to hover over the different palettes until you find one that resonates with your style.
For my example, I chose the Ocean Blue palette. It gave the thumbnails a clean, modern look that makes both text and visuals pop on screen. Best of all, it applied instantly across all nine thumbnails in the bundle, saving me tons of time compared to editing each one individually.
How to Upload a Headshot and Remove Background
Adding a personal touch to your thumbnails can significantly boost your channel's recognition and brand presence. Including your face or a recognizable image of yourself is a great way to do this.
Uploading your headshot in Kittl is simple and doesn’t require studio-quality photos. I used a casual photo taken on my iPhone, and with just a few clicks, it looked polished and professional.
To upload your image, click the Uploads icon in the left toolbar. This opens your media library where you can access previously uploaded images or upload new ones. Click the upload button at the top and select your image file. Kittl supports common formats such as PNG, JPEG, SVG, and WEBP.
Once uploaded, your image appears in the uploads panel and on your canvas. You can drag and drop it to reposition it within your design.
Now, it’s time to clean up your image by removing the background. Select your photo, then head over to the tools section on the right and click the Remove Background button. Kittl works its magic, and within seconds, the background is gone, leaving a crisp cutout of you that fits seamlessly into your thumbnails.
For example, my photo went from a casual iPhone shot with a Christmas tree in the background to a clean, isolated headshot, perfect for grabbing attention on YouTube.
How to Edits Thumbnails in Kittl
With your headshot ready, let’s place it into one of your chosen thumbnail templates. For example, I added my headshot to thumbnail number five in my bundle.
You might notice an existing image in the template, such as another person’s photo. Simply select that image and hit delete to remove it, making room for your headshot.
Drag your photo onto the thumbnail canvas, resize it by dragging the corners, and reposition it to get the perfect framing. Keeping your face large and visible helps your thumbnail stand out in YouTube’s crowded feed.
For precise editing, here’s a quick tip: click the thumbnail’s name in the top left corner (e.g., “Thumbnail 5”) to select the entire artboard. Then, use the zoom dropdown in the bottom toolbar to choose Fit to Artboard. This zooms in on your design, making it easier to fine-tune layouts, align text, and balance elements.
Once your headshot is in place, you can make it pop off the background by adding a shadow. Select your image and open the editing panel on the right. Click the Shadow section, then the plus icon to open shadow settings. Here, you can adjust color, opacity, blur, angle, and distance of the shadow. I prefer a soft shadow to subtly separate the image from the background without harshness.
Next, open the Photo Filter section. This lets you tweak brightness, contrast, saturation, and more to correct lighting or enhance the overall tone. Even small adjustments can make a big difference, especially when your face is front and center.
Don’t worry if you close these settings; closing them removes the effects from your image, so keep them open if you want to retain the look.
Editing text is just as easy. Click on any text box to start typing your own words. I changed “vloggers” to “YouTube” to better reflect my audience. You can also adjust font size, color, font family, and even angle to make the text fit your style.
One of Kittl’s coolest features is the ability to mix and match elements from different templates within a bundle. For example, if you like a camera graphic from another thumbnail, just copy it (Command+C on Mac or Control+C on PC), then paste it (Command+V or Control+V) into your current design.
If the new element appears behind other objects, use the Layers panel on the left toolbar. This panel shows every object in your design stacked by layers. Drag the new element above your headshot layer to bring it to the front, then reposition it as needed. I moved the camera graphic to the bottom-left corner to balance the composition and reinforce the thumbnail’s theme.
To customize another template in your bundle, zoom out by selecting the zoom feature and choosing Fit to Content. This shows all thumbnails in the bundle at once. Select the one you want to edit, zoom back in with Fit to Artboard, and start customizing.
For example, I selected a template with a phone graphic and battery savings hacks text. I deleted the battery graphic by selecting it and pressing delete, then replaced it with a new headshot I had already uploaded and background removed.
Sometimes your image might be too small when dropped onto the canvas. Resize it by dragging the corners, and position it to fit perfectly inside frames or shapes. To make the headshot fit inside the phone screen, I cropped the image by right-clicking it, choosing Crop, and adjusting the crop handles. After cropping, I used the erase tool from the top toolbar to carefully erase parts of the image overlapping the phone’s finger, creating a realistic illusion that the headshot is inside the screen.
Finally, adjust text accordingly by clicking on text boxes to edit and tweak fonts as needed. I replaced “battery saving” with “mobile app” to match my new topic. I also slightly increased brightness and contrast on the headshot to help it blend with the design.
Adding a new headshot to other templates follows the same process: upload or select your photo, remove the background, drag and drop it onto the canvas, resize, and reposition. This fast and easy method personalizes your thumbnails while maintaining visual consistency across your channel.
How to Export Your Thumbnails
Once you’re happy with your designs, the final step is exporting your thumbnails to use on your YouTube channel.
In the upper right corner of Kittl’s editor, click the Export button. This opens the export panel where you can choose to export all artboards or just select individual thumbnails.
By default, all artboards are selected to export at once. You can open the artboards dropdown to see each thumbnail. If you want to export just one, deselect all and then check the box for the specific thumbnail you want.
Make sure your file type is set to PNG to ensure high-quality images. The resolution should be set to 72 dpi unless you need something different.
Click Export, and your thumbnail will download to your computer, ready to upload to YouTube.
Don’t worry about losing your work, your templates remain fully editable in Kittl. You can return anytime to make updates or download additional thumbnails as needed.
My Final Thoughts
Kittl has made creating professional-quality YouTube thumbnails incredibly accessible, even for those without design experience. With its intuitive drag-and-drop interface, background removal tool, photo filters, and easy export options, you can create eye-catching thumbnails in minutes, saving you hours of work.
If you’re serious about building your brand or growing your YouTube channel, consider upgrading to Kittl’s Pro plan starting at just $10 per month. The pro features include high-resolution exports, advanced editing tools, and commercial licensing, which are perfect for creators looking to take their visuals to the next level.
Remember, thumbnails play a crucial role in attracting viewers and increasing your video’s click-through rate. Investing a little time in creating polished, consistent thumbnails can make a significant difference in your channel’s growth.
For more resources and tutorials on blogging, YouTube, AI, and tech trends, be sure to visit my website, Blog With Ben – Learn How To Start A Blog. You can also connect with me on Instagram and Facebook for updates and tips.
Thanks for reading, and I hope this guide helps you create stunning YouTube thumbnails quickly and easily with Kittl!

Written by Ben Cummings
Co-Founder of Sage Wave Media
Ben is the Co-Founder of Sage Wave Media, LLC which is the parent company of Blog With Ben. He enjoys teaching, blogging, startups, a hoppy IPA, and college basketball. Whenever he's not blogging, you can find him cruising around sunny San Diego with his amazing family.
0 Comments