STEP-BY-STEP VIDEO ON HOW TO START A BLOG THE RIGHT WAY
What You'll Learn
- Start a Self-Hosted Blog
- Set Up Your Web Hosting Account
- Get a Free Domain Name
- Access the NEW Bluehost Control Panel
- Install WordPress
- Access Your WordPress Dashboard
- Create a Powerful and Professional Digital Platform
STEP-BY-STEP VIDEO ON HOW TO START A BLOG THE RIGHT WAY
What You'll Learn
- Start a Self-Hosted Blog
- Set Up Your Web Hosting Account
- Get a Free Domain Name
- Access Your Bluehost Control Panel
- Install WordPress
- Access Your WordPress Dashboard
- Create a Powerful and Professional Digital Platform
Jump to a specific section by clicking on the links below:
Bluehost Web Hosting and Domain Name Setup
Install WordPress
Before diving into this guide, an important disclosure.
Step 1
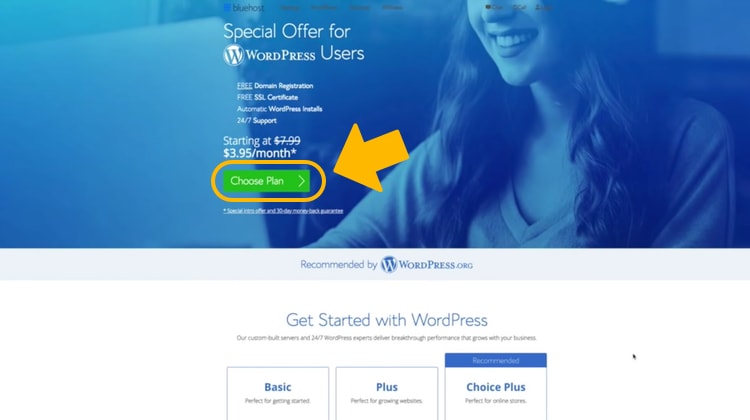
Click here → Bluehost (my affiliate link) and click on the “Choose Plan” button to take advantage of the exclusive offer for WordPress users.
Step 2
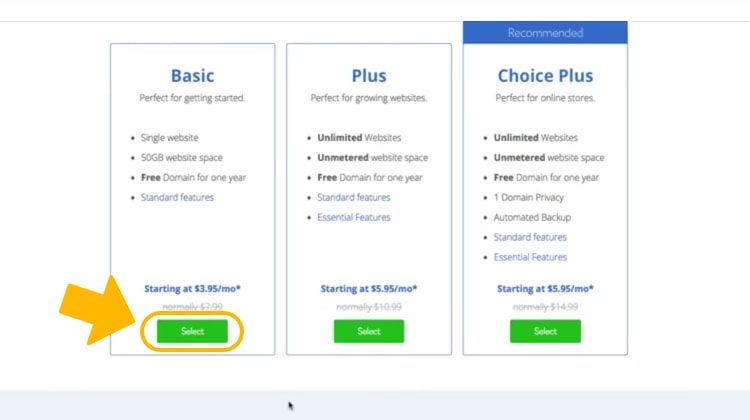
Select a hosting plan that fits your needs.
Step 3
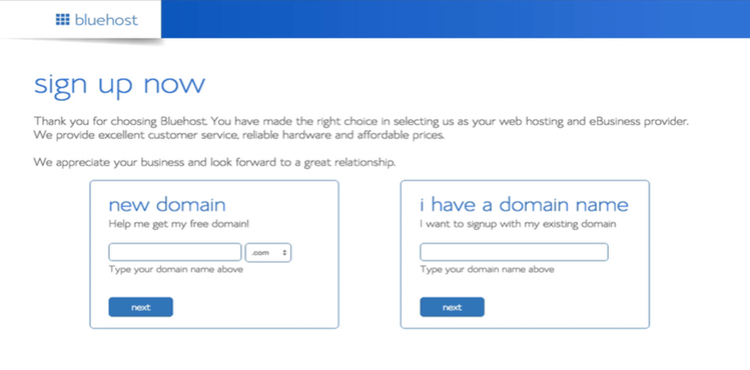
Choose your free domain name or, if you already have a domain, just transfer it. Once you've set up your Bluehost account, watch this video on how to transfer your domain.
Step 4
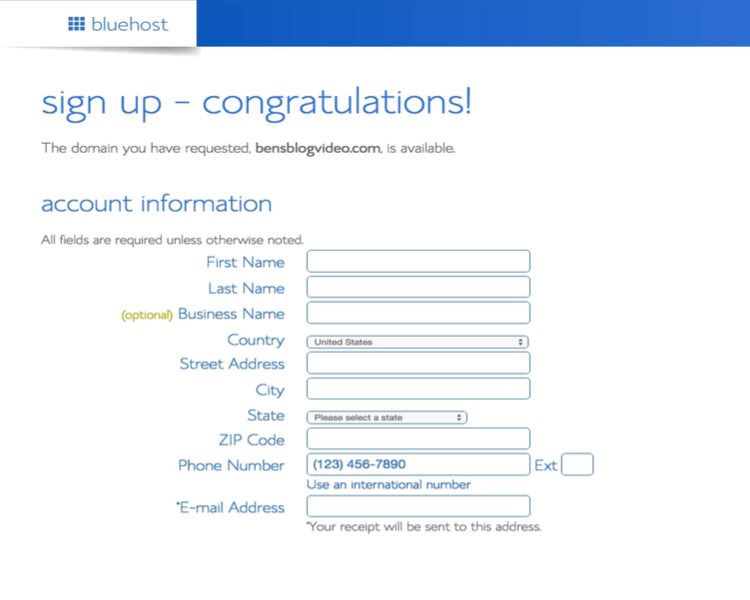
Enter your account info.
Step 5
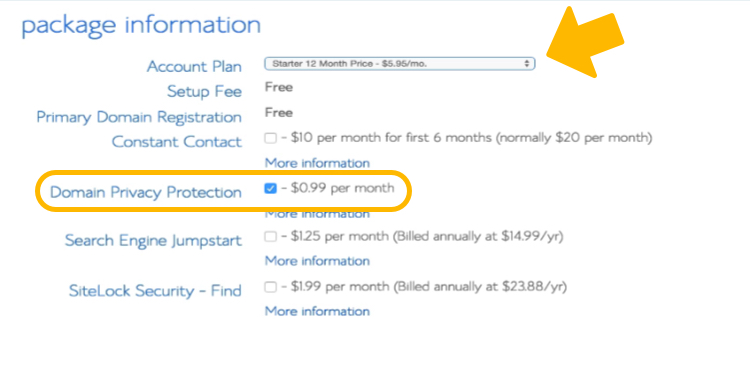
Select your package. Quick tip: I highly recommend the Domain Privacy Protection add-on. It keeps your personal info safe and secure.
Step 6
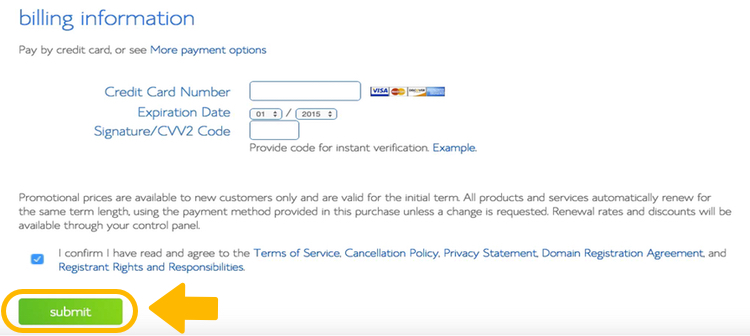
Enter your billing information, confirm and agree to terms of service, and click “Submit”.
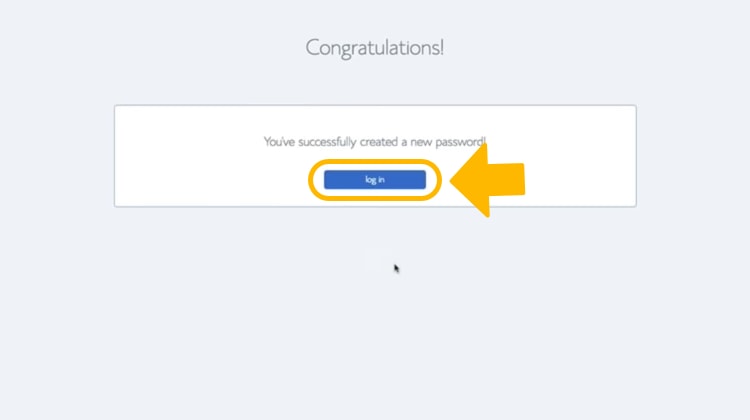
Step 7
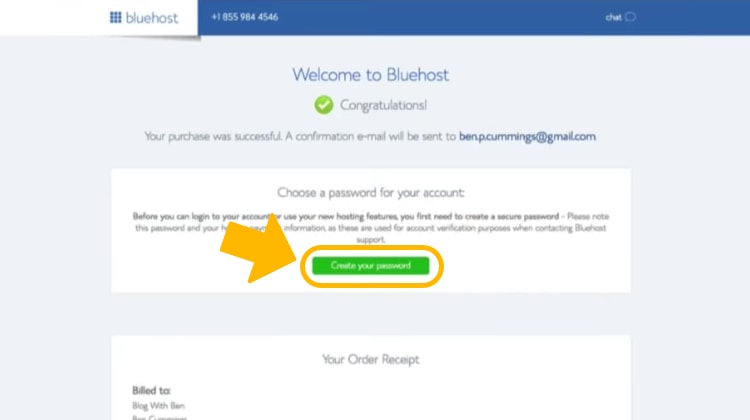
Click “Create Your Password” to create your password.
Step 8
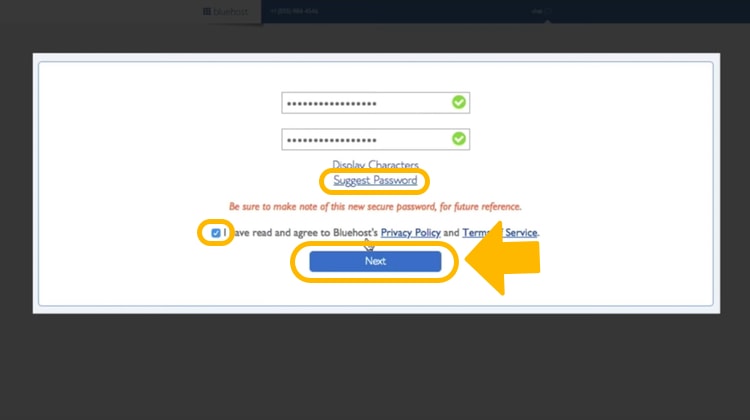
Click “Suggest Password”, confirm and agree to terms of service, and click “Next”.
Step 9
Click “Log In” to install WordPress.
Step 10
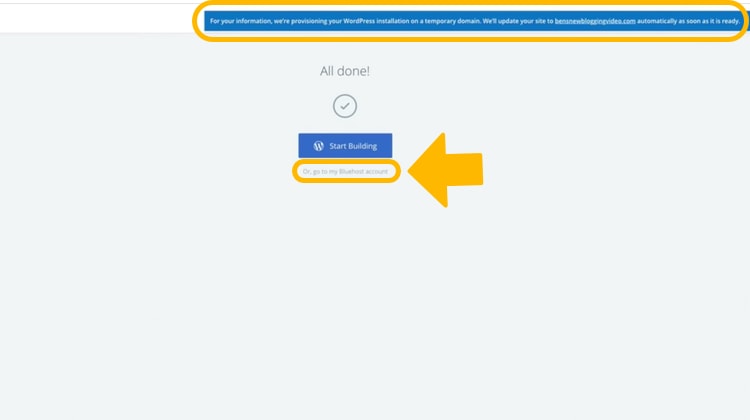
After the installation is all done, you may get a notification telling you that Bluehost is provisioning your WordPress installation on a temporary domain. That’s why your domain name might look a little weird. Don’t worry, it will update very soon.
Click the “Go to my Bluehost Account” link to get started.
Step 11

This will bring you to the new and improved Bluehost customer portal. Click the “Log in to WordPress” button to access your WordPress dashboard.
Step 12

Congratulations! You just installed your very own self-hosted WordPress blog! Click the “I don’t need help” link and move on to my next tutorial on how to set up a WordPress blog.