
How to Start a WordPress Blog: EasyWP and Spaceship.com Tutorial
How to Start a WordPress Blog: EasyWP and Spaceship.com Tutorial
Hi — I'm Ben from Blog With Ben. In this step-by-step guide I’ll walk you through getting started with Spaceship.com’s EasyWP managed WordPress hosting. This cloud-based, WordPress-optimized platform makes launching a blog fast and painless by letting you connect domain, SSL, CDN and business email in a single, guided flow called Unbox™. Follow these steps to pick a plan, register a domain, enable security and performance features, and get your WordPress site ready to build.
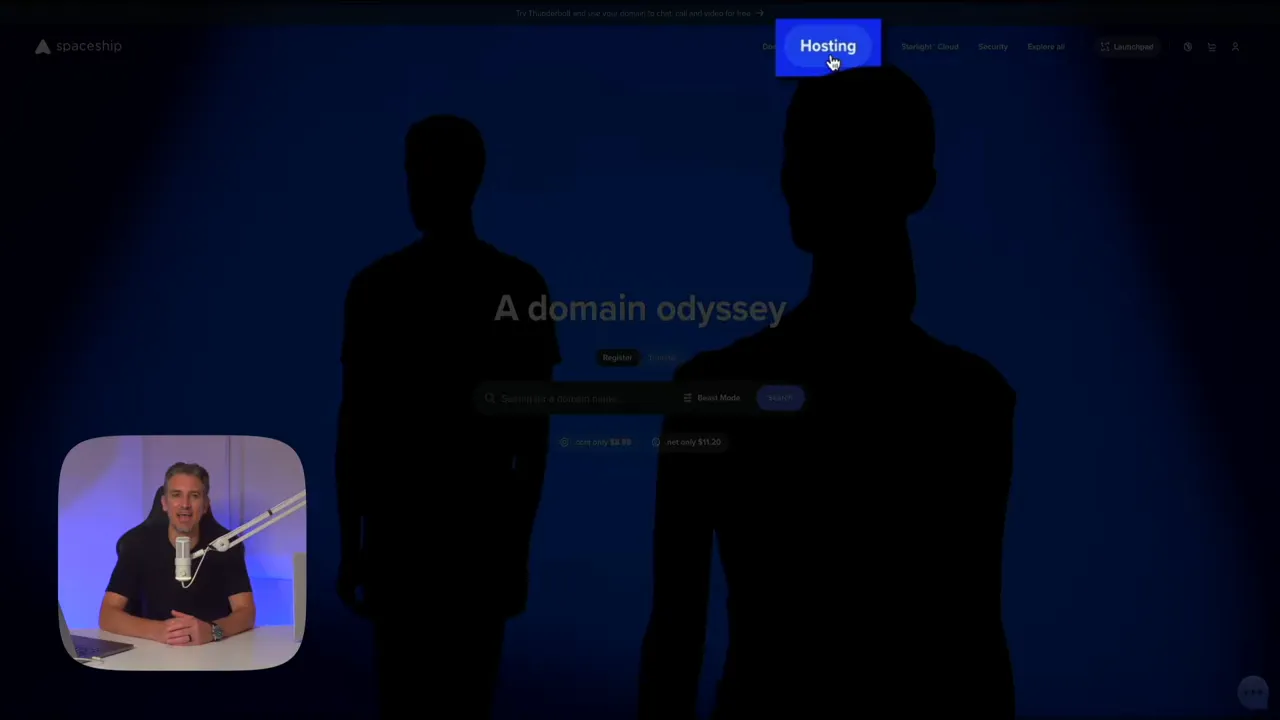
Step 1: Pick the EasyWP plan that fits your needs
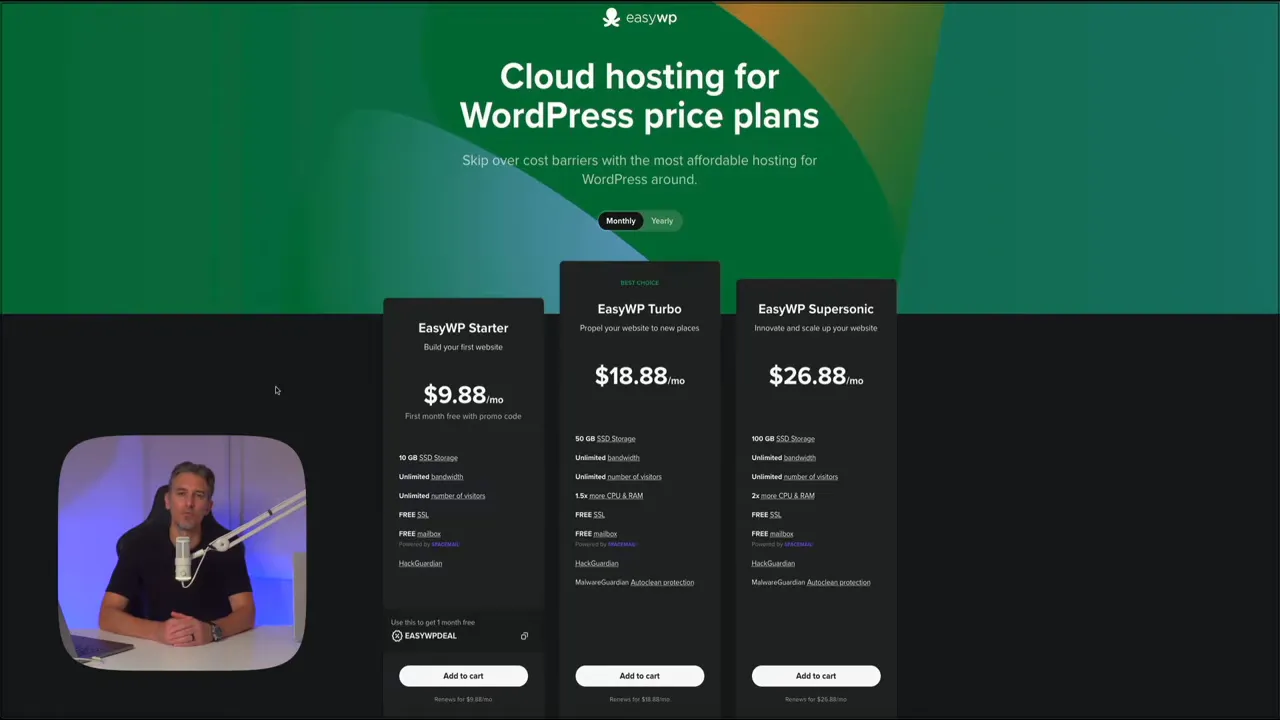
Head to Spaceship.com and choose Hosting → Cloud WordPress hosting to view EasyWP plans. EasyWP is cloud-based and tuned for WordPress performance — meaning faster loads and more reliable resources than traditional shared hosting.
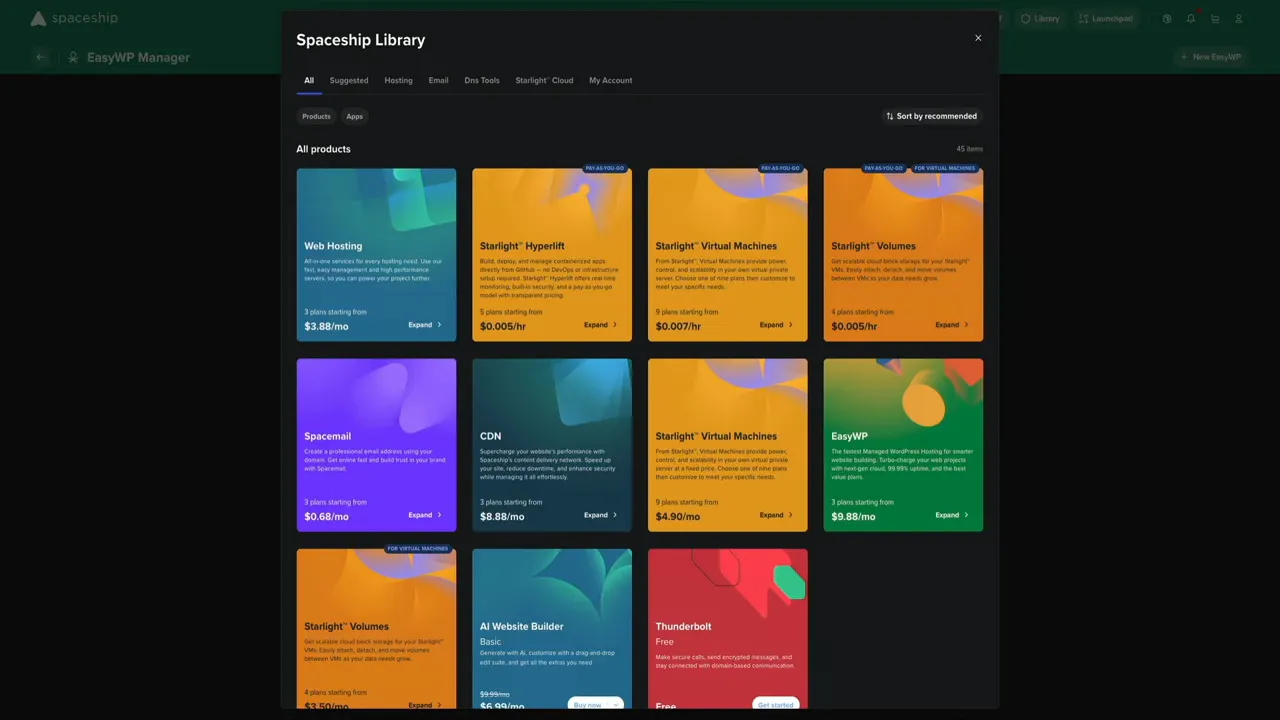
- Starter — $9.88/month: 10 GB SSD, unlimited bandwidth & visitors, free SSL, free SpaceMail mailbox.
- Turbo — $18.88/month: 50 GB SSD, 1.5× CPU & RAM, same unlimited visitors and free SSL/mailbox — great for growing sites.
- Supersonic — $26.88/month: 100 GB SSD, 2× CPU & RAM — built for scaling and high-traffic sites.
You can switch to yearly billing for big savings (Starter drops to $48.88/year, Turbo to $68.88/year, Supersonic to $98.88/year). For demos or short-term testing you may prefer month-to-month; for long-term projects yearly saves money.
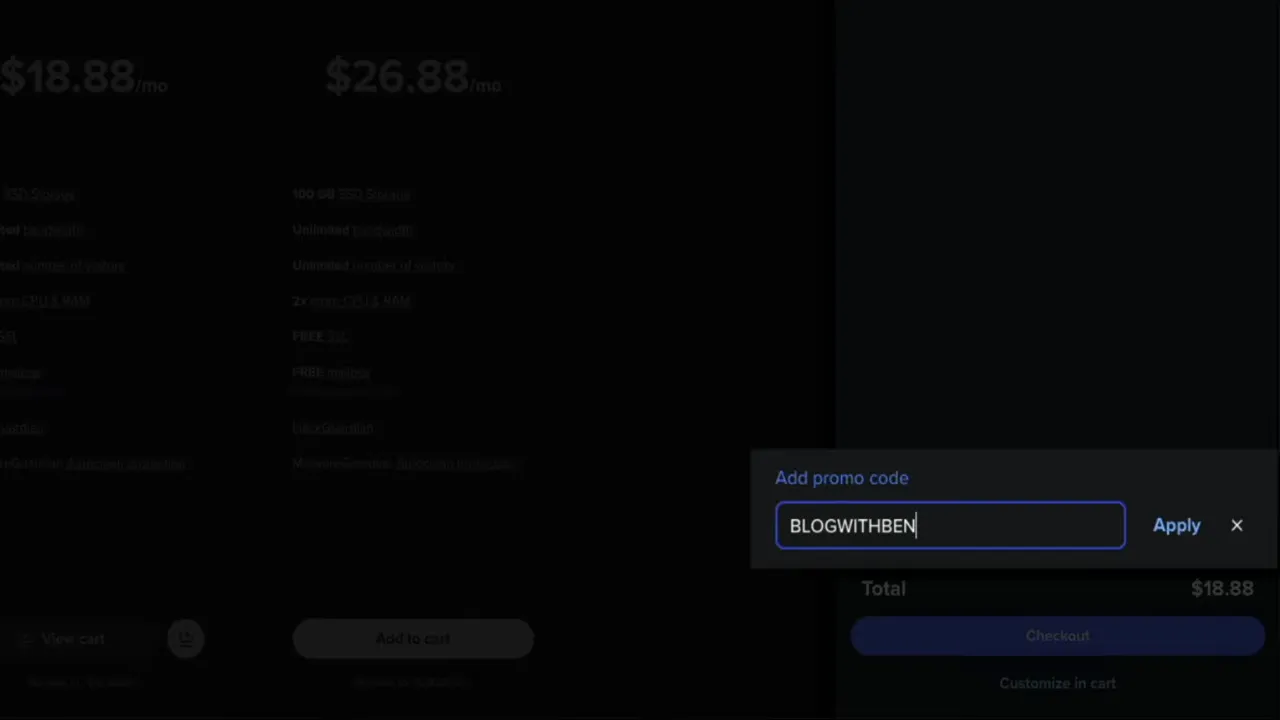
Step 2: Add to cart and apply the promo code
After choosing a plan, click Add to cart and then View cart to open checkout. At checkout you can apply the promo code BLOGWITHBEN (also shown in the video as blogwithben) to get 50% off monthly or annual EasyWP plans.
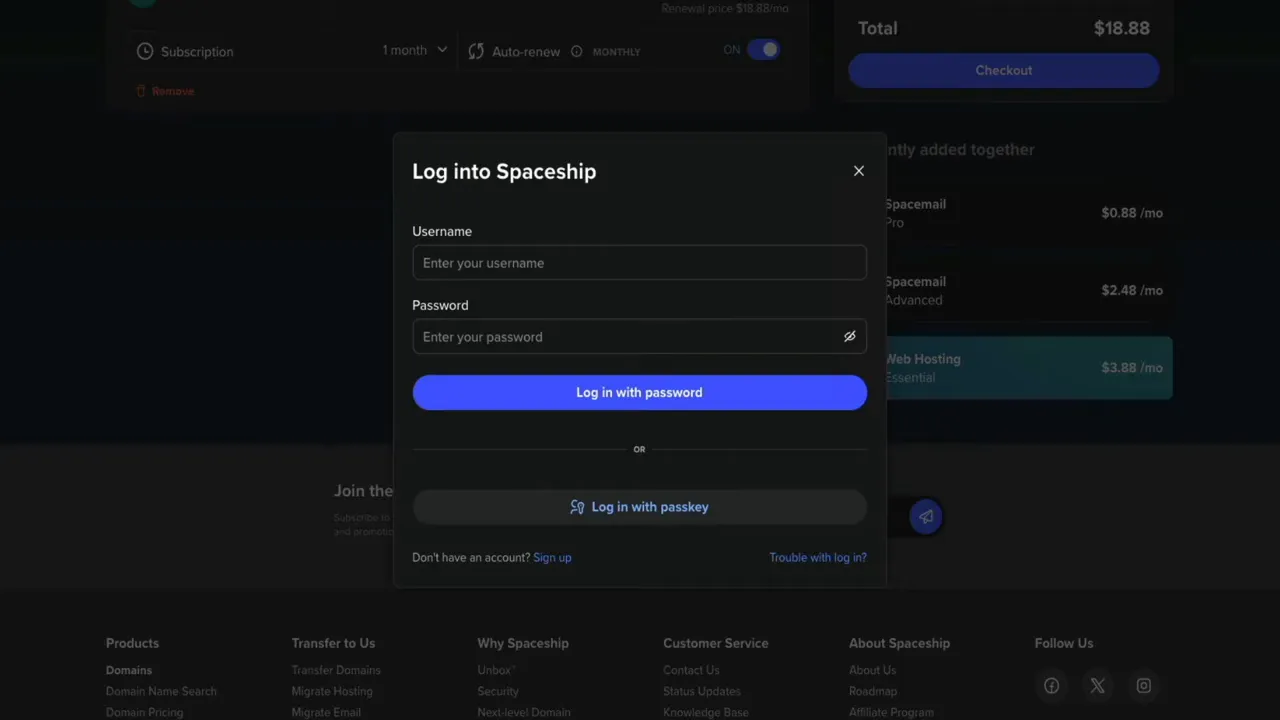
Step 3: Create your Spaceship.com account and choose authentication
If you don’t already have a Spaceship.com account, sign up during checkout. You’ll provide name, email and username, then choose an authentication method:
- Password — the traditional option.
- Passkey — uses fingerprint, Face ID or a hardware key for a passwordless, phishing-resistant login.
Spaceship.com will email a six-digit verification code to confirm your account. After verifying, add your billing details and complete the purchase.
Step 4: Open Unbox™ — the guided setup flow
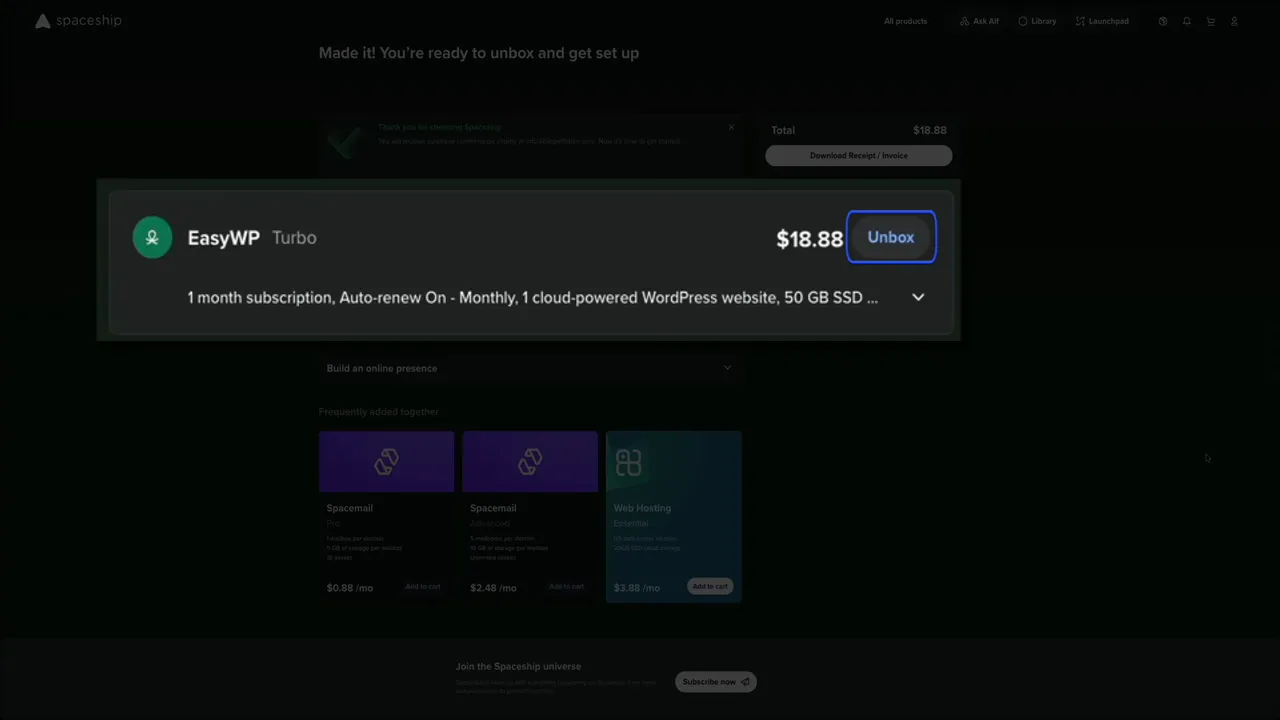
After purchase, use the Unbox button on the order summary or open the Launchpad → EasyWP Manager to start the Unbox wizard. Unbox connects hosting, domain, CDN, SSL and email in a single flow so you don’t have to manually wire services together.
Step 5: Register a domain (or connect an existing one)
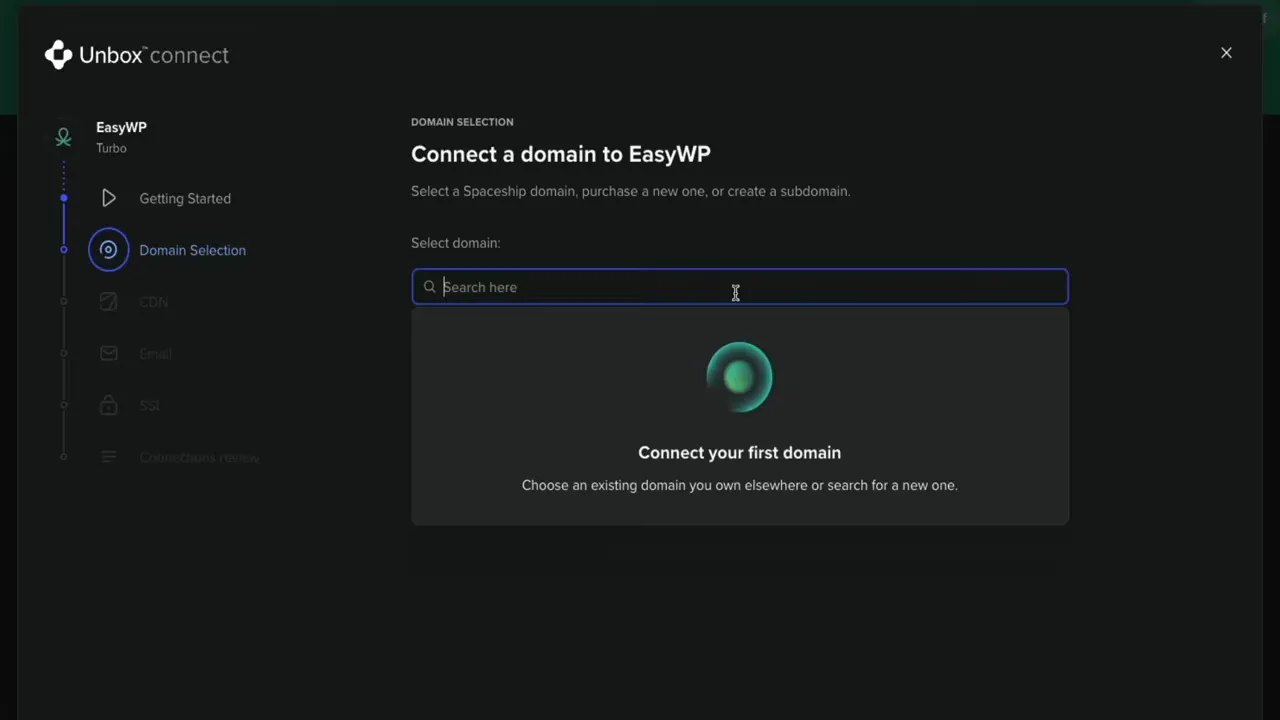
When prompted, choose Start a new EasyWP account (unless you’re migrating). Click Add domain to search and register a new domain right inside the flow. Domain registration shows pricing, auto-renew toggle and free privacy protection. You must provide contact information (registrant/admin/tech/billing) — you can reuse one address for all roles.
Complete payment to register the domain; Spaceship confirms registration and then lets you continue to connect that domain to your EasyWP site.
Step 6: Choose a CDN plan for speed and security
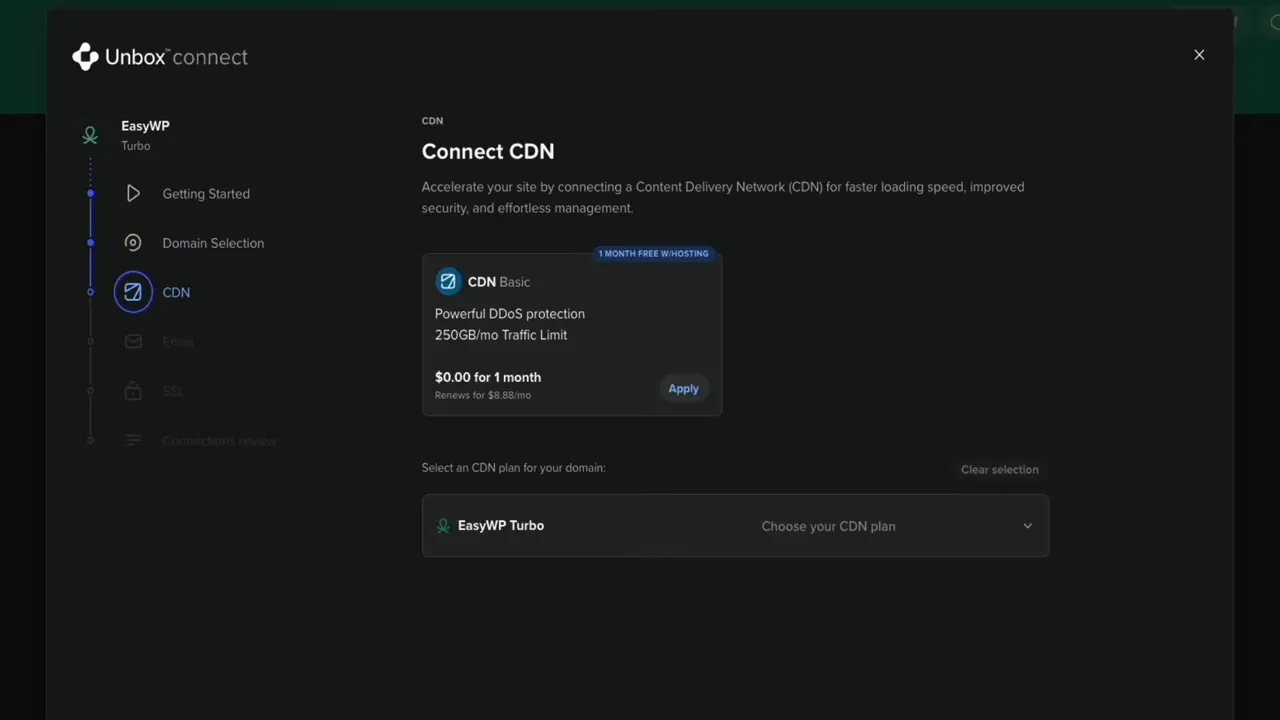
Next you’ll be offered Spaceship’s CDN options. A CDN serves your content from servers near your visitors and adds DDoS protection. Plans typically include:
- CDN Basic — Free first month, then $8.88/month. 250 GB/month traffic and DDoS protection — good for most personal projects.
- CDN Medium — $14.88/month — higher traffic cap and performance for growing sites.
- CDN Advanced — $28.88/month — built for high-traffic or e-commerce sites.
I recommend enabling the CDN from day one for better performance and added security.
Step 7: Add a professional email with SpaceMail
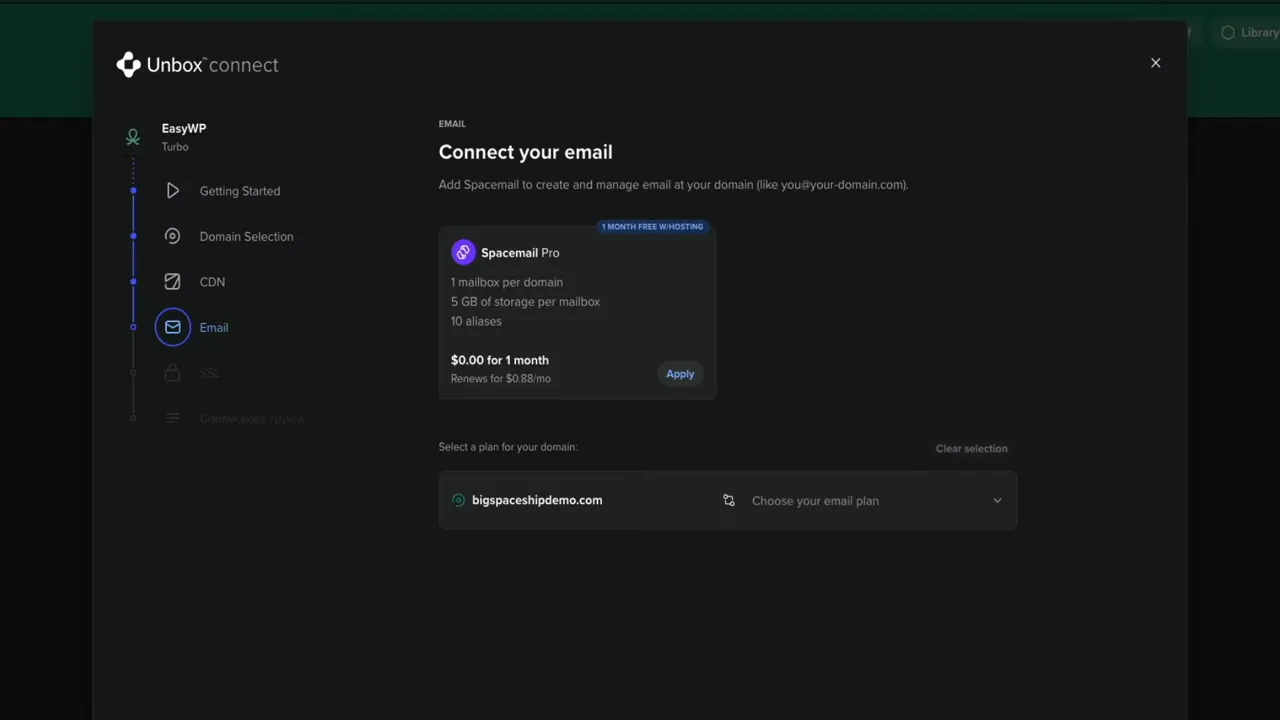
Spaceship offers SpaceMail to add email at your domain. The most balanced option is SpaceMail Pro (one mailbox per domain, 5 GB storage, up to 10 aliases). It's free for the first month and then around $0.88/month — a small price for professional credibility.
Why use an email at your domain? Addresses like [email protected] or [email protected] look more trustworthy than free providers and reinforce your brand every time you send email.
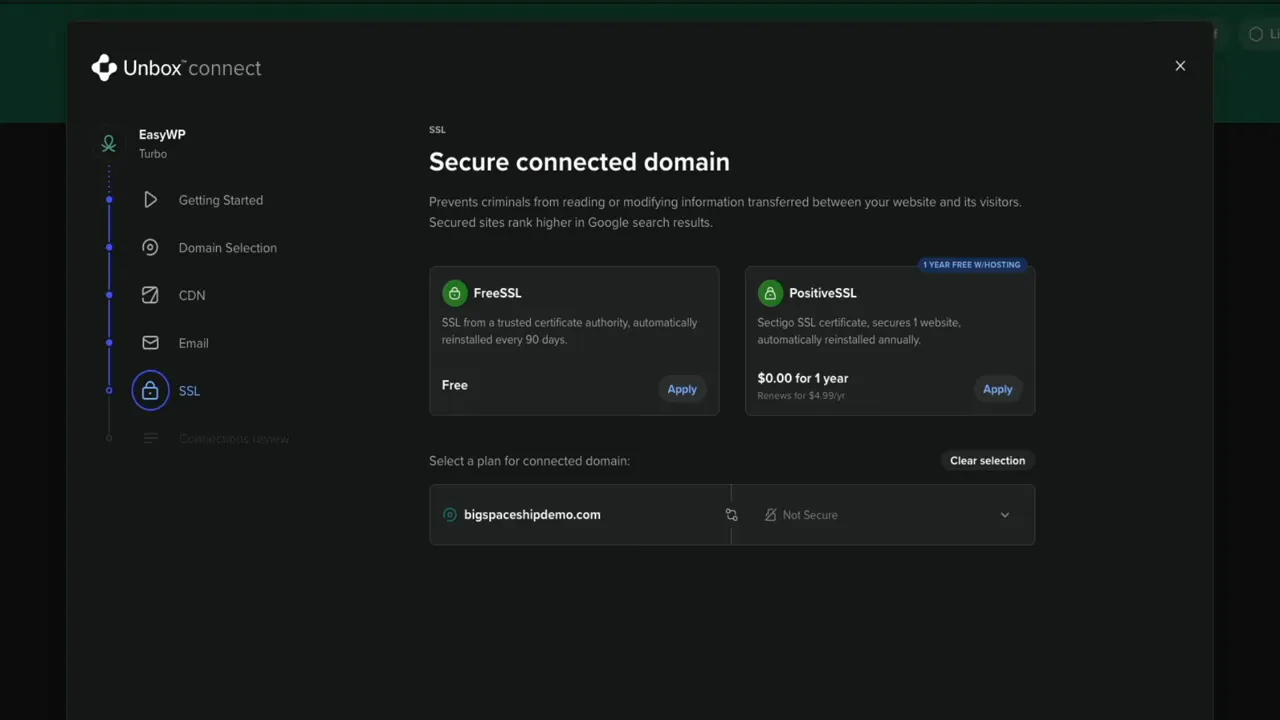
Step 8: Secure your site with SSL
Choose an SSL certificate to enable HTTPS:
- Free SSL — Issued from a trusted authority and automatically reinstalled every 90 days.
- Positive SSL (Sectigo) — Free first year, then $4.99/year. Branded certificate for one site and automatic annual reinstall.
- Custom SSL — Upload your own certificate files via EasyWP manager’s SSL tab if needed.
I usually apply the free SSL to get HTTPS immediately. Note: SSL propagation can finish in minutes, but brand-new domains may take up to 48 hours to fully propagate.
Step 9: Review connections and connect everything
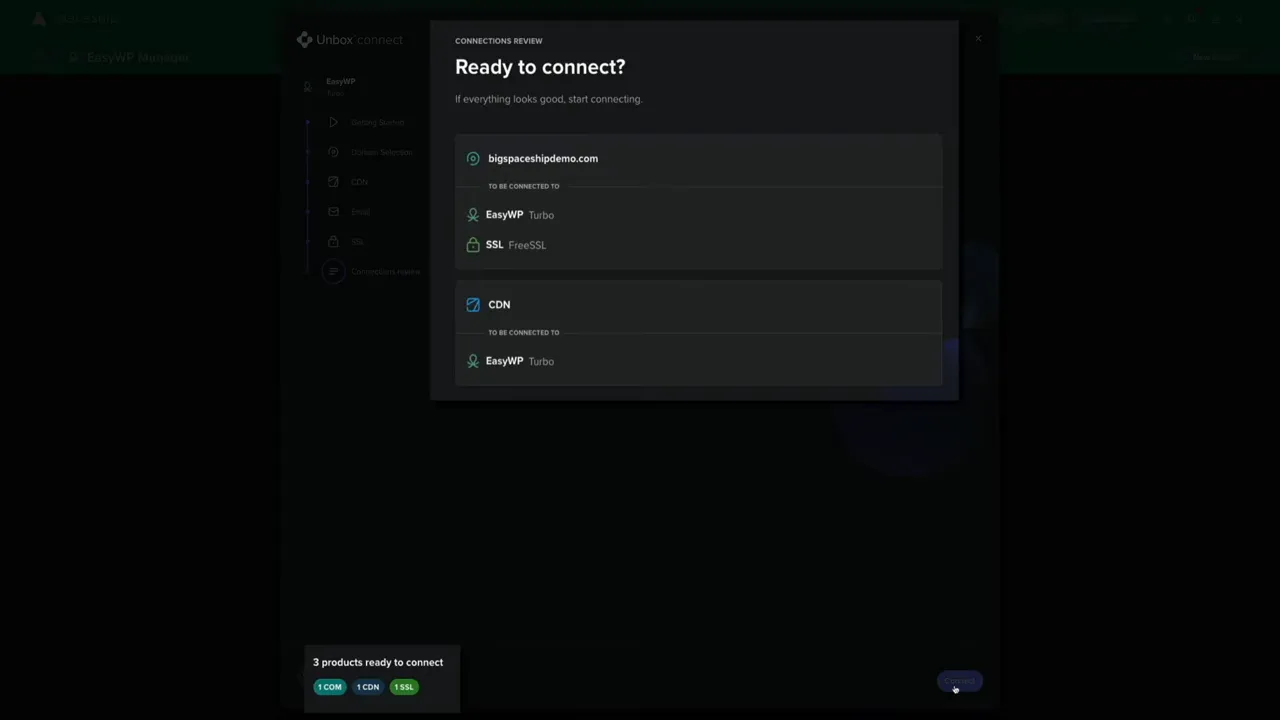
The Unbox connection review shows what will be linked: your domain, EasyWP hosting plan, CDN and SSL (and email if selected). Click Connect and Spaceship will perform the required backend steps to wire everything — this typically takes 20–30 seconds.
Step 10: Create a new website and configure WordPress
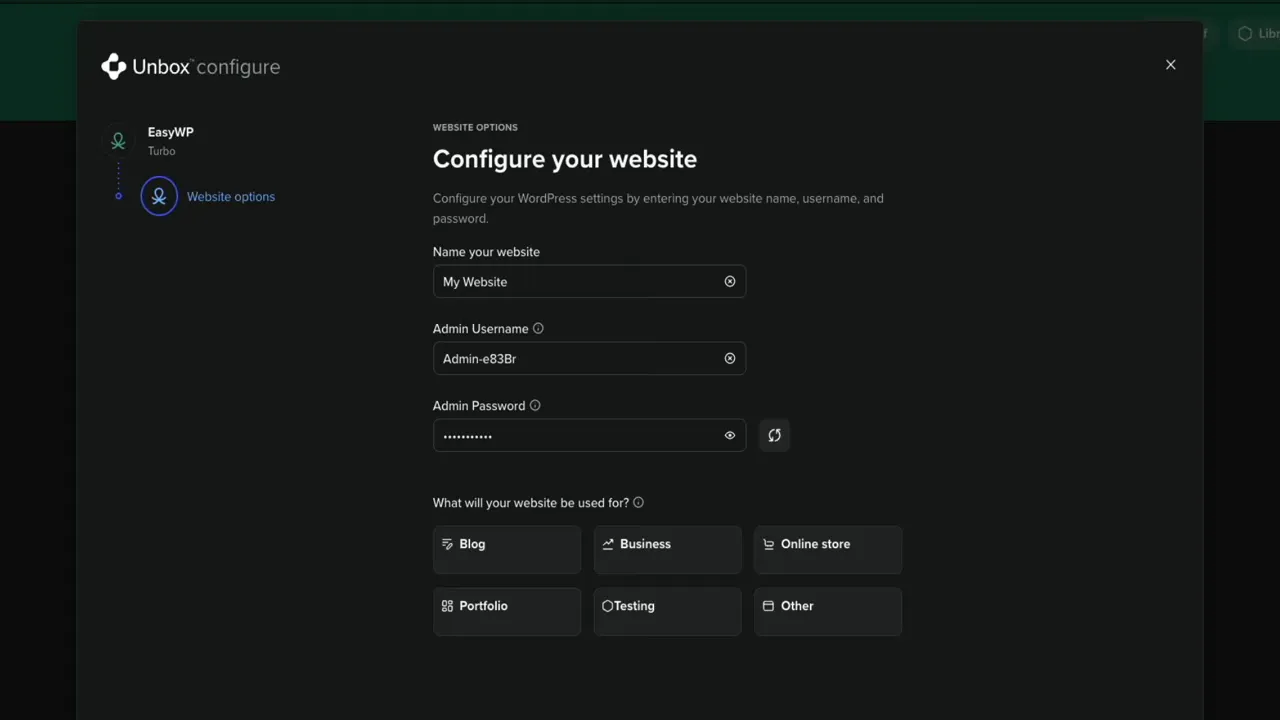
After products are connected, choose Create a new website (unless restoring old files). Then configure your WordPress installation:
- Site name — you can change this later in the WordPress dashboard.
- Admin username — choose something unique (avoid generic “admin” or your real full name).
- Strong password — use a random generator or a mix of uppercase, lowercase, numbers and symbols.
- Site purpose — select blog, business, store, portfolio, testing, etc.
Spaceship will email your WordPress login credentials after setup. Click Configure products to finish the initial install.
Step 11: Unbox complete — access your EasyWP dashboard
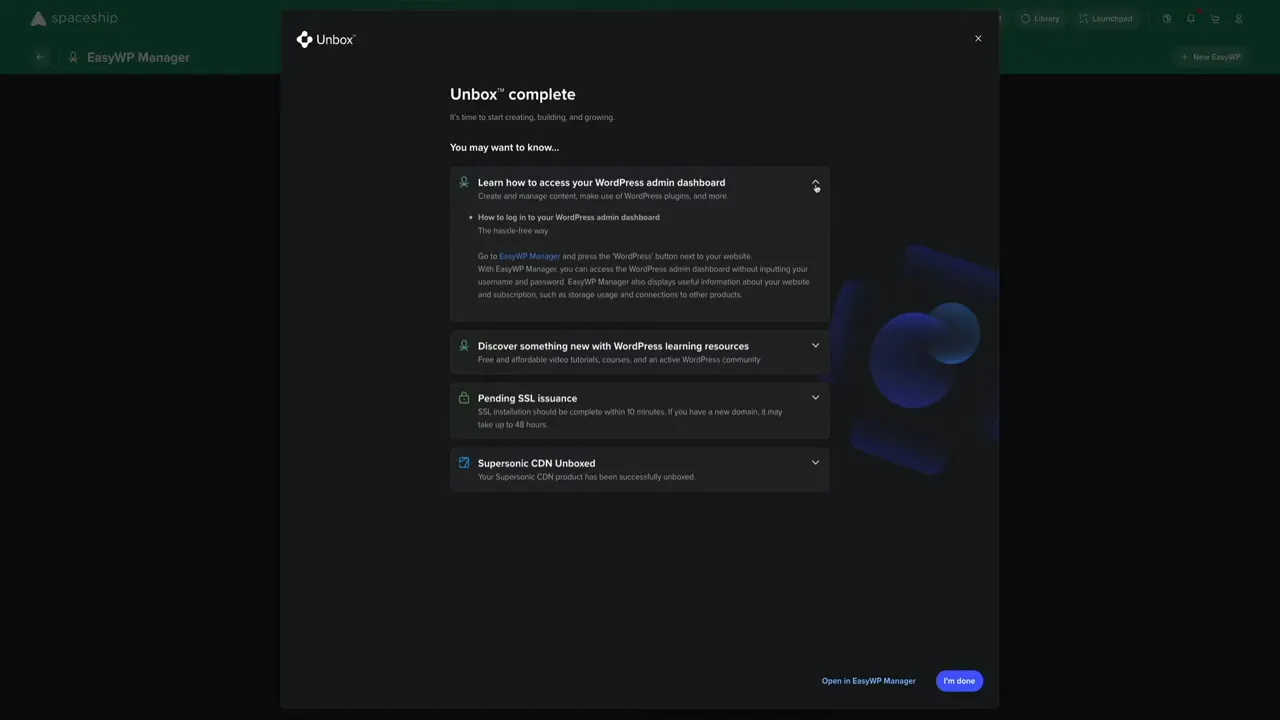
When Unbox finishes you’ll see a confirmation screen that SSL, CDN (and email if used) are connected. Click I’m done to return to your EasyWP management dashboard where your site and hosting plan are listed.
Step 12: Log into WordPress and start building
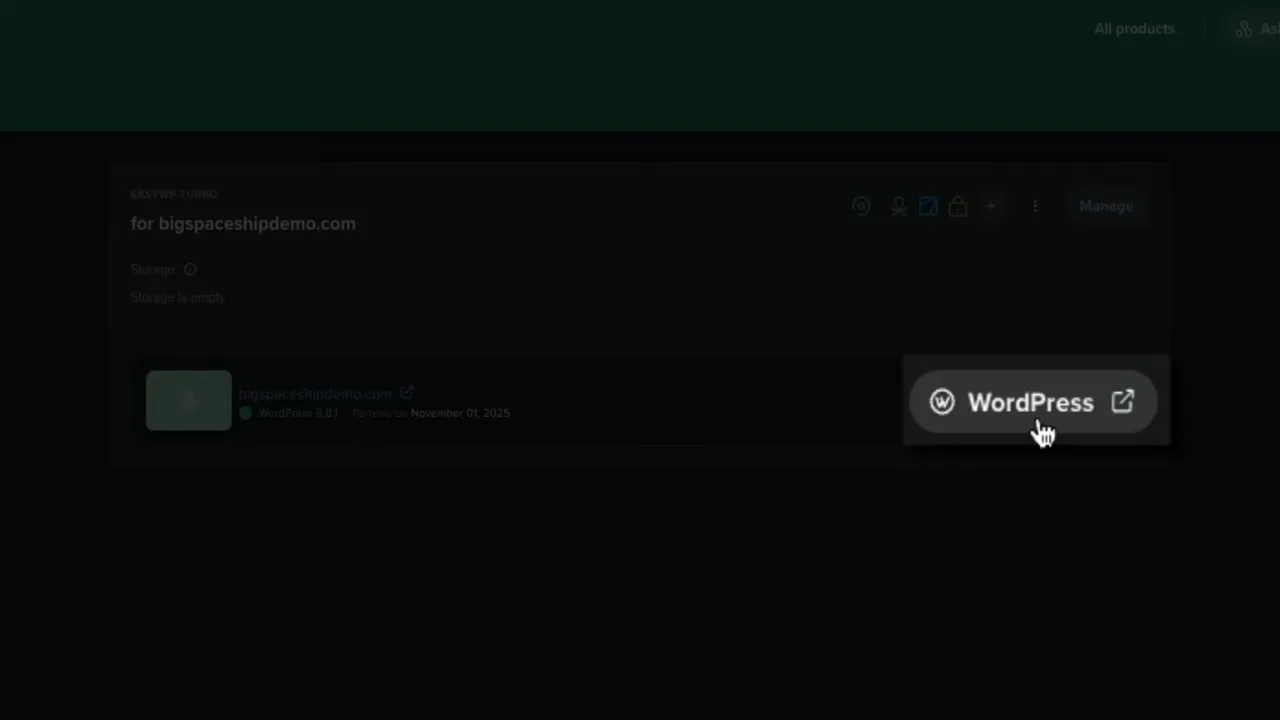
To access your WordPress admin, open the EasyWP manager and click the WordPress button next to your site — Spaceship logs you in automatically and takes you to the WordPress dashboard. This is your home base for posts, pages, themes, plugins and settings.
The default theme is installed during setup; you can keep it or choose from thousands of free and premium themes. From the dashboard you’ll install plugins, set up a child theme, configure security and SEO, and publish your first posts.
Quick tips before you build
- Save your admin username/password in a secure password manager.
- Use a child theme when customizing so theme updates don’t overwrite changes.
- Install a caching plugin and enable CDN from day one for speed.
- Install a security plugin and enable two-factor authentication if possible.
Step 13: Where to go next
Once your environment is set, continue with site design and content. If you want guided, step-by-step walkthroughs for installing themes, plugins, child themes, publishing posts or monetizing your blog, check out the full WordPress setup tutorials linked from Spaceship or other resources you trust.
Conclusion & recommendation
Spaceship.com’s EasyWP and Unbox flow streamline the most tedious parts of launching a WordPress site — domain registration, SSL, CDN, email and WordPress installation — all in a single guided experience. For beginners and those who want a fast, reliable setup without wrestling with cPanel and DNS records, EasyWP is a strong, affordable option.
If you decide to try it, remember to use promo code BLOGWITHBEN (or blogwithben) for 50% off monthly and annual EasyWP plans. Good luck building your blog — and if you need help during setup, prioritize secure credentials and enable CDN + SSL from day one for the best performance and protection.
Happy building!
Hi — I'm Ben from Blog With Ben. In this step-by-step guide I’ll walk you through getting started with Spaceship.com’s EasyWP managed WordPress hosting. This cloud-based, WordPress-optimized platform makes launching a blog fast and painless by letting you connect domain, SSL, CDN and business email in a single, guided flow called Unbox™. Follow these steps to pick a plan, register a domain, enable security and performance features, and get your WordPress site ready to build.
Step 1: Pick the EasyWP plan that fits your needs
Head to Spaceship.com and choose Hosting → Cloud WordPress hosting to view EasyWP plans. EasyWP is cloud-based and tuned for WordPress performance — meaning faster loads and more reliable resources than traditional shared hosting.
- Starter — $9.88/month: 10 GB SSD, unlimited bandwidth & visitors, free SSL, free SpaceMail mailbox.
- Turbo — $18.88/month: 50 GB SSD, 1.5× CPU & RAM, same unlimited visitors and free SSL/mailbox — great for growing sites.
- Supersonic — $26.88/month: 100 GB SSD, 2× CPU & RAM — built for scaling and high-traffic sites.
You can switch to yearly billing for big savings (Starter drops to $48.88/year, Turbo to $68.88/year, Supersonic to $98.88/year). For demos or short-term testing you may prefer month-to-month; for long-term projects yearly saves money.
Step 2: Add to cart and apply the promo code
After choosing a plan, click Add to cart and then View cart to open checkout. At checkout you can apply the promo code BLOGWITHBEN (also shown in the video as blogwithben) to get 50% off monthly or annual EasyWP plans.
Step 3: Create your Spaceship.com account and choose authentication
If you don’t already have a Spaceship.com account, sign up during checkout. You’ll provide name, email and username, then choose an authentication method:
- Password — the traditional option.
- Passkey — uses fingerprint, Face ID or a hardware key for a passwordless, phishing-resistant login.
Spaceship.com will email a six-digit verification code to confirm your account. After verifying, add your billing details and complete the purchase.
Step 4: Open Unbox™ — the guided setup flow
After purchase, use the Unbox button on the order summary or open the Launchpad → EasyWP Manager to start the Unbox wizard. Unbox connects hosting, domain, CDN, SSL and email in a single flow so you don’t have to manually wire services together.
Step 5: Register a domain (or connect an existing one)
When prompted, choose Start a new EasyWP account (unless you’re migrating). Click Add domain to search and register a new domain right inside the flow. Domain registration shows pricing, auto-renew toggle and free privacy protection. You must provide contact information (registrant/admin/tech/billing) — you can reuse one address for all roles.
Complete payment to register the domain; Spaceship confirms registration and then lets you continue to connect that domain to your EasyWP site.
Step 6: Choose a CDN plan for speed and security
Next you’ll be offered Spaceship’s CDN options. A CDN serves your content from servers near your visitors and adds DDoS protection. Plans typically include:
- CDN Basic — Free first month, then $8.88/month. 250 GB/month traffic and DDoS protection — good for most personal projects.
- CDN Medium — $14.88/month — higher traffic cap and performance for growing sites.
- CDN Advanced — $28.88/month — built for high-traffic or e-commerce sites.
I recommend enabling the CDN from day one for better performance and added security.
Step 7: Add a professional email with SpaceMail
Spaceship offers SpaceMail to add email at your domain. The most balanced option is SpaceMail Pro (one mailbox per domain, 5 GB storage, up to 10 aliases). It's free for the first month and then around $0.88/month — a small price for professional credibility.
Why use an email at your domain? Addresses like [email protected] or [email protected] look more trustworthy than free providers and reinforce your brand every time you send email.
Step 8: Secure your site with SSL
Choose an SSL certificate to enable HTTPS:
- Free SSL — Issued from a trusted authority and automatically reinstalled every 90 days.
- Positive SSL (Sectigo) — Free first year, then $4.99/year. Branded certificate for one site and automatic annual reinstall.
- Custom SSL — Upload your own certificate files via EasyWP manager’s SSL tab if needed.
I usually apply the free SSL to get HTTPS immediately. Note: SSL propagation can finish in minutes, but brand-new domains may take up to 48 hours to fully propagate.
Step 9: Review connections and connect everything
The Unbox connection review shows what will be linked: your domain, EasyWP hosting plan, CDN and SSL (and email if selected). Click Connect and Spaceship will perform the required backend steps to wire everything — this typically takes 20–30 seconds.
Step 10: Create a new website and configure WordPress
After products are connected, choose Create a new website (unless restoring old files). Then configure your WordPress installation:
- Site name — you can change this later in the WordPress dashboard.
- Admin username — choose something unique (avoid generic “admin” or your real full name).
- Strong password — use a random generator or a mix of uppercase, lowercase, numbers and symbols.
- Site purpose — select blog, business, store, portfolio, testing, etc.
Spaceship will email your WordPress login credentials after setup. Click Configure products to finish the initial install.
Step 11: Unbox complete — access your EasyWP dashboard
When Unbox finishes you’ll see a confirmation screen that SSL, CDN (and email if used) are connected. Click I’m done to return to your EasyWP management dashboard where your site and hosting plan are listed.
Step 12: Log into WordPress and start building
To access your WordPress admin, open the EasyWP manager and click the WordPress button next to your site — Spaceship logs you in automatically and takes you to the WordPress dashboard. This is your home base for posts, pages, themes, plugins and settings.
The default theme is installed during setup; you can keep it or choose from thousands of free and premium themes. From the dashboard you’ll install plugins, set up a child theme, configure security and SEO, and publish your first posts.
Quick tips before you build
- Save your admin username/password in a secure password manager.
- Use a child theme when customizing so theme updates don’t overwrite changes.
- Install a caching plugin and enable CDN from day one for speed.
- Install a security plugin and enable two-factor authentication if possible.
Step 13: Where to go next
Once your environment is set, continue with site design and content. If you want guided, step-by-step walkthroughs for installing themes, plugins, child themes, publishing posts or monetizing your blog, check out the full WordPress setup tutorials linked from Spaceship or other resources you trust.
Conclusion & recommendation
Spaceship.com’s EasyWP and Unbox flow streamline the most tedious parts of launching a WordPress site — domain registration, SSL, CDN, email and WordPress installation — all in a single guided experience. For beginners and those who want a fast, reliable setup without wrestling with cPanel and DNS records, EasyWP is a strong, affordable option.
If you decide to try it, remember to use promo code BLOGWITHBEN (or blogwithben) for 50% off monthly and annual EasyWP plans. Good luck building your blog — and if you need help during setup, prioritize secure credentials and enable CDN + SSL from day one for the best performance and protection.
Happy building!

Written by Ben Cummings
Founder of blogwithben.com
Ben is the Co-Founder of Sage Wave Media, LLC which is the parent company of Blog With Ben. He enjoys teaching, blogging, startups, a hoppy IPA, and college basketball. Whenever he's not blogging, you can find him cruising around sunny San Diego with his amazing family.
0 Comments