List Building Strategies: How to Build a Massive Email List
List Building Strategies: How to Build a Massive Email List
According to a an email statistics report by The Radicati Group, there are 3x more email accounts than Twitter and Facebook accounts combined. That's a huge opportunity for you to grow your email list!
Whether you’re a food blogger, a political blogger, or a blogger that’s just getting started, building an email list is crucial to your blog’s success. When you have an email list, you have a direct line of communication with your audience. This gives you an immense advantage that can yield some pretty significant results. For example, it allows you to promote your content, sell products, inform subscribers, deliver value, and most importantly build a relationship with your audience.
I broke this post into two sections so that I could walk you through the entire list building process. Part one will focus on the technical aspects of creating a path that helps your blog’s visitors become subscribers. And part two will focus on engaging those subscribers with effective email campaigns. All in all, by the end of this post, you’ll have everything you’ll need to build a massive email list. Let’s get started!
Part I: Creating the Path
1. Have a Landing Page
The first step in building your email list is to create a way for visitors to give you their email address. The way that this is typically accomplished is by creating a landing page.
Simply put, a landing page is a single page on your website or blog that your visitors “land” on. Hence the name, landing page. However, most landing pages are more than just a landing spot for your visitors. They’re typically used to capture email addresses.
We’ll get more into the email aspect of the landing page a little later on, but the first step in this process is to have some sort of digital landing page to send traffic to.
There are boatloads of companies and freelance designers that can handle creating your landing page. But, if you’re using WordPress.org for your digital platform, you can easily create high-quality landing pages yourself.

Quick tip: Check out Divi. This premium WordPress theme allows you to easily create landing pages with their pre-made landing page templates. I literally use Divi for all of my landing pages (that banner takes you to my affiliate link…just FYI).
2. Create a Free Offer
Next, you need to ask yourself, “Why would someone sign up for my email list?”
Nine times out of ten, your visitors will need to be enticed to subscribe to your list. They’re not just going to go to your landing page and give you their email address because they think you have a nice face.
By offering a freebie, you’re creating an exchange of value. Both you and your visitors will benefit from the exchange.
That’s where the free offer (a.k.a. lead magnet) comes into play. Here’s how it works. You create something of value that would benefit your audience. However, the only way they can access this freebie is by giving you their email address. It sounds super simple, but it’s a very effective list building strategy.
Three things to keep in mind when creating a free offer:
1. Solve a problem with your offer.
2. Make it quick and easy to receive and consume.
3. Ensure that it relates to your blog’s overall message.
Examples of free offers:
- eBook
- Online course
- Webinar
- Cheat Sheet
- Audio File
- Video File
- Free Coaching
- Email Templates
- Discount Codes
- Vip Content
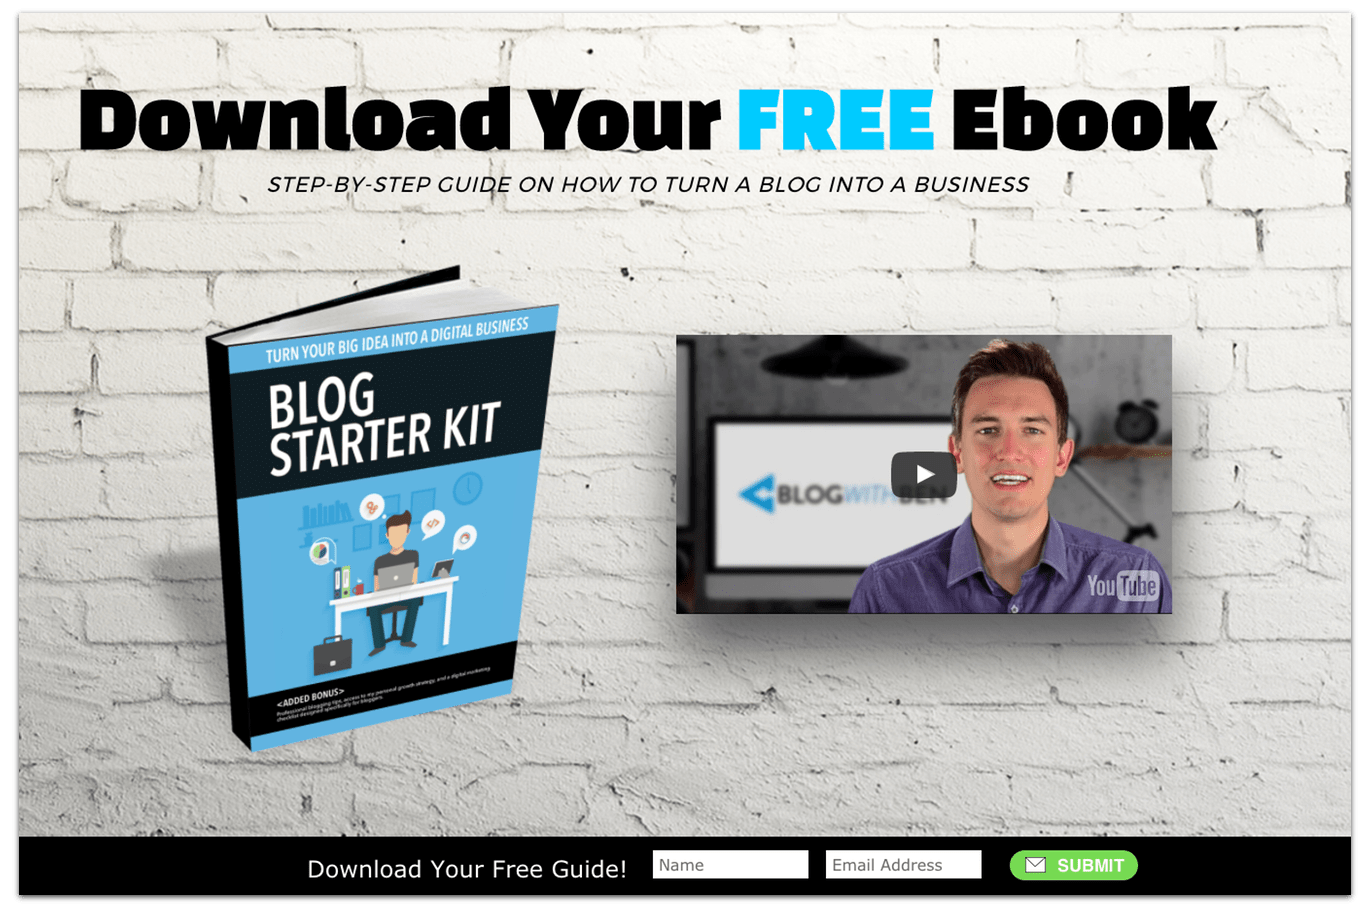
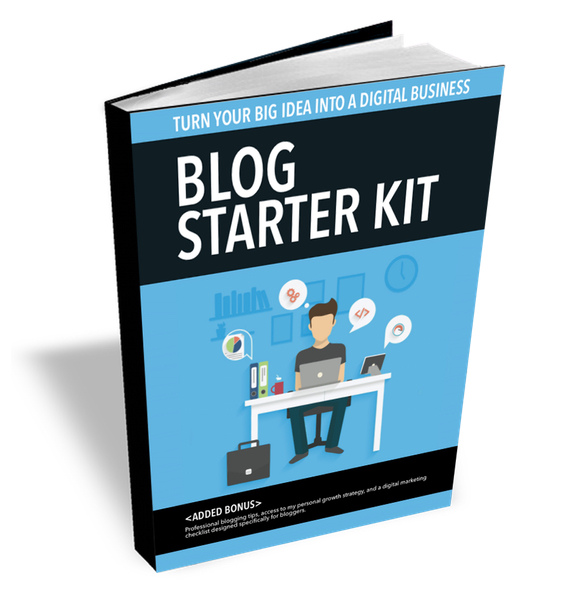
I personally use a downloadable eBook for my free offer. The Blog Starter Kit is how I generate interest and entice visitors to sign up for my email list. I simply wrote an eBook that helped my audience solve a problem, turned it into a PDF, and then offered it in exchange for a visitor’s email address. It’s that simple.
By offering a freebie, you’re creating an exchange of value. Both you and your visitors will benefit from the exchange, and it’s the first step in building a substantial email list.
3. Display an Opt-In Form
Now that you have your free offer ready to go, you’ll need a way for visitors to submit their email address. This is achieved through an opt-in form. Simply put, the opt-in form gives your blog’s visitors the ability to submit their email address in exchange for your free offer.
Try not to overwhelm your visitors with too many options. Having one or two opt-in forms on your blog will get the job done.
As you become more familiar with the process, you’ll notice that there are a ton of options whenever it comes to opt-in forms. There are different types, locations, and capabilities of each form. But, my recommendation is to just keep it simple. Don’t overwhelm your visitors with too many options. Having one or two opt-in forms on your blog will get the job done.
Email opt-in form tips:
- Keep it simple
- Tell the visitor what they’ll get
- Keep form fields to a minimum
- Have a clear call-to-action
- Use imagery (optional)
Types of opt-in forms:
- Sidebar
- Popup
- Ribbon
- Slide in
- Inline
- Below post
If you’re just starting out, I recommend that you place an opt-in form in the sidebar of your blog. Then as you get more comfortable with this feature, you can explore and experiment with different types, locations, and features of your opt-in forms.

Photo Credit: ElegantThemes
Quick tip: If you’re using WordPress.org to build your blog, use a plugin. Bloom, Thrive Leads, and OptinMonster (affiliate links) are all amazing WordPress plugins that will help you build high-converting and beautiful opt-in forms for your blog.
4. Use an Email Marketing Service
Collecting email addresses is one thing, but how do you store and keep track of them? Additionally, how do you respond to everyone that subscribed to your list? You’re not going to use a Gmail account to respond to thousands of people at once, and you’re definitely not going to manually keep track of your subscribers.
So, how do you manage all of the people that submit their email address to your opt-in form? By using a professional email marketing service. This special software is designed specifically to collect, track, monitor, respond and build an email list the right way.
If you're serious about growing your email list, then you need to invest in a professional email marketing service.
Like everything else out there, you have a ton of options when choosing which email marketing service to use. However, for the sake of your business, I recommend using a paid email service like Aweber (affiliate link). Yes, it will cost you a little money, but it’s definitely an investment that will almost always yield a huge ROI (return on investment).
Benefits to professional email marketing services:
- Offers a direct line of communication with your audience.
- You can send private mass emails to your subscribers.
- You can monitor subscriber activity and coordinate emails based on actions they take.
- Reporting and tracking capabilities allow you to see things like the location of your subscribers, clicks, opens, and much more.
- A/B split testing capabilities allow you create high-converting forms and email campaigns.
- You control your list. You can import, export, and actually see all of the email addresses within your list.
Once you’ve setup your email marketing service and opt-in form, you’ll connect the two through an API (application program interface). I know it sounds technical, but think of it as a link that allows them to talk to each other. Here’s how easy it is to connect Aweber to Thrive Leads through an API.
5. Set Up Your List
Now it’s time to segment your subscribers into lists. Depending on your email marketing service, this step might vary. However, the logic behind it is pretty much the same. Once someone gives you their email address, your email marketing service will place that email within the list of your choice.
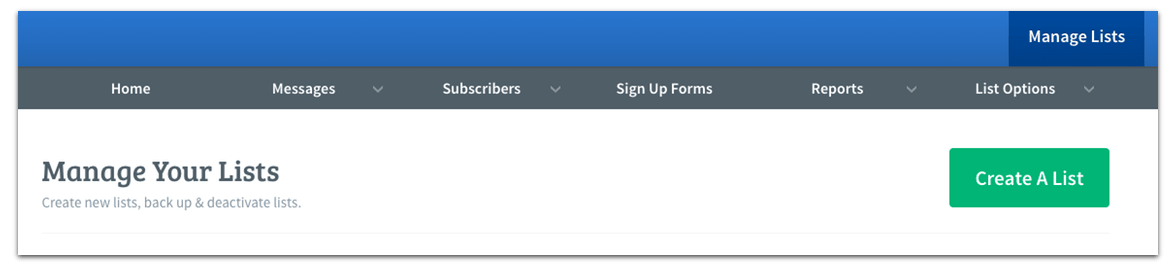
Aweber has a pretty straight forward list setup process. You simply click a few buttons and you can create an email list. The reason this is important is that it gives you the ability to segment your subscribers based off of the list they’re assigned to.
For example, you could have a newsletter list where anyone who signs up for that list will receive your monthly newsletter. Or you could also have a list that focuses more on promotional sales and marketing campaigns. All in all, the content you send to the subscribers will depend on the list they sign up for.
6. Update Your Basic Info
It’s important to note that every email marketing service will have a unique setup process. However, the logic behind their process will remain the same. For this post, I’m focusing on Aweber’s process because that’s the email marketing service I use to build my email lists.
So, once you’ve setup your list, it’s time to configure it. The first thing you’ll want to do is enter your basic information. This includes things like your list’s name, description, who the email will be from, contact address, and notification settings.
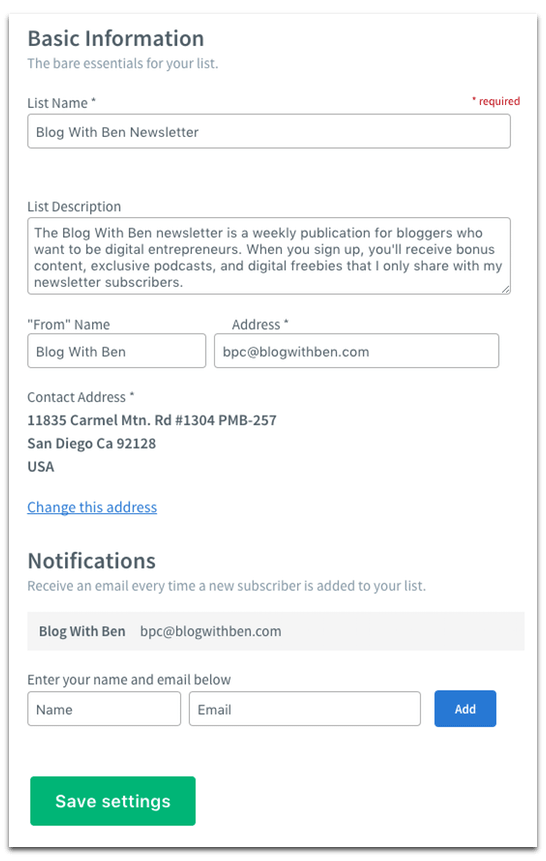
One thing to keep in mind is that The CAN-SPAM Act requires you to include a valid postal address in your messages. P.O. Boxes for your business are permitted. I highly recommend getting a P.O. Box because I don’t think you want your entire email list knowing your home address. I use UPS for my P.O. Box. They’re pretty affordable and easy to use.
7. Create a Confirmation Email
As soon as someone signs up for your list, a confirmation message (a.k.a. double opt-in or confirmed opt-in) is immediately sent to them. This confirms that they want to receive emails from you.
Remember, the visitor isn’t a subscriber until they click on the confirmation link within the confirmation email.
Aweber gives you the ability to customize your confirmation message and make it unique. Rather than just having a bland and boring confirmation email, try to match your personality and make it personal. Remember, the visitor isn’t a subscriber until they click on the confirmation link within that email.

One final recommendation is to redirect the user to a confirmation page. We’ll get into this a little bit later, but by having a confirmation page, you’ll be able to enhance the user experience and drive more traffic to your blog.
8. Design a Thank You Page
Now it’s time to focus on the user experience for your subscribers. This is where you’ll guide and hold the visitor’s hand to ensure they’ll be a loyal subscriber. This is also an opportunity to wow them and bring them back to your blog.
The way I recommend going about this is to create a series of pages on your blog that lead the new subscriber towards a conversion. The first page you’ll want to create is a thank you page. Simply put, once someone gives you their email address, you can redirect them to your thank you page.

This page should be a warm greeting, but it should also set the expectation for what your subscribers should expect from you. Additionally, it should also explain the signup process and tell them what to do next.
For example, on my thank you page, I explain that the subscriber will be receiving a confirmation email and that they’ll need to click the confirmation link in order to receive the free e-book. I also remind them to whitelist my email address so that my emails won’t go to their spam box. This ensures that they’ll always get my emails.
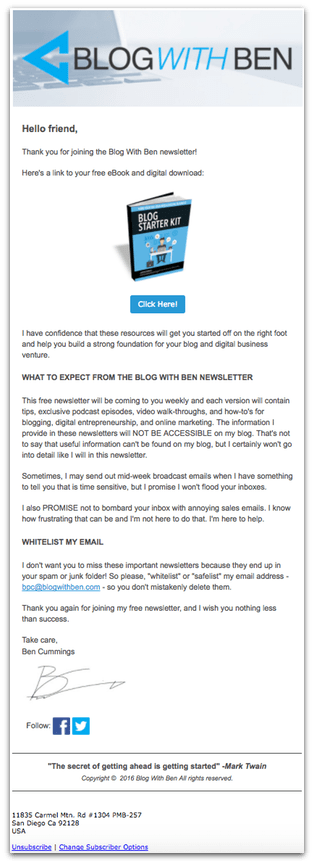
9. Create a Welcome Email
Your welcome email should be sent as soon as the subscriber confirms that they want to be a part of your list. So, once they’ve clicked the confirmation link, your welcome email should be sent.
A well written welcome email can go a long way in creating a lasting relationship with your readers.
Aweber calls this a legacy follow-up series. But it’s basically an autoresponder that can easily be configured within the backend of any email marketing service. It’s super simple to set up and it’s just another great way to wow your audience.
A well written welcome email can go a long way in creating a lasting relationship with your readers. This is a great way to make a stellar first impression and it’s another way to set clear expectations.
What your welcome email should include:
- Start off with a warm and friendly greeting.
Thank the reader for signing up. - Remind the subscribers about the benefits of your emails.
- Set the expectation.
Tell your subscribers how often they should expect emails from you. - Include your incentive (lead magnet) if you have one.
Ask readers to whitelist your email. - Keep it simple. Don’t include blog posts or additional content. Keep this welcome email concise.
Sample Welcome Email Template:
10. Design a Confirmation Page
The final stop of the subscriber’s journey should be your confirmation page. This can be set up so that whenever someone receives your confirmation email and clicks on the confirmation link, they’ll be redirected to your confirmation page. That’s a lot of confirmations!
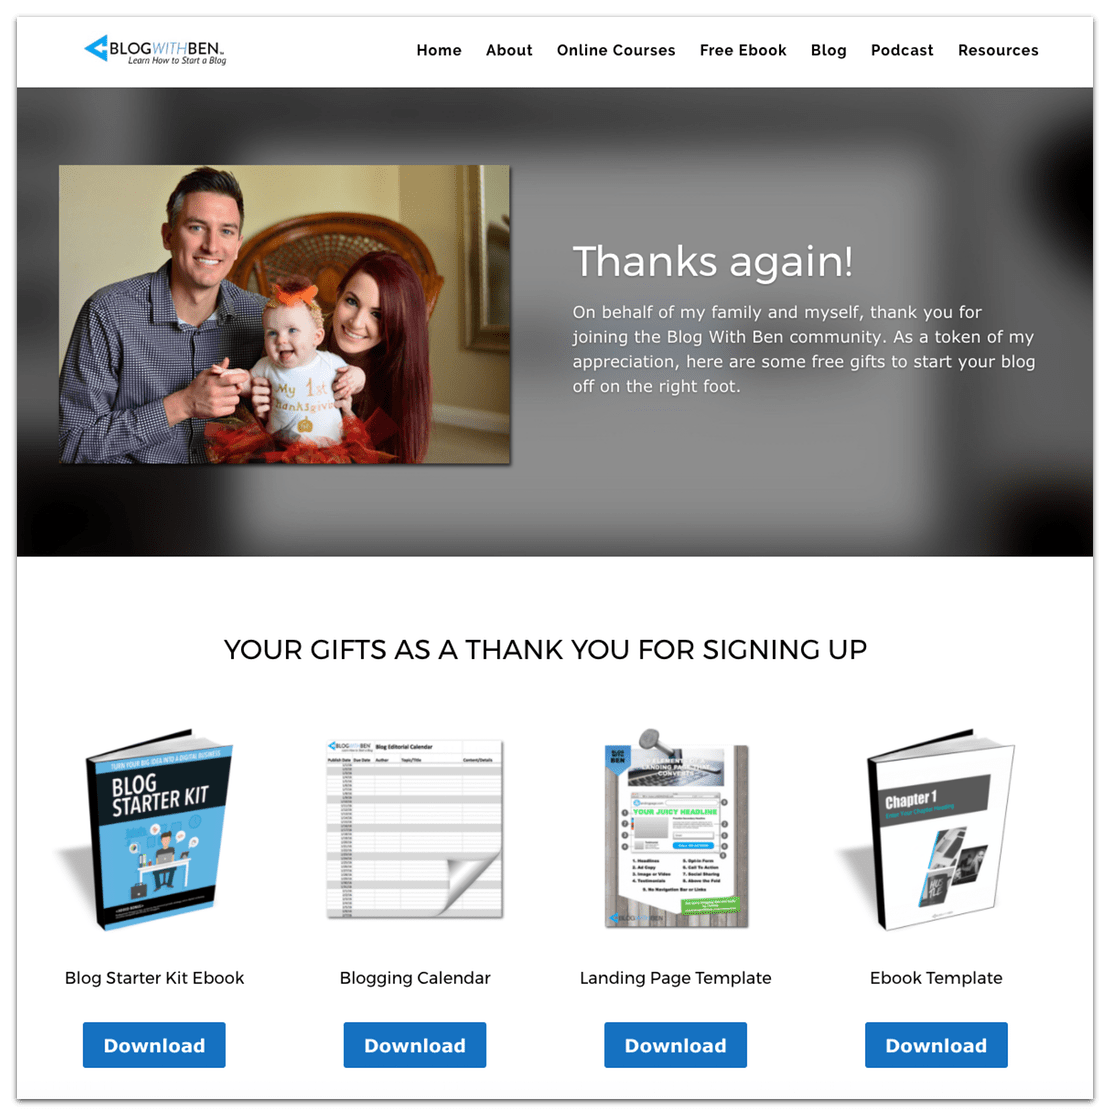
Either way, this gives you a huge opportunity to wow your subscribers and direct them back to your blog. Plus, it’s another way to present your free offer.
For example, whenever someone subscribes to the Blog With Ben newsletter, they’ll receive a free blogging bundle. This includes four downloadable gifts that can only be accessed by clicking the confirmation link. That’s because the confirmation link redirects the user to my confirmation page, and this is where the subscriber can access my free offer.
I know there is a lot of set up that goes along with creating an efficient path for your subscribers, but below is a visual I’ve created to help illustrate how someone goes from signing up for my newsletter to becoming a subscriber.
Here's how it works: Landing Page>Free Offer>Opt-In Form>Welcome Page>Email Marketing Service>Sends Confirmaion Email>Confirmation Link>Sends Visitor to Confirmaton Page (I also send a Welcome Email).

Part II: How to Write Engaging Emails
11. Always Deliver Value
Your audience is busy, so it’s important that your emails don’t waste their time. I know it sounds harsh, but it’s the truth. The last thing you want to do is pester your subscribers with junk mail.
When you always deliver value, you're showing your subscribers that you want them to succeed and that you respect their time.
So, how do you NOT waste your subscriber’s time? By always delivering value. This is a surefire way to not only wow them, but it shows them that you respect their time.
Whether you’re telling your audience about a new blog post or a new product, make sure you’re highlighting the benefits and showing them the value they'll recieve from your content.
12. Remember That Your Subscribers are Real People
It’s easy to forget that there are real human beings on the other side of your emails. Sometimes we can get caught up in the blogging and marketing process that we forget that there are real people consuming our content.
Your subscribers are people with dreams, families, desires, fears, and hobbies. They have busy lives and it’s important to remember that when you are creating email campaigns.
When you begin creating content, try to always keep that in the front of your mind. Doing so will help you write in a way that not only speaks to your audience but assures them that you have their best interest at heart.
13. Write as if You’re Writing to One Person
I don’t care if you have ten or ten thousand subscribers, the key to writing amazing emails is to imagine that you’re writing to one person. This strengthens the bond between you and your subscribers and it creates trust.
Writing in a more personal style shows your subscribers that you’re not just a robotic sales machine trying to squeeze money out of them, but that you actually want to help them succeed.
One way to help you with this is to create a persona or avatar of your subscriber. I talk a little bit about pinpointing your target audience in this blog post, but when you understand your audience, you’ll have a much easier time writing to them.
14. Be Engaging and Spark Interest
This step is sometimes easier said than done. However, as you begin to write your emails, try to be engaging and spark interest in whatever it is you’re sharing with your audience.
As you’re delivering value, try adding some humor to your content or include different types of media (images, videos, audio, etc.) within your emails.
It’s important to not overdo it though. Try to keep the tone of your emails conversational and relevant to what your audience is looking for.
15. Get Feedback From Your Subscribers
As you begin to build your list, you’ll want to always keep your fingers on the pulse. This means that you’ll want to check in with your subscribers from time to time to get their feedback and suggestions.
Ask your subscribers what they want. This is the best way to create content that meets their needs.
This is by far one of the most useful tactics when it comes to list building because it gives you some powerful insight on what your audience wants. It also helps you to deliver value on a continuous basis.
16. Be Consistent
Finally, just be consistent when delivering emails. If you’re sending emails once a year and you’re just trying to sell something, then your subscribers will probably recognize that you don’t have their best interest at heart. Chances are their next move will be to unsubscribe. Not cool.
But, if you're emailing them consistently and delivering value, then you’ll have a much better chance of retaining them. This in turn will create a happy subscriber, and a happy subscriber will more than likely become a lifelong follower.
These are the best types of subscribers because they are ten times more likely to share your content, tell their friends about you, and even buy something from you. In the end, it’s all about building that relationship with your subscribers and showing them that you want them to succeed.

Written by Ben Cummings
Founder of blogwithben.com
Ben is a Digital Marketing and CMS Specialist for Bridgepoint Education who holds an MBA with a specialization in Entrepreneurship. He enjoys teaching, blogging, startups, a hoppy IPA, and college basketball. Whenever he's not blogging, you can find him cruising around sunny San Diego with his amazing family.
Hi Ben,
How are you doing.
Thanks a ton for these amazing list building tips.
Your Friend
Pawan
Thank you so much for the following up email! I am just about to set up email list and learning about email marketing. Your info is very helpful!
Plus: I just built a welcome mat, subscribe if you can see it! Thanks!
Hello Ben
Haven't started Blogging as such, if not at all. Am still researching and taking everything in, so it doesn't over whelm me. I have got Aweber as my email provider and Clickfunnels for building my funnels. Haven't got a PO Box, for my emails to go to.The one you use, we don't have in NZ,closest is Australia. I will try our Local, its something.
Your instructions are very helpful and informative and I like the way you display everything so easily.
Haven't got a Website yet. Soon. Keep up the GREAT Work you do. Cheers Ben.
Thanks, Miriam! I'm glad the post is helping you out! It sounds like you have a strong understanding of the process and I know you'll be successful with it. Nice work and thanks again!